Just drag, drop, click, and type to customize your landing page— there's no need to hire designers or a developer. Whether you're starting from scratch or using premade section templates, you can quickly add content, customize your layout, and publish your page. In this guide, we’ll cover all the steps you need to build your first page. Get started below!
Before you begin...
Building best practices
While our builder automatically saves your edits, there are a few tips to keep in mind when using the Page Studio builder:
- Ensure that you’re working on a stable Internet connection.
- Keep your editing sessions in the builder to a single tab, and to a single browser. If you're working between two browser tabs/devices at the same time, you may notice that edits in one tab will override the other.
- Close out the builder when you’re not actively working on editing. It’s better to close the page and come back to it later than leave the builder open for extended periods of inactivity.
- Keep in mind that browser extensions, like Adblocker or VPNs, can sometimes interfere with Internet connection. If you are experiencing any issues with preserving edits, consider turning off those extensions when accessing the builder.
Accessing the Page Studio builder
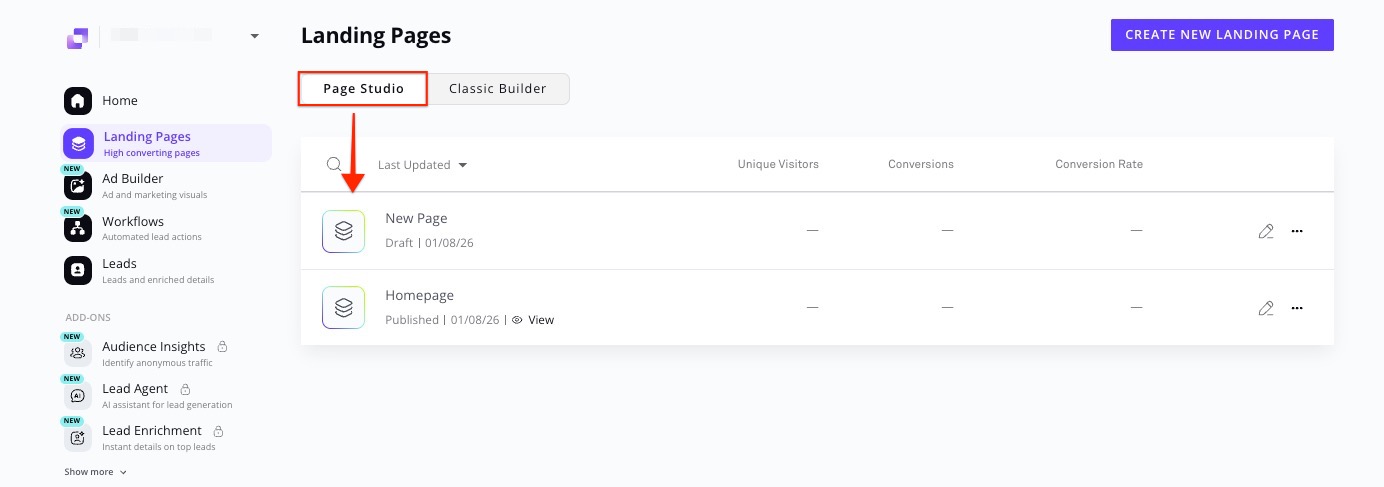
From the Leadpages Dashboard, navigate to Landing Pages. Pages will be organized into two tabs: Page Studio and Classic Builder.
To create a new page using Page Studio, select the Page Studio tab and click Create New Landing Page.
Adding content
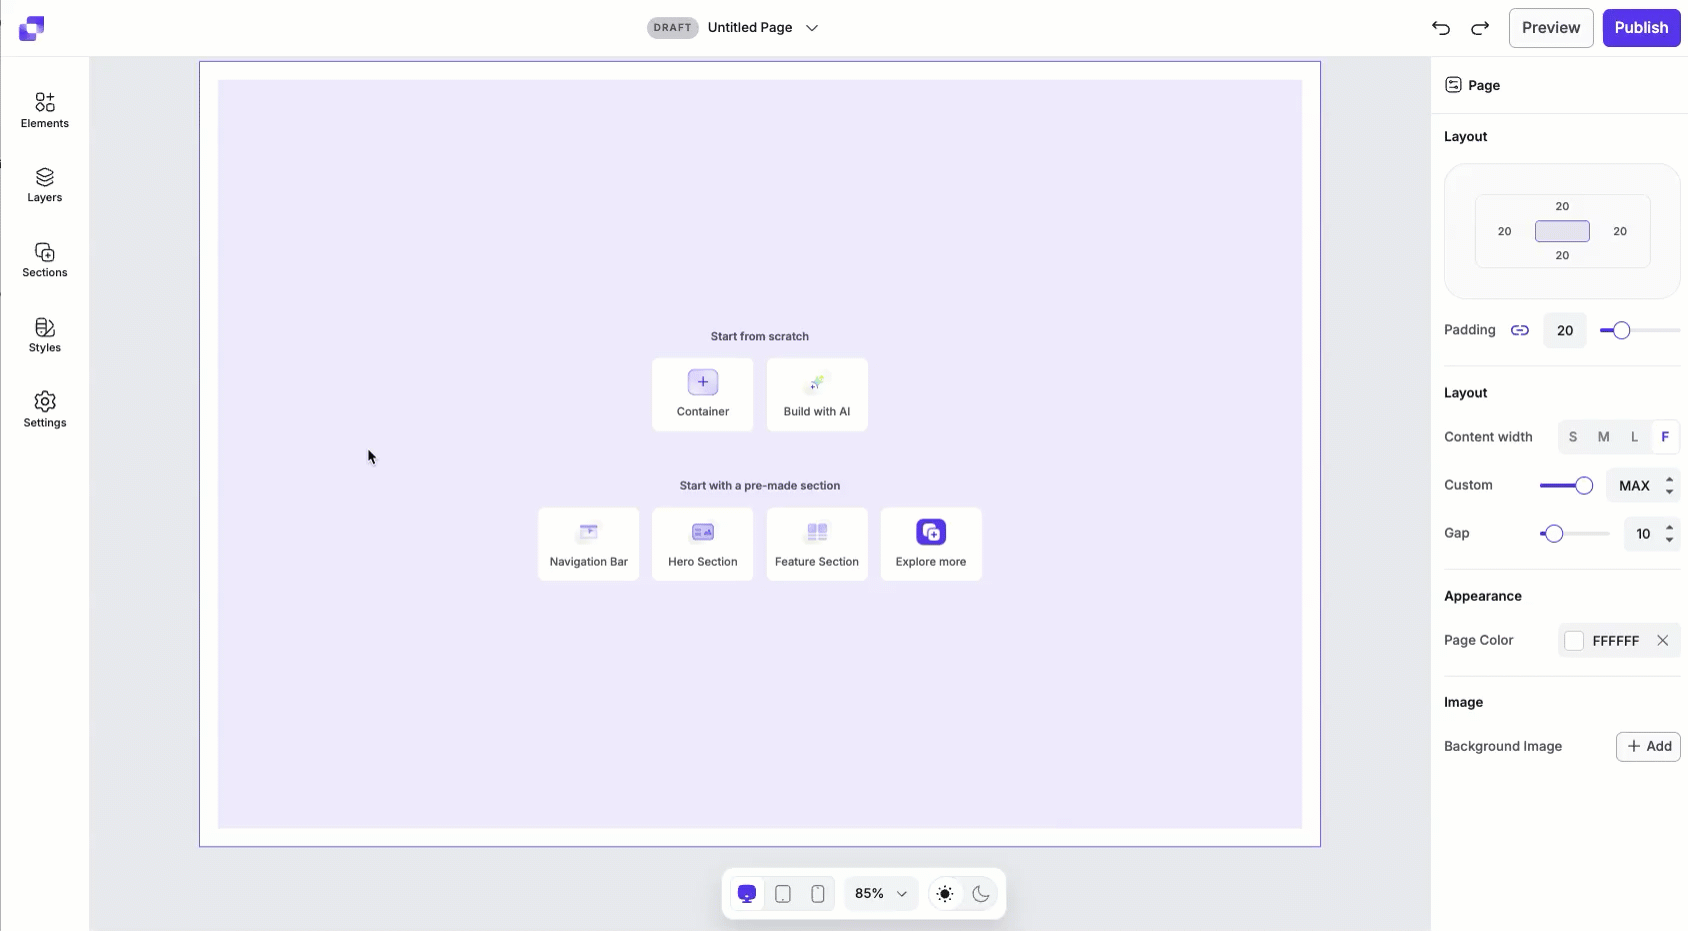
Start from scratch
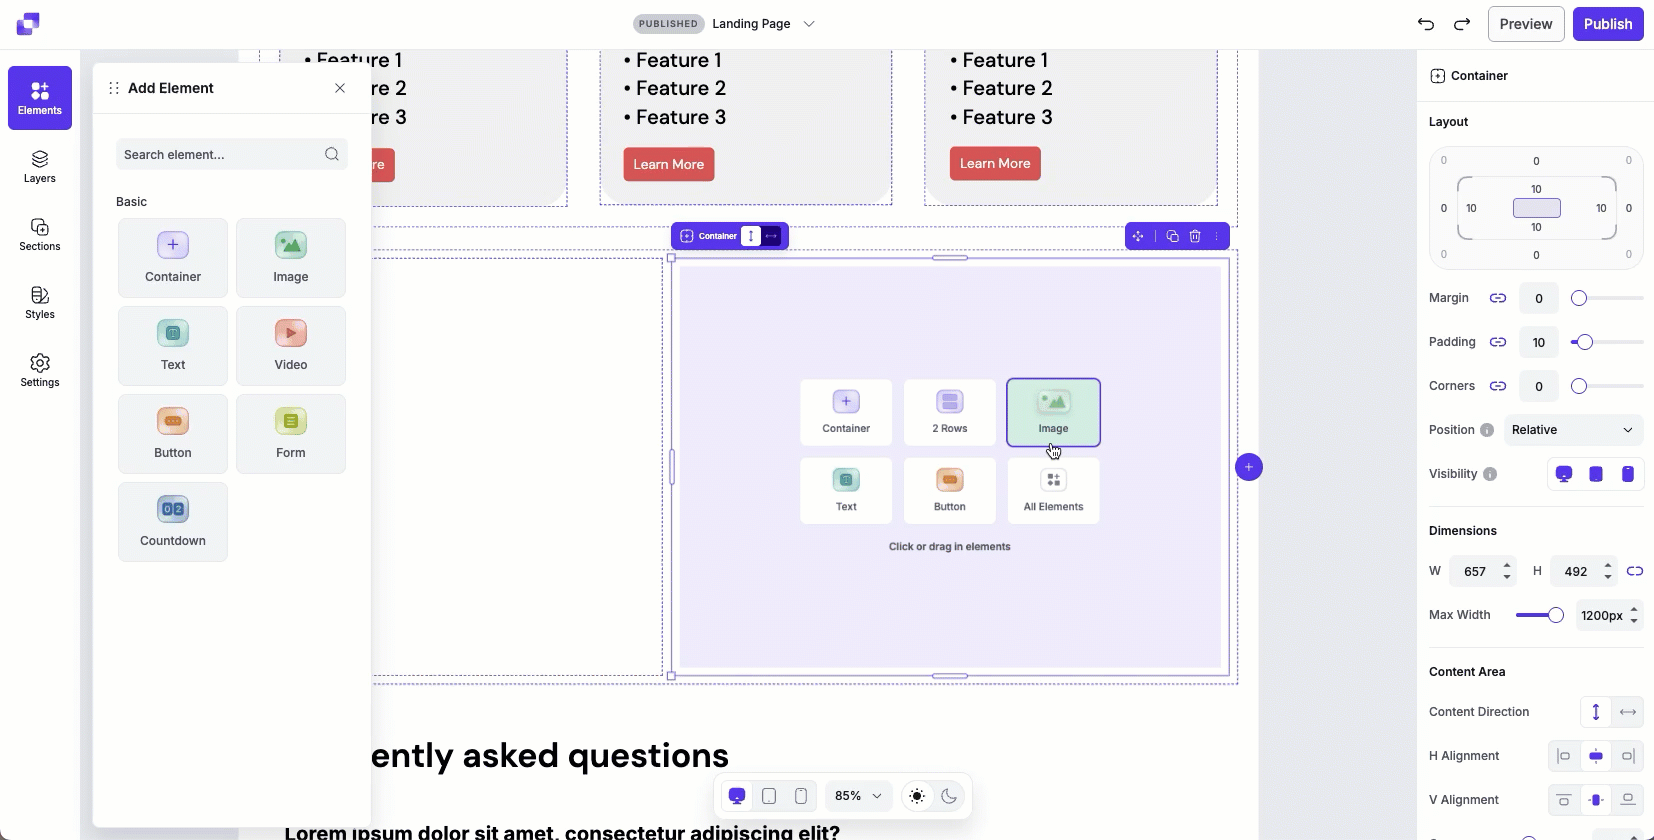
If you're creating a page from scratch, you'll notice that a container will already be placed on your page. This is your first section. You can start adding elements into the section by clicking the element icons directly on the canvas, or dragging an element from the Elements panel.
- Open the Elements panel.
- Drag and drop an element onto your page.
![]()
You can learn more about how to build layouts with container elements in our article here.
Use section templates
We have several prebuilt section templates that you can add, to help you set up your page quickly. To add a premade section:
- Open the Sections panel.
- The prebuilt templates will be shown below Saved Sections, divided by a line.
- Click a category to see the prebuilt templates for it.
- To place a section, you have two options:
a. Click to add: Click on the page canvas (or on a specific container) and the click the section template you want to add. It will be added either at the bottom of the page or inside the selected container.
b. Drag and drop: Click and drag the section template from the panel to the exact spot on the canvas where you want it to appear.
 After adding a section template to your page, you can further customize its look and feel by editing its content as well as adding/removing elements, etc.
Set up a style kit
A style kit is a collection of global design settings that automatically apply to any element connected to it. The style kit includes:
- Text styles (heading, body, and link styles)
- Color styles (branded colors that will be easily accessible when applying colors to any elements on canvas)
- Button styles (primary, secondary, and tertiary)
If you have your text and button elements linked up to a style, any edits that you make to the style kit will update those elements on canvas.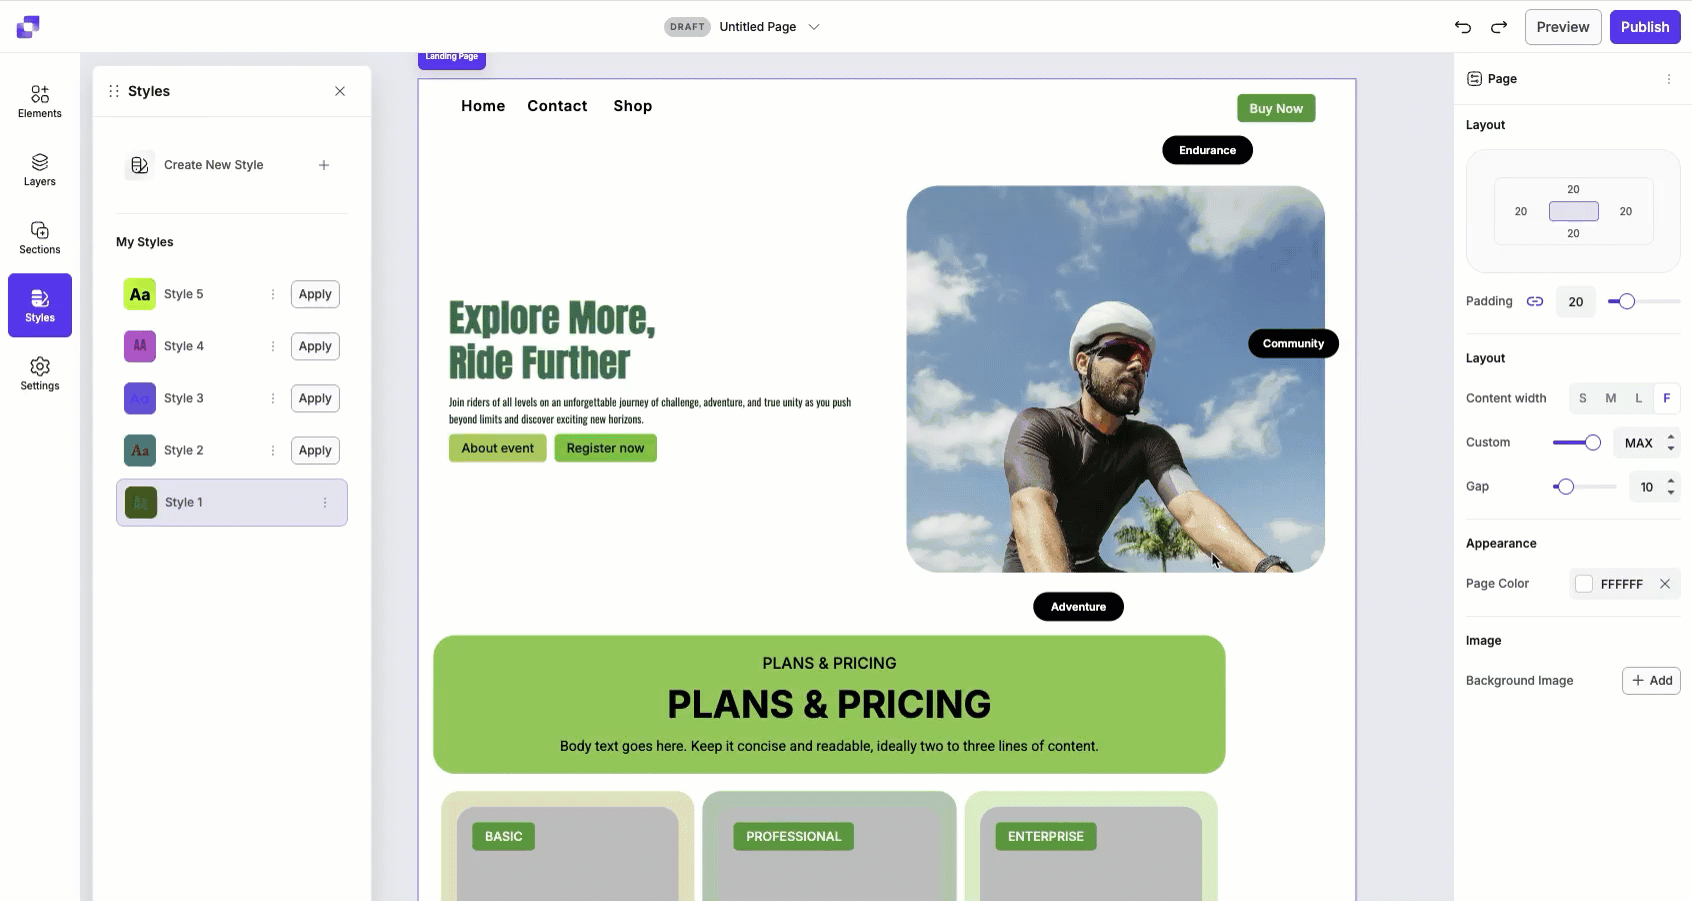
You can learn more about how to set up a style kit in our article here.
Edit your page content
Whether you're creating a page from scratch or using premade section template, you can edit, rearrange, delete, and add new content to customize your page further.
Edit elements
Elements are the content on your page—from text to images to buttons. Click on any element to access its settings in the Edit panel on the right-hand side of the builder.
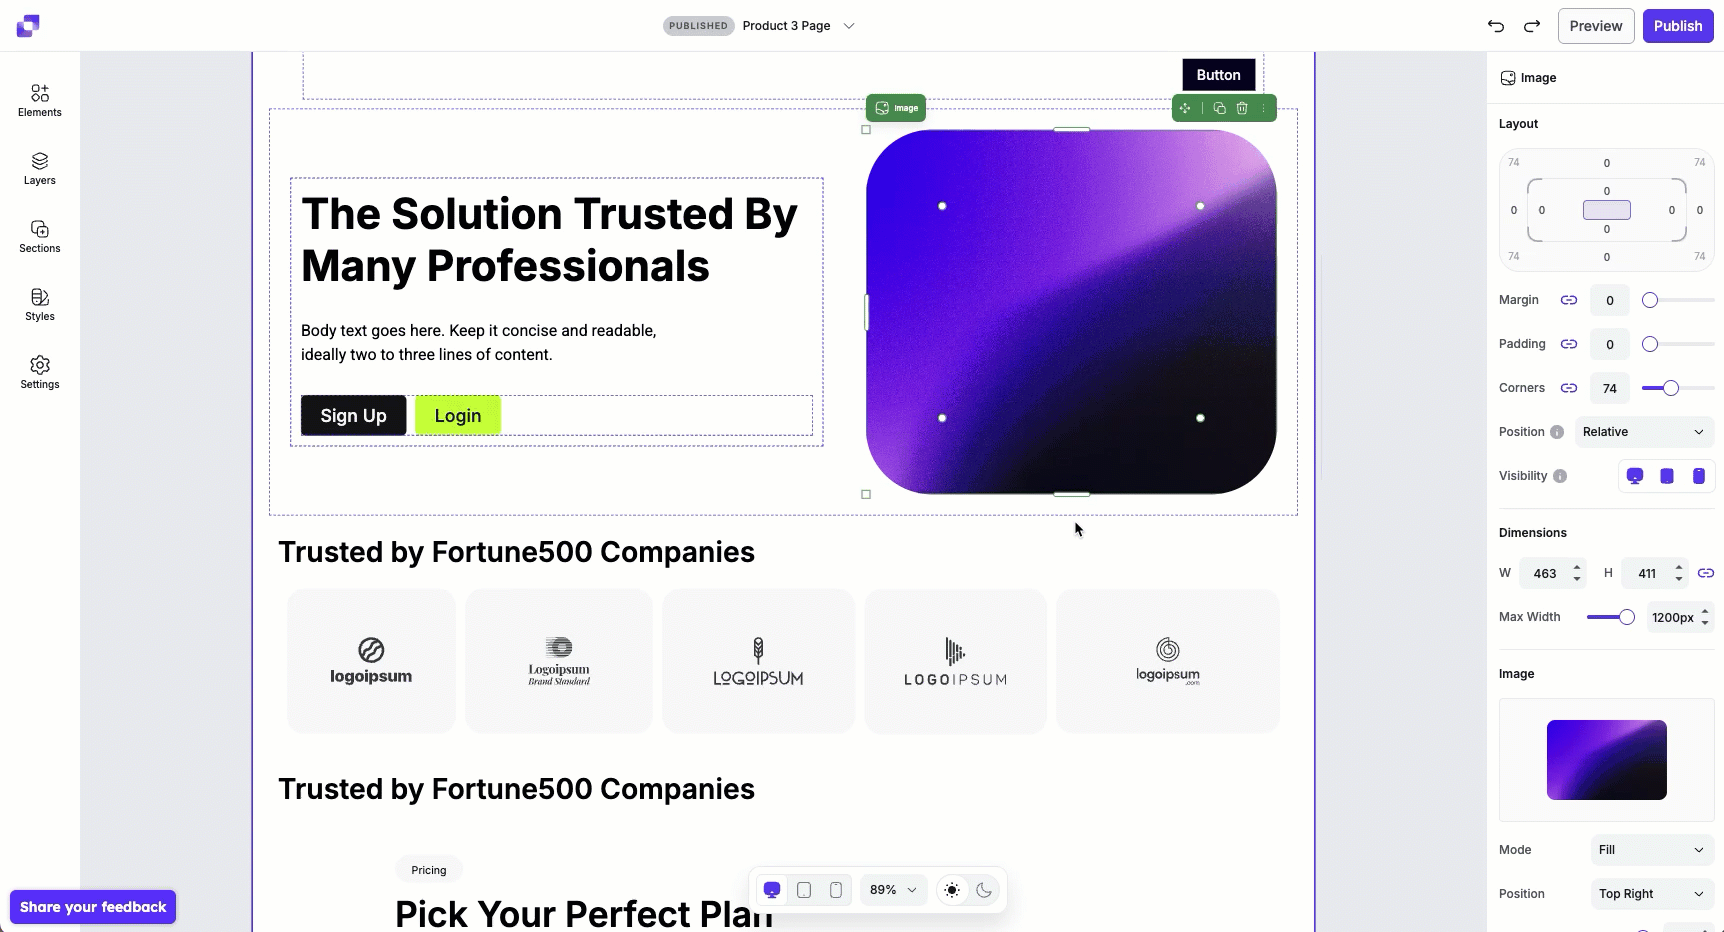
Each element also provides various customization and styling options. You can learn more about each element's options by clicking the links below:
- [Page Studio] The Video Element
- [Page Studio] The Container Element
- [Page Studio] The Countdown Element
- [Page Studio] The Image Element
- [Page Studio] The Text Element
- [Page Studio] The Button Element
- [Page Studio] The Form Element
Other customization options
Page Studio offers additional tools to help you style and organize your page. For more detailed guidance, see these articles:
- [Page Studio] Page Styles and Style kits
- [Page Studio] Understanding Layout Settings
- [Page Studio] Optimizing your page for mobile
Set up a form
You’ll need at least one form element in order to collect opt-ins on your page.
- Add a form element to your page.
- Add form fields that you want visitors to fill out.
- Style the form.
- Set up a Thank You page to send your leads to after they opt into the form.
You can read more about how to add form fields and style the form in our article here.
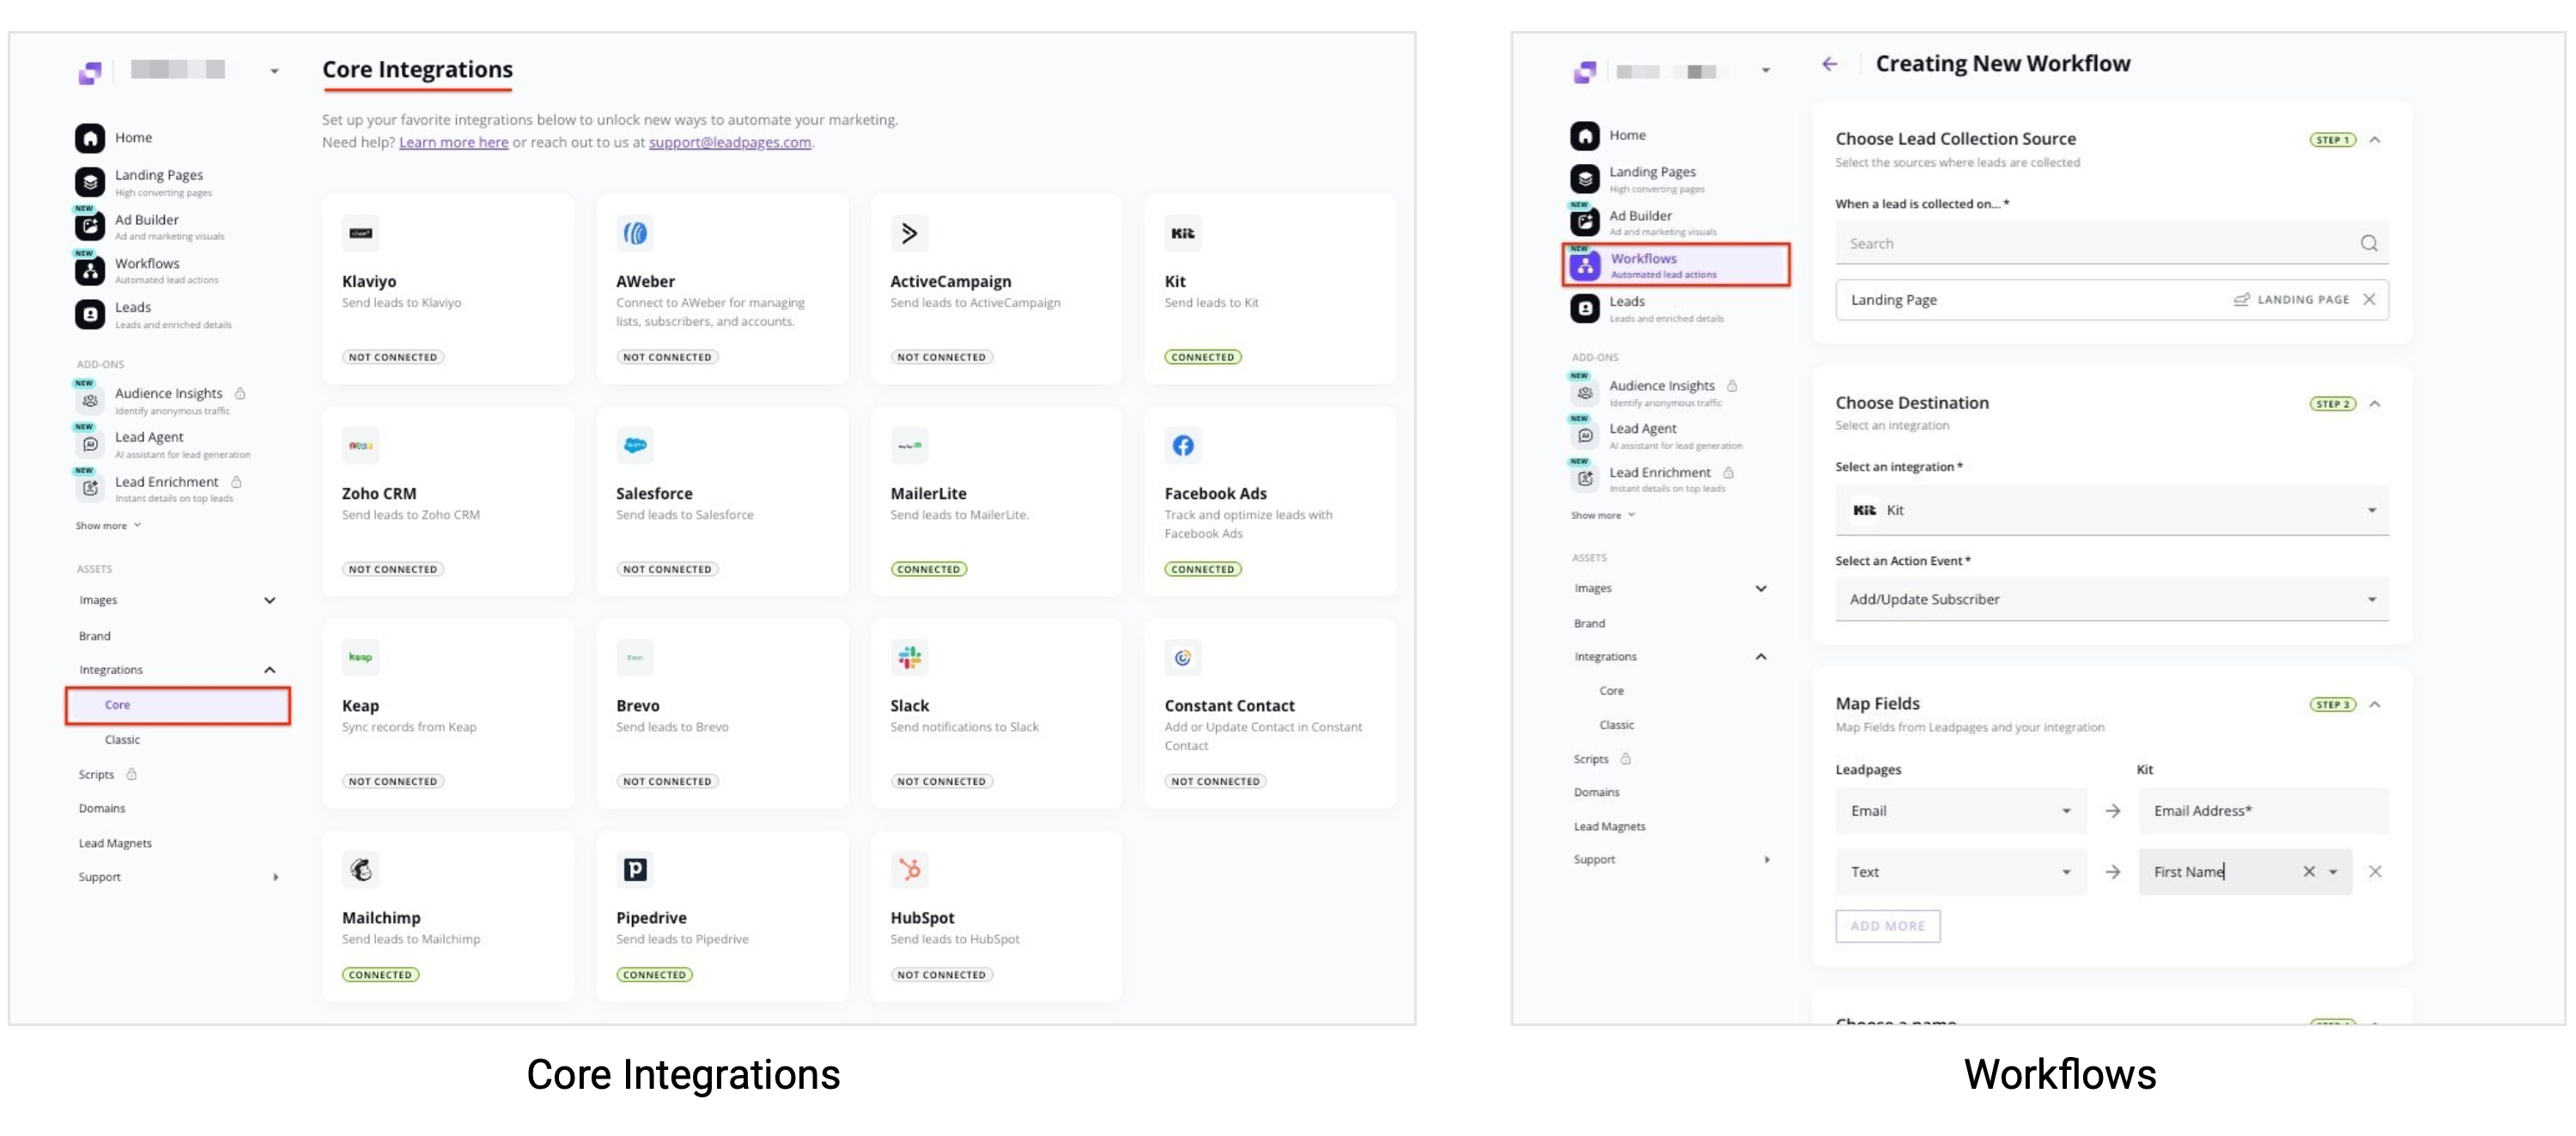
Connect an integration
If you want to send the lead data to an email service provider or CRM, you can see the platforms we support under Core Integrations. Once a Core integration has been connected, you can set up a Workflow to connect the forms on your pages to your preferred integration.
Send a lead magnet
You can incentivize visitors to opt into your page by offering a lead magnet. We recommend using an email service provider (ESP) or CRM to send lead magnets, as they are better equipped for managing follow-ups and nurturing relationships.
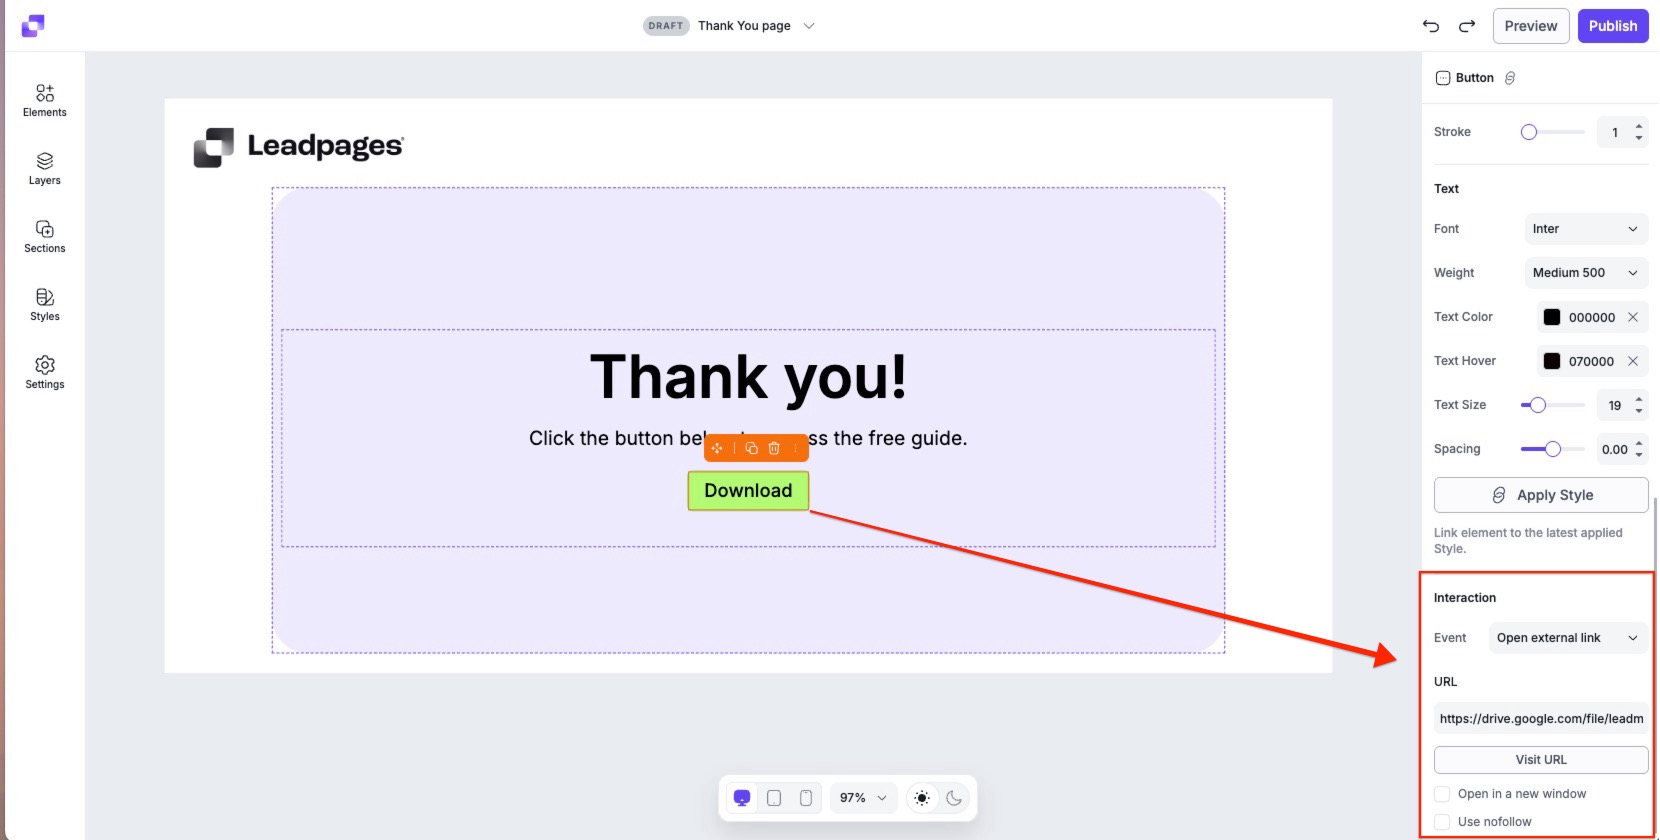
If you are not using an ESP or CRM, you can add a download link to a button on a connected Thank You page.
Setting up a download link
Leadpages is not a file hosting service, and we do not provide an option for you to upload lead magnet files directly onto your pages to download. The only way you can share this file within Leadpages is to link to it through a linkable element.
You can use a third-party service like Google Drive or DropBox to upload your lead magnet file. Once uploaded, you can grab the direct download URL for your file and attach it to an element using the Open external URL link option.
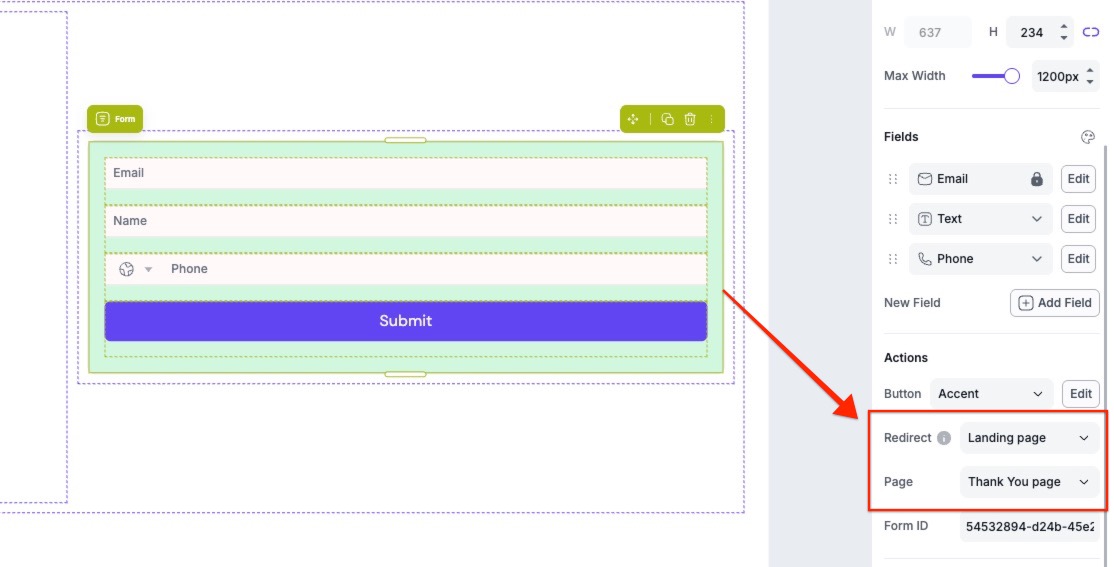
Set up a Thank You page
By default, visitors who submit a form on your landing page will remain on the page. Since the default Leadpages thank you page is not editable, if you wish to customize your thank you page, we suggest creating a custom one to connect to your opt-in page.
Once your thank you page is set up, you can connect it to your opt-in form by:
- Clicking on the opt-in form.
- Navigate to the Actions section within the Edit panel.
- Select Landing page in the Redirect drop-down field.
- In the Page drop-down, select your thank you page.
Publish your page
Before publishing your page, click the Preview button to see it in action—you can even make sure your page looks good on mobile devices.
When you’re satisfied, click Publish to go live!
Page Name
When publishing a page for the first time, you'll be prompted to set a page name if one hasn't been added.

- Enter a name for your page.
- Click Save.
- Click Publish again to continue.
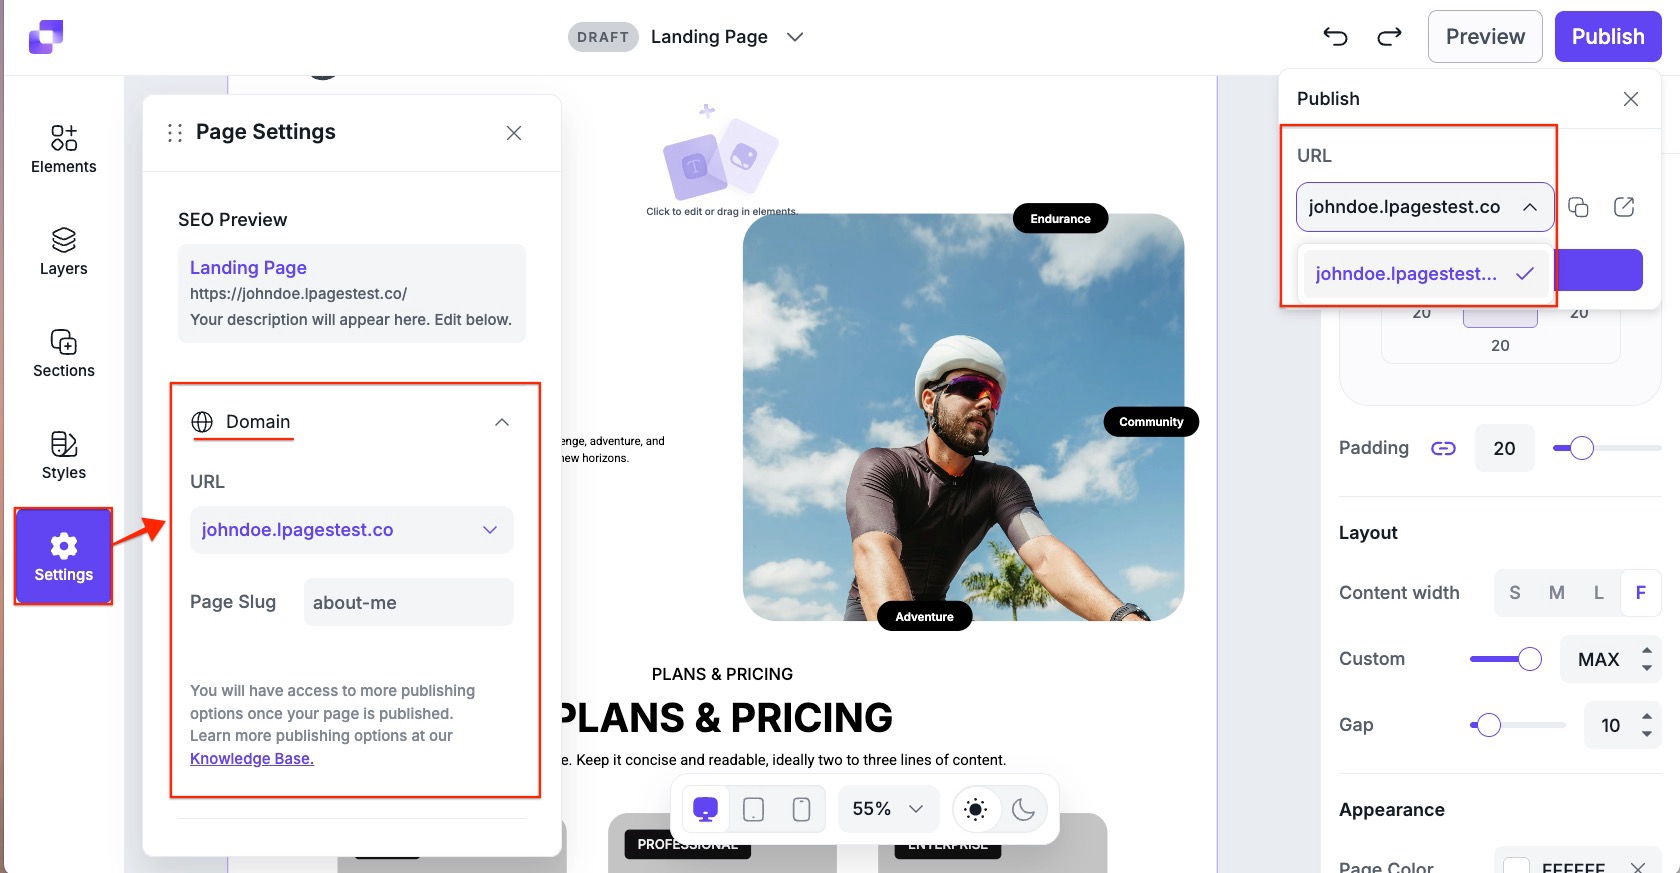
Page URL
When publishing your page, you'll choose where it lives online.
- Select a domain connected to your account from the URL dropdown.
- If you need to connect a custom domain, follow this guide.
- You can also change the domain later on by navigating to Settings→Domain.
By default, the page URL slug is generated using the page name. You can edit the slug at any time by:
- Navigating to Settings.
- Expand the Domain section.
- Enter a new value in the Page Slug field.
Test your page
After publishing, test your page to ensure everything works as expected:
- Submit the form and confirm that data is being sent to your connected integration, or a page redirect is occurring.
- Test links, buttons, and pop-ups on page.
- View the page on multiple devices and browsers.
Update your page
If you make changes to your page after it's been published, you'll need to update the page for those changes to go live.
To update your page, simply click the Publish button again. Your existing URL will remain the same unless you change the domain or page slug.
Need more help?
You can always get in touch with our support team—just click Support in your Leadpages navigation menu, or submit a ticket ↗