Collect the information you need by adding a form directly to your page using the form element. With this form you can customize your fields, and set up a follow-up action for those that subscribe like a thank you page.
The fine print
- This article goes over the form element within the Page Studio builder. If you are looking to edit the form widget in your Classic Builder pages, visit this article.
- Select from a set of default fields including email, text, phone, dropdown, consent, and more!
- Leads can be exported to CSV from your Leads library.
- You can send leads to integrations through Workflows.
Adding a form to your page
To add a form to your page:
- Open the Elements panel
- Drag and drop the form element onto your page
Once added, you can click on the form on the canvas to access its settings in the Edit panel.
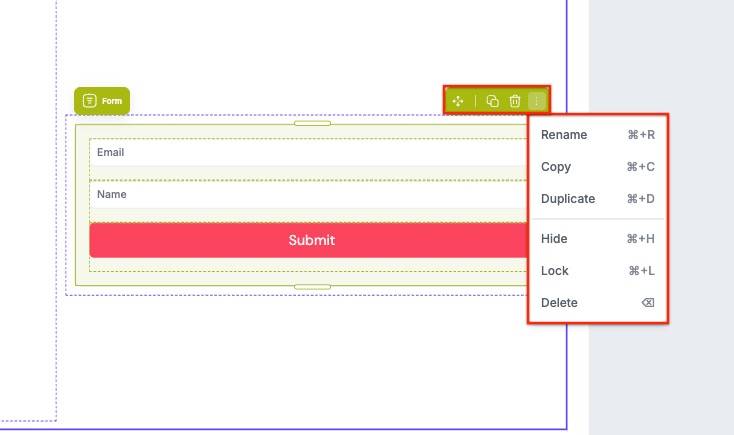
Canvas quick actions
Each form includes a quick actions menu that lets you make fast changes. From this menu you can:
- Copy the form to paste elsewhere on the page.
- Duplicate the form, which will appear under or to the right of the button (depending on the direction of the container the form sits it).
- Hide/Show the form.
- Lock/Unlock the form. Locking an element can help prevent accidental edits or movement.
- Delete the form from the page.
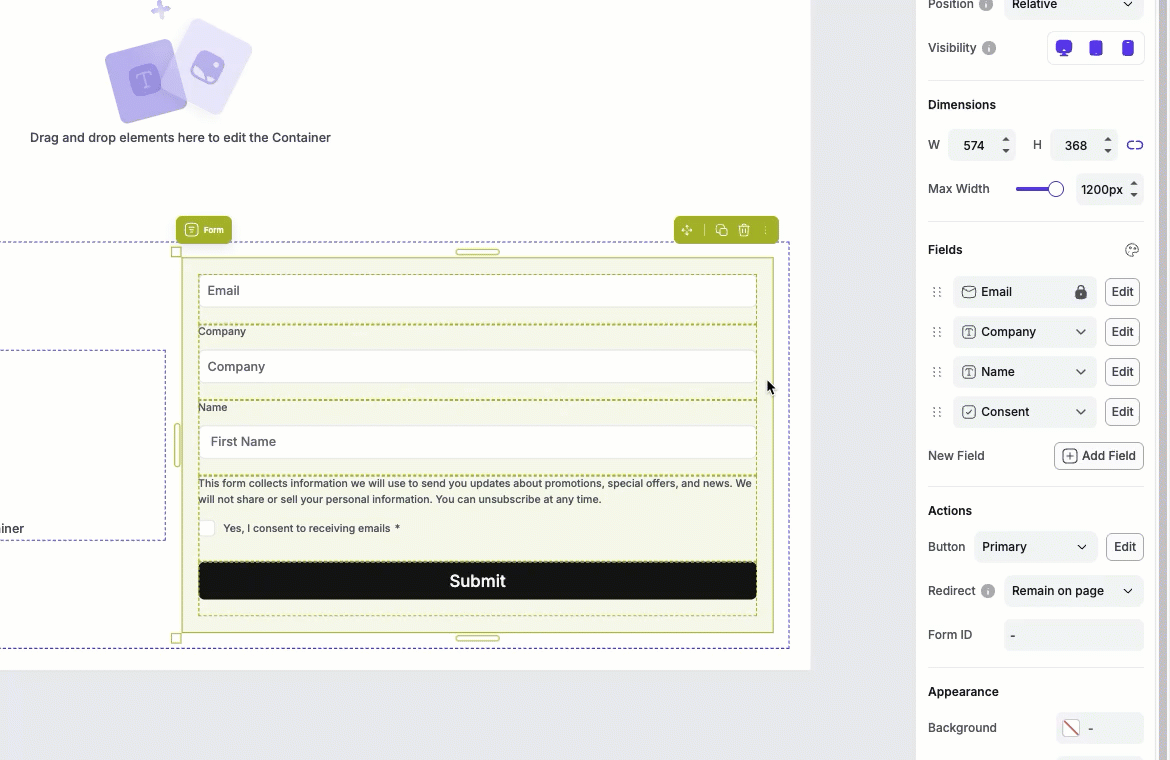
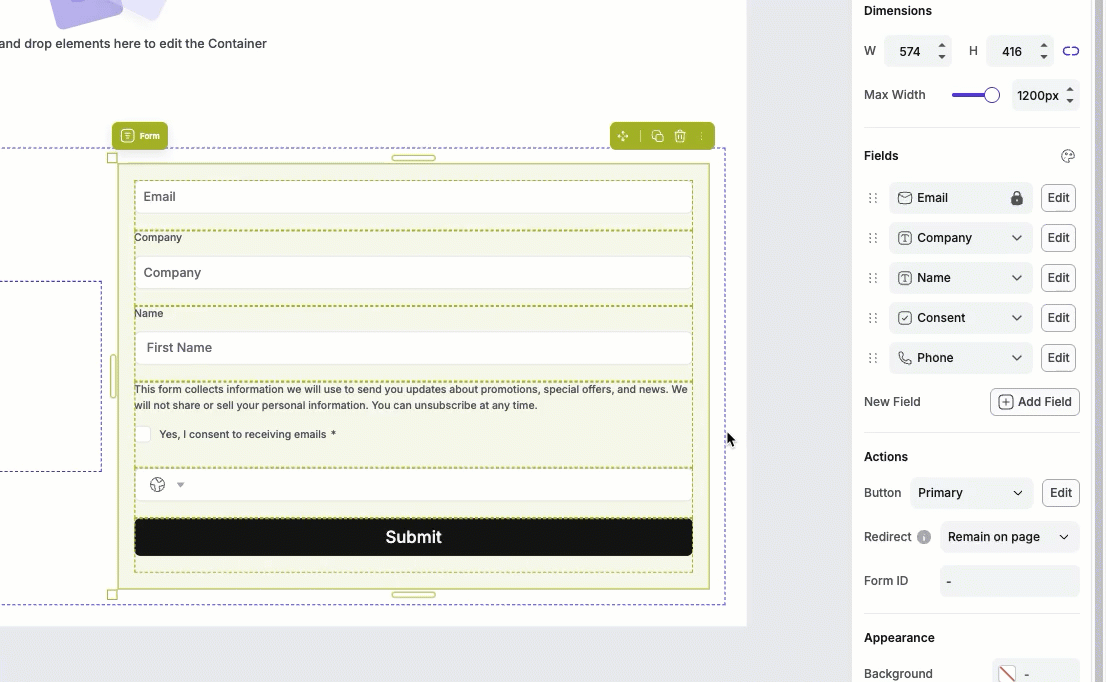
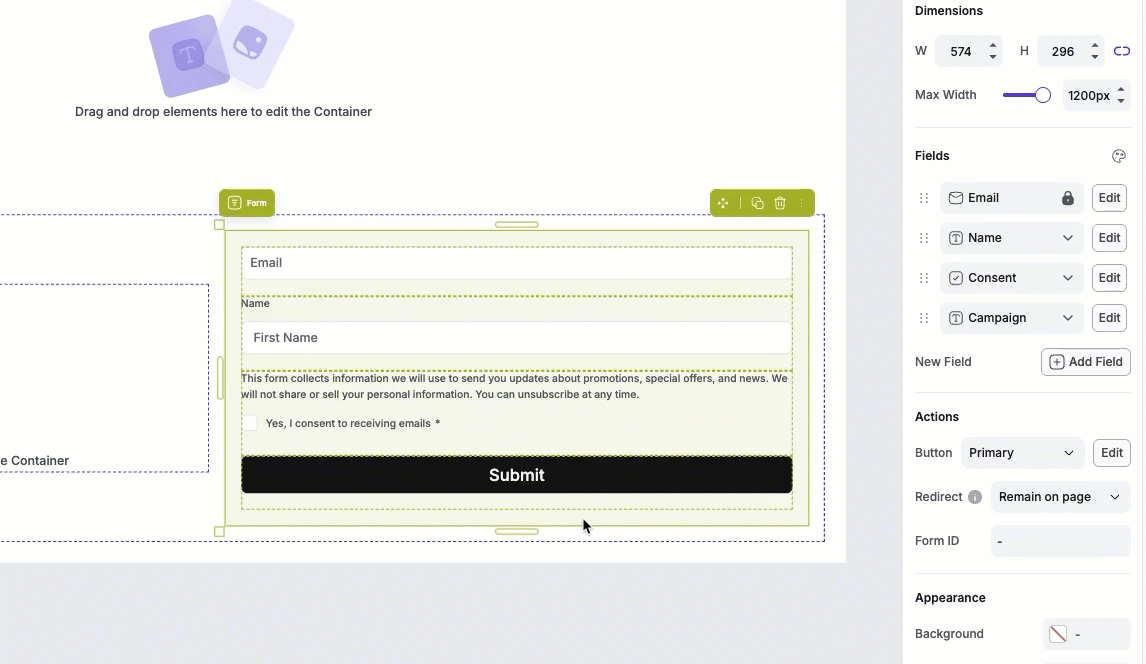
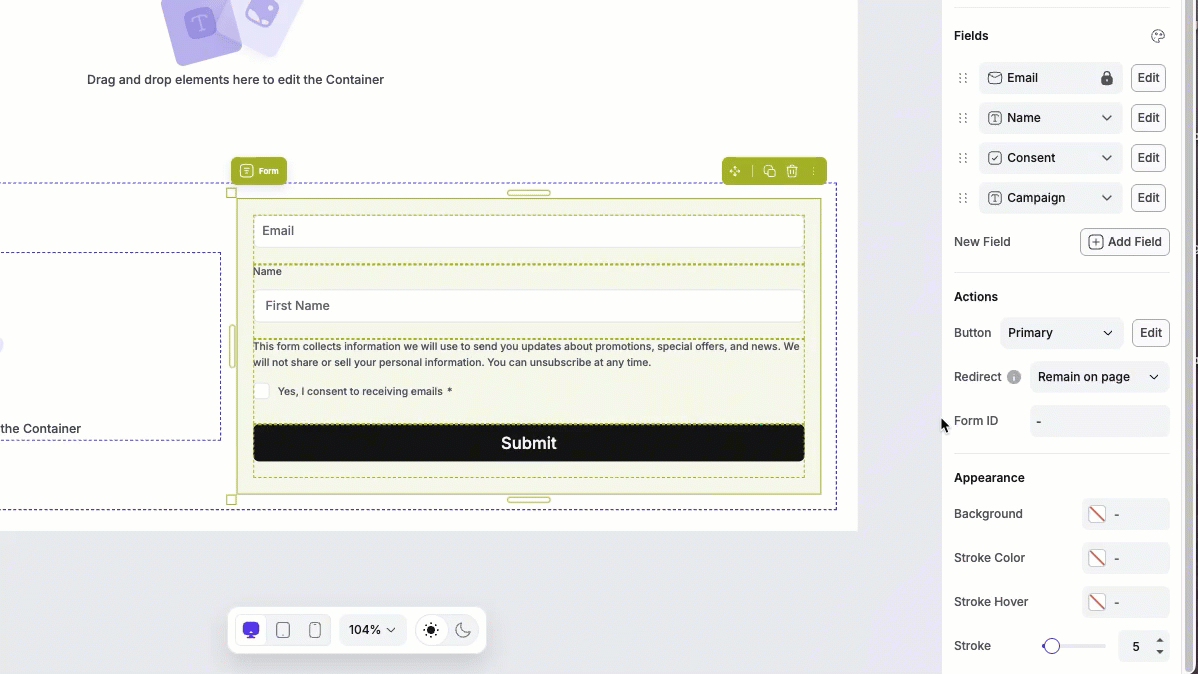
Add or remove form fields
You can easily customize your form by adding new fields to collect the information you need, or removing fields that aren’t necessary. By default, the form element will have a required email field which cannot be removed.
Add a field
If you want to add additional fields to the form:
- Click the form on your page to pull up the Edit panel
- Under Fields, click Add Field.
- Once the new field is added, you can select the type of field you want it to be by clicking on the field’s drop-down (e.g., text, name, phone, etc)
Delete a field
If you want to remove a field from the form:
- Click the form on the page.
- Click the field you want to remove, then click the trash can icon.
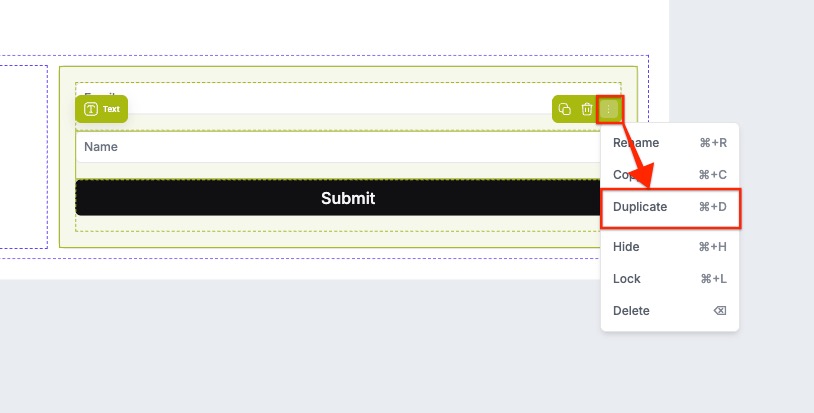
Duplicate a field
To quickly duplicate an existing form field:
- Click the form on the canvas
- Click the field you want to duplicate
- Open the actions menu (:) for that field and select Duplicate.
- The duplicated field will appear directly below the original field in the form.
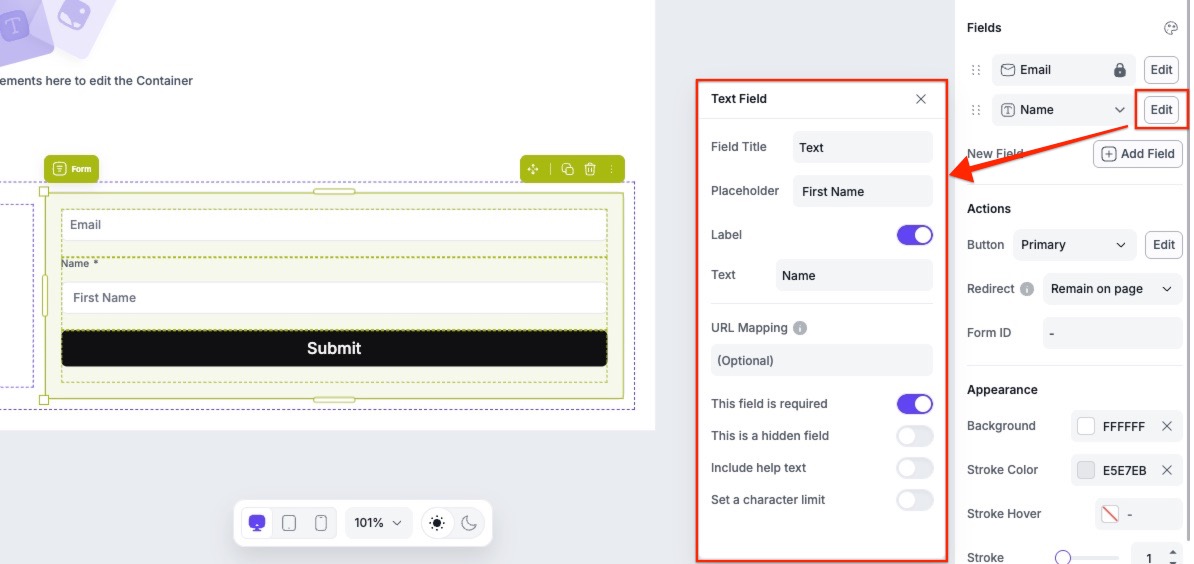
Customize field settings
You can customize your fields in a few ways, including:
- Changing a field’s label, and placeholder text
- Setting a URL variable for a field
- Making a field required/not required
- Hiding a field
- Adding helper text to the field
- Setting a character limit
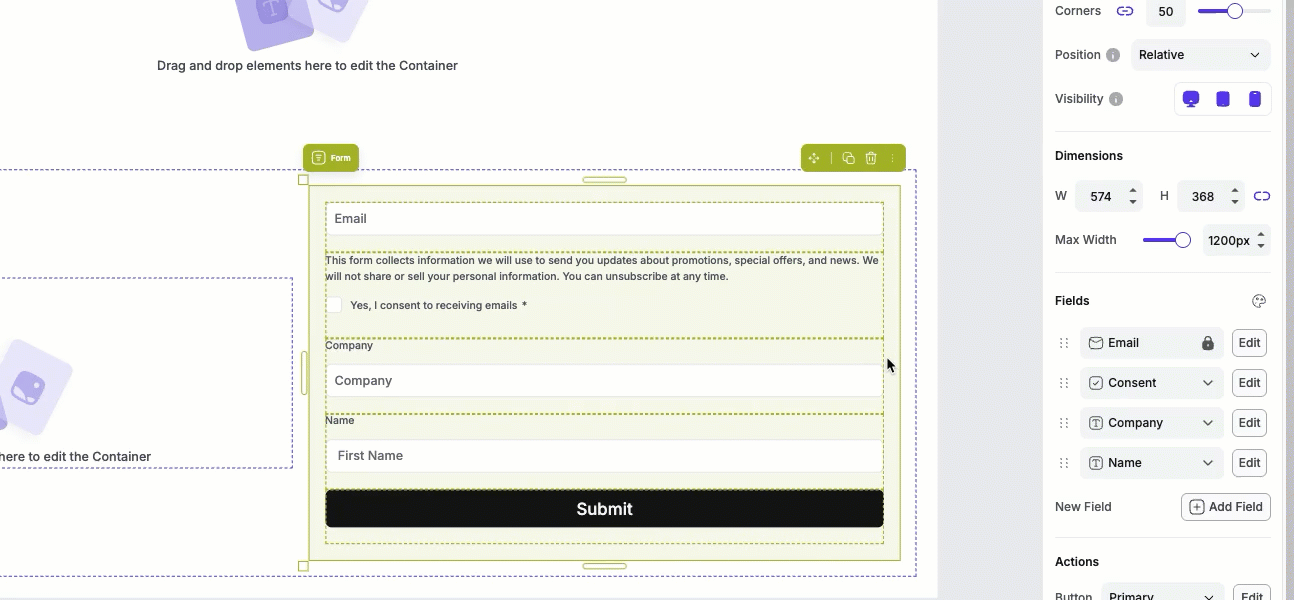
Reordering fields
You can reorder fields in the Edit panel.
- Click the form on the page
- In the Edit panel, locate the field you want to reorder under Fields.
- Click and drag it to a new position.
Hidden fields & pre-population
Hidden fields allow you to pass data invisibly through your form (such as UTM values or campaign identifiers). You can pre-populate hidden or visible fields using URL parameters with the URL Mapping option. You can learn more about how to set up a hidden field to capture UTM parameters here.

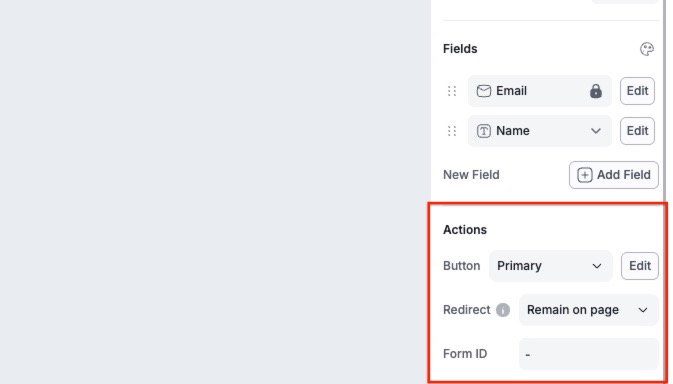
Set follow-up actions
Within the Edit panel, under Actions, you can choose where you'd like to send your visitors after they opt in to your form element. If you click on the Redirect drop-down field, you'll have the option to select:
- Default page: Send your leads to a Leadpages Thank You page. This default page cannot be edited.
- Landing page: Send your leads to one of your other published Page Studio landing pages.
- External URL: Send your leads to an external URL of your choice.
- Remain on page: Your leads will not be redirected after opting into the form.
Styling your form
Once your form is added to the page, you can customize its appearance to match your page design and branding. In the form element’s Edit panel, you can adjust your form’s appearance to match your brand.
Layout settings
Under Layout, you can adjust the padding, margin, and corners to control how your form fits within its parent container. You’ll also be able to adjust its position and visibility. To learn more about the Layout settings, in general, you can visit this article.
Customize field styles
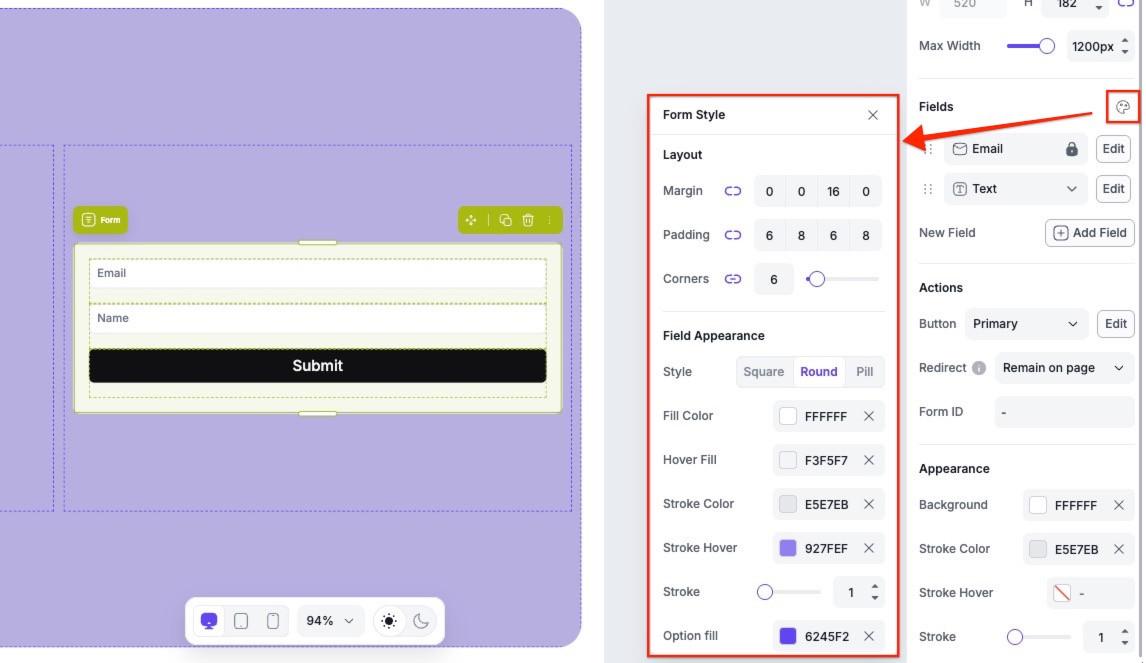
Form styles let you control the visual appearance of your form fields so they match the rest of your page design.
To access the form styles, open the Edit panel and navigate to the Fields section. Click the palette icon to open the style settings.
From there, you can customize the look and feel of your form fields, including:
- Layout (margin, padding, and field corners)
- Field appearance (field color, border stroke, drop shadow, etc.)
- Field text styles
- Label text styles
Customize button
The button in your form will take on the button styles set up in your style kit, if applied to the page. Make sure to check out this article on how to set up your own style kit.
Once a style kit has been applied to your page, you can choose which button type is in your form under Actions. You'll be able to select either your primary, secondary or accent button.

To edit the text within the button, simply double click the text on the canvas to them remove and add any text you like.
Background and border
To set a background color or border for your form:
- Click the form to open up the Edit panel
- Under Appearance, you can:
A. Set a Background color
B. Set a Stroke Color
C. Set a Stroke Hover color
D. Adjust the strike width
Frequently asked questions
Can I add an image background to the field?
No, you will only be able to set a color background. However, you can add a background image to the container that holds the form element. If the form doesn’t have a background color set, you will see the form on top of the container’s background.
How do I set up integrations for my form?
To set up integrations for the form, you’ll need to create a Workflow. More on that here.
I want to send my opt-ins to my thank you page but it's not appearing in the Redirect drop-down. Why is that?
You'll only see landing pages listed if the page is a Page Studio page, and if the page is published. If the page is in draft, you will not see it listed.
Need more help?
You can always get in touch with our support team—just click Support in your Leadpages navigation menu, or submit a ticket ↗