Add forms directly to your page or pop-up using the form widget. Learn to connect integrations, filter spam opt-ins, and set up a follow-up for those that subscribe, like a thank you page. The form widget is also included by default in pop-ups.
Using the form widget
Name your form
First, make sure to name your form something unique to the page or pop-up you've created. The form name will default to the page name and the date and time the form was created.
If you've got Lead Notifications set up on your form, this form name will be used in the subject line of your Lead Notifications emails.
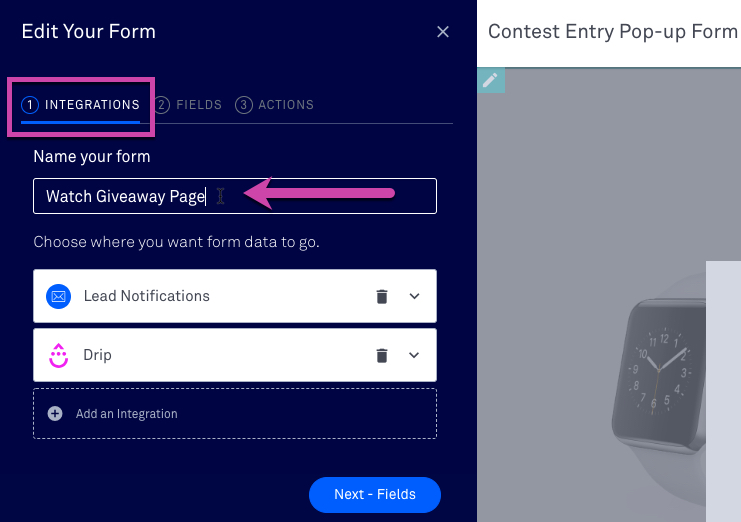
Add an integration
Before editing your form widget's settings, the first thing you'll want to do is connect your integrations to your Leadpages account in order to send your leads there after they have opted in to your form.
Add any other integrations you’d like, such as an email service provider like AWeber or Mailchimp.
Add a form field
The form widget will only have a field for email by default. You can set it up with other fields as needed.
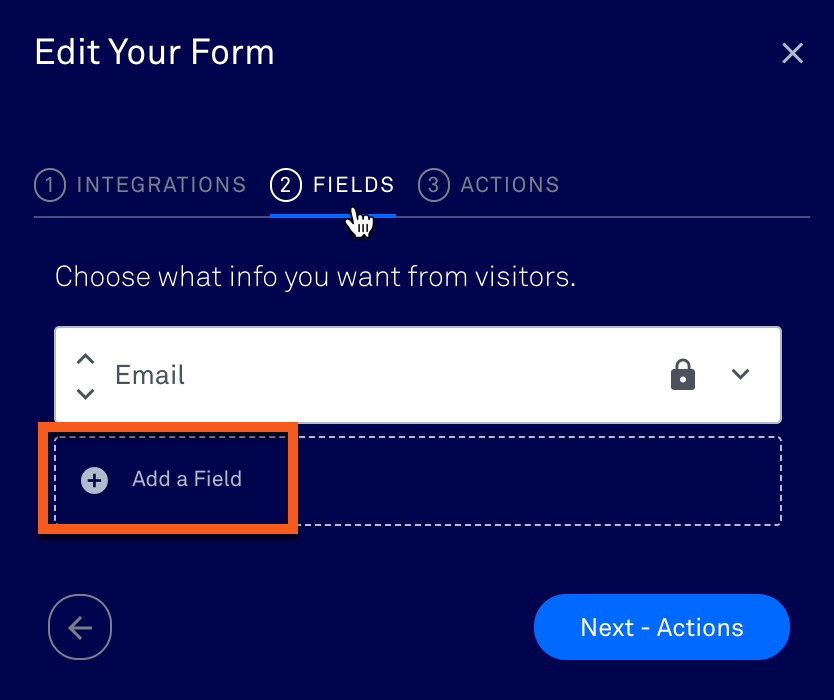
To delete a field, click the trash can icon and then Delete. If you see a lock icon instead of a trash can, your field is marked as required. You’ll need to make the field optional in order to delete it (either in Leadpages’ settings, or in some cases, in the settings for whichever service the field is coming from).
Custom fields (i.e. drop-downs, radio buttons)
You may may be looking to add more than simply text fields to your form in Leadpages. In order to do so, you must integrate your form with an email service provider that provides the field you're looking to add, such as drop-downs, radio buttons, checkboxes etc.
Some examples of services Leadpages integrates with that offer custom form fields:
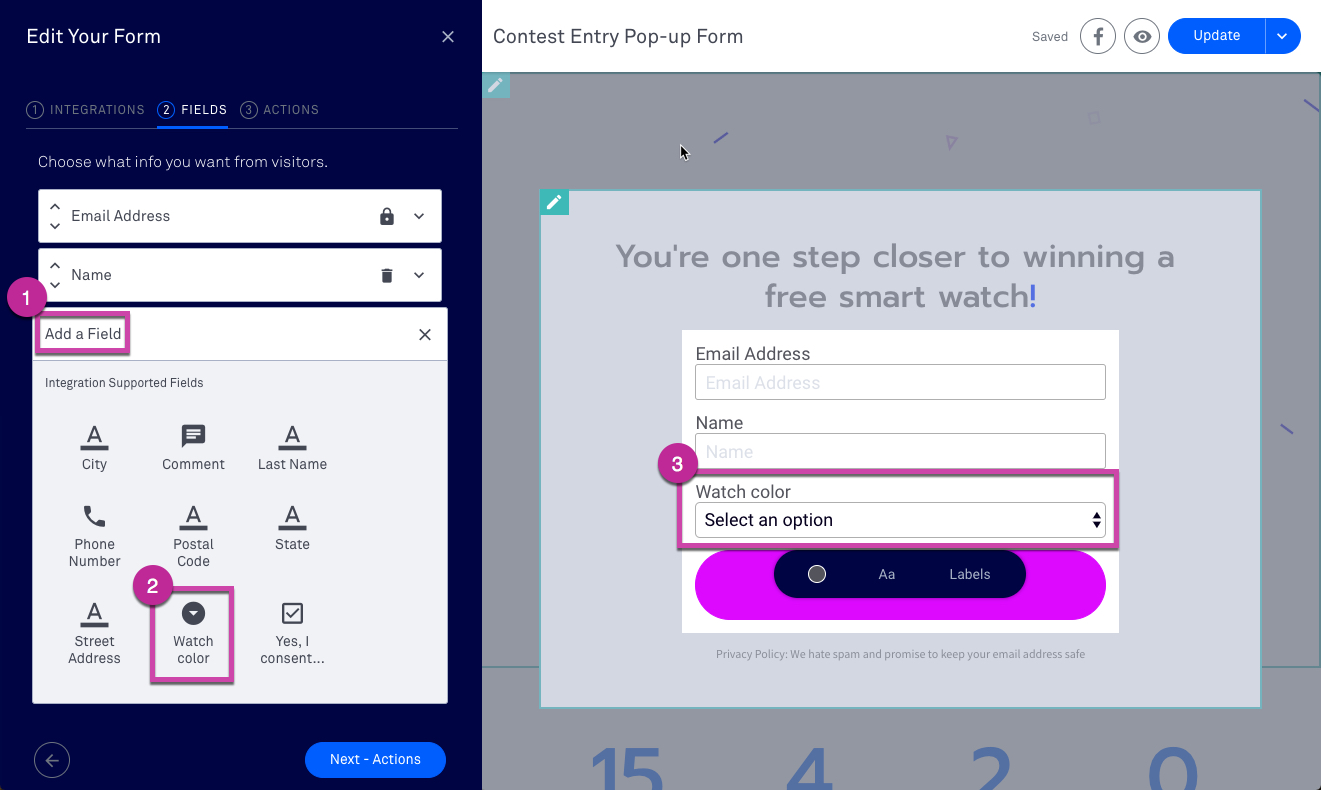
Once you've added the custom form field in your email service provider and your page is integrated with that service, you'll see that field available within the form widget's settings.
For example, here's a form widget integrated with a Mailchimp list that has a drop-down custom field:
Changing form field settings (i.e. labels, hidden fields)
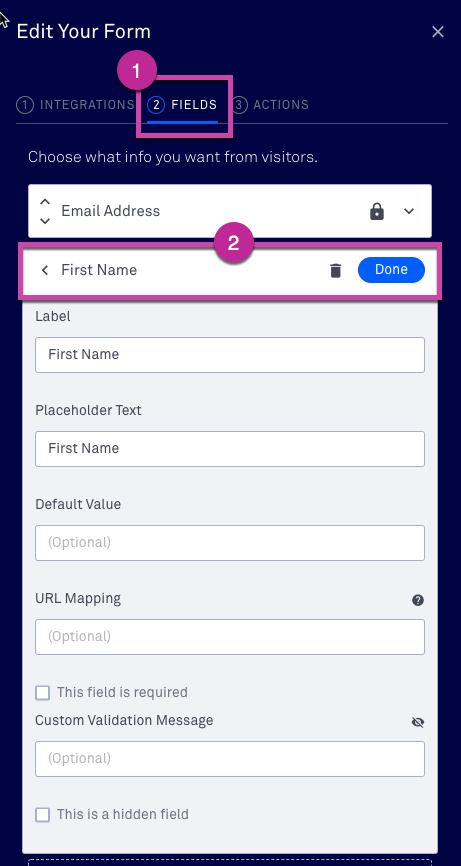
You can customize your fields within our builder in many ways, including:
- making a field required/not required
- hiding a field
- setting a default value for a field
- changing a field’s label and placeholder text
- adjusting drop-down field choice labels
To access these settings, click the name of the field you’d like to change. Any settings for it will appear in the left-hand sidebar. When you’re finished adjusting the field, be sure to click Done to save your changes.
Reordering fields
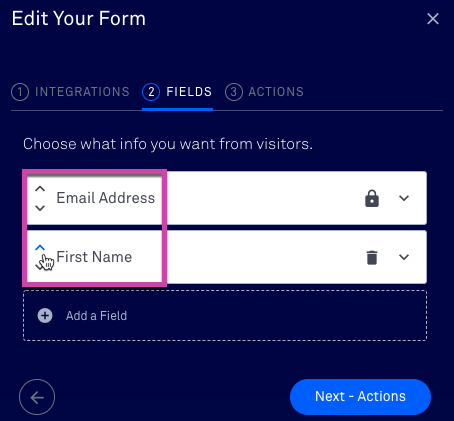
To change the order in which your fields appear, open your form settings by clicking on any field. Then, use the up and down arrows in the sidebar to change how your fields appear, as shown below.
Filter spam opt-ins
To make sure only the real, quality leads are getting to your email list, you can turn on Google reCAPTCHA to filter out spam opt-ins and any bots trying to get through to your list.
You'll need a Google account as well as Google reCAPTCHA keys that you create within Google to showcase reCAPTCHA on your Leadpages forms.
Click here to learn more about how to implement Google reCAPTCHA in Leadpages.
Follow-up actions (i.e. thank you page, lead magnet)
Under ③ ACTIONS you can choose where you'd like to send your visitors after they opt into your form and attach a lead magnet. Please note, that the lead magnet feature is considered legacy, and may not be available in all accounts.
We have a resource for each of these actions here:
Customization and Styling Details
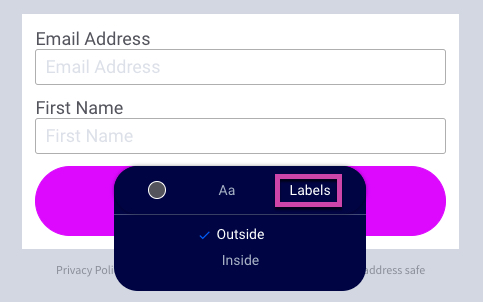
You can adjust the font, size, color and adjust the label (inside or outside the field) under the menu by clicking on any of your form fields, as seen here:
You can also adjust the style, text and color of the submit button by clicking on it, then select Customize Button, as seen here:
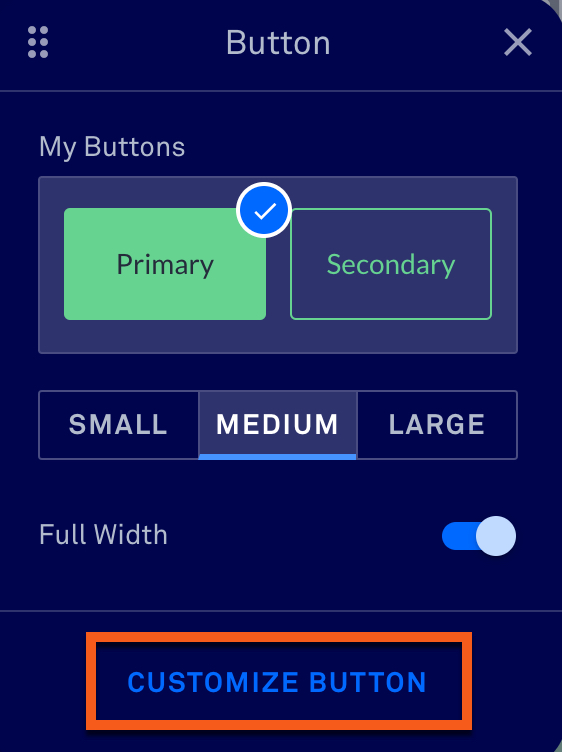
For more details on customizing your form’s submit button, including global primary and secondary button styles, please see our button widget article.
Tips and Frequently Asked Questions
How do I test my form?
How can I pre-populate or set default values for my form fields?
How do I turn the country code selector off for my form's phone field?
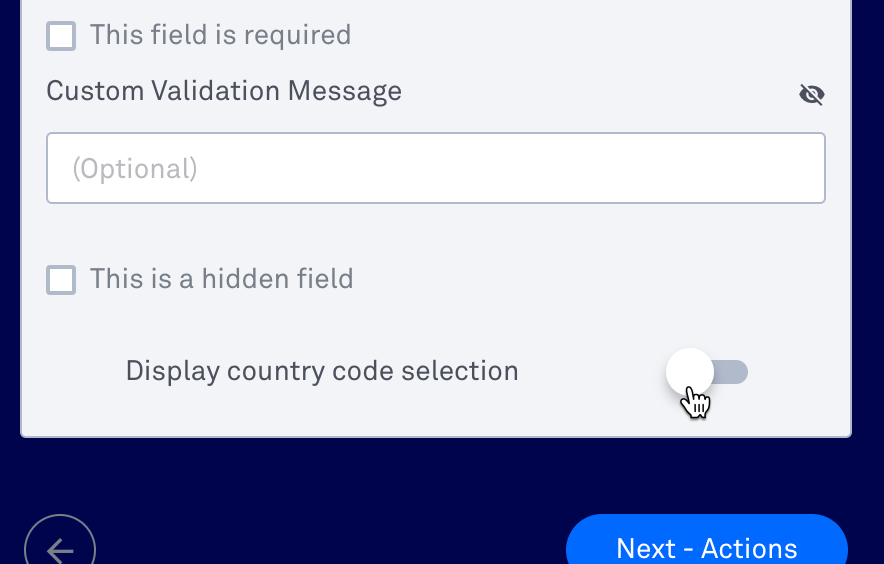
To turn off the country code selector on a phone number form field, click on your form to open its settings, select the ② FIELDS tab, click on phone number and at the bottom of it's settings, toggle "Display country code selection" to the OFF position.
The country code selector will always default to the United States.
What’s the difference between a field’s placeholder text and its label?
The field label is like the field’s title or name, while placeholder text is what shows up in the field before a user’s input. For instance, a field could have the label of “Name”, and placeholder text of “First and last, please!” Please note, however, if labels are set to Inside, they will override placeholder text.
Why don’t I see extra form fields like radio buttons, drop-down menus, etc.?
You can add certain text fields through Lead Notifications to your form. Any other fields will need to be set up in your email service provider, and imported into your form as shown above.
You can also use our custom form widget.
Why can’t I delete a field?
If you don’t see the trash can icon to delete a form field, the field is set to required. You can click into the field options and try un-checking the Visitor must fill out this field checkbox. If you’re unable to do so, you may need to set the field as not required from within your ESP.
Is the HTML Copy/Paste option gone?
We no longer have the HTML Copy/Paste integration included in forms, but you can paste your third-party form code into the HTML widget.
Need more help?
You can always get in touch with our support team—just click Support in your Leadpages navigation menu, or submit a ticket ↗
