Bring your designs to life with effects and editing tools that let you customize each element to match your vision. From flipping and cropping to adding shadows and overlays, these tools give you the flexibility to fine-tune details and create a polished, professional look.
Design tools
Add a background color or image
- Open a design or create a blank canvas.
- Click on the background.
- In the Edit panel on the right-hand side:
• To add an image, click Add Image to upload your own or choose from stock images
• To add a color, click the Color HEX code button to open the color palette and select a color.
Removing the background from an image
You can remove image backgrounds directly from your dashboard or inside the editor.
From the dashboard
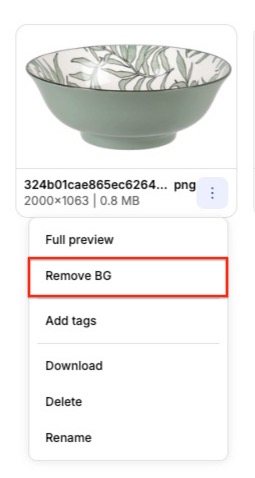
- On your dashboard, navigate to My Uploads.
- For the image you want to edit, click the ⋮ (More) icon, then select Remove BG.
- After the background is removed, refine the image (if needed) using the Keep, Remove, Eraser, and Scalpel tools.
- When you’re happy with the result, click Done to save your changes.
Inside the editor
- Add an image to your canvas.
- Click the image to open the Edit panel on the right-hand side.
- Click the Remove Background button.
- Make any needed adjustments, then click Done to save your changes.
Cropping an image
- Double-click the image you want to crop to enter Crop Mode.
- Use the zoom scale or drag the anchors/corners of the image to adjust the crop as desired.
- Click outside the image to exit Crop Mode and apply your changes.
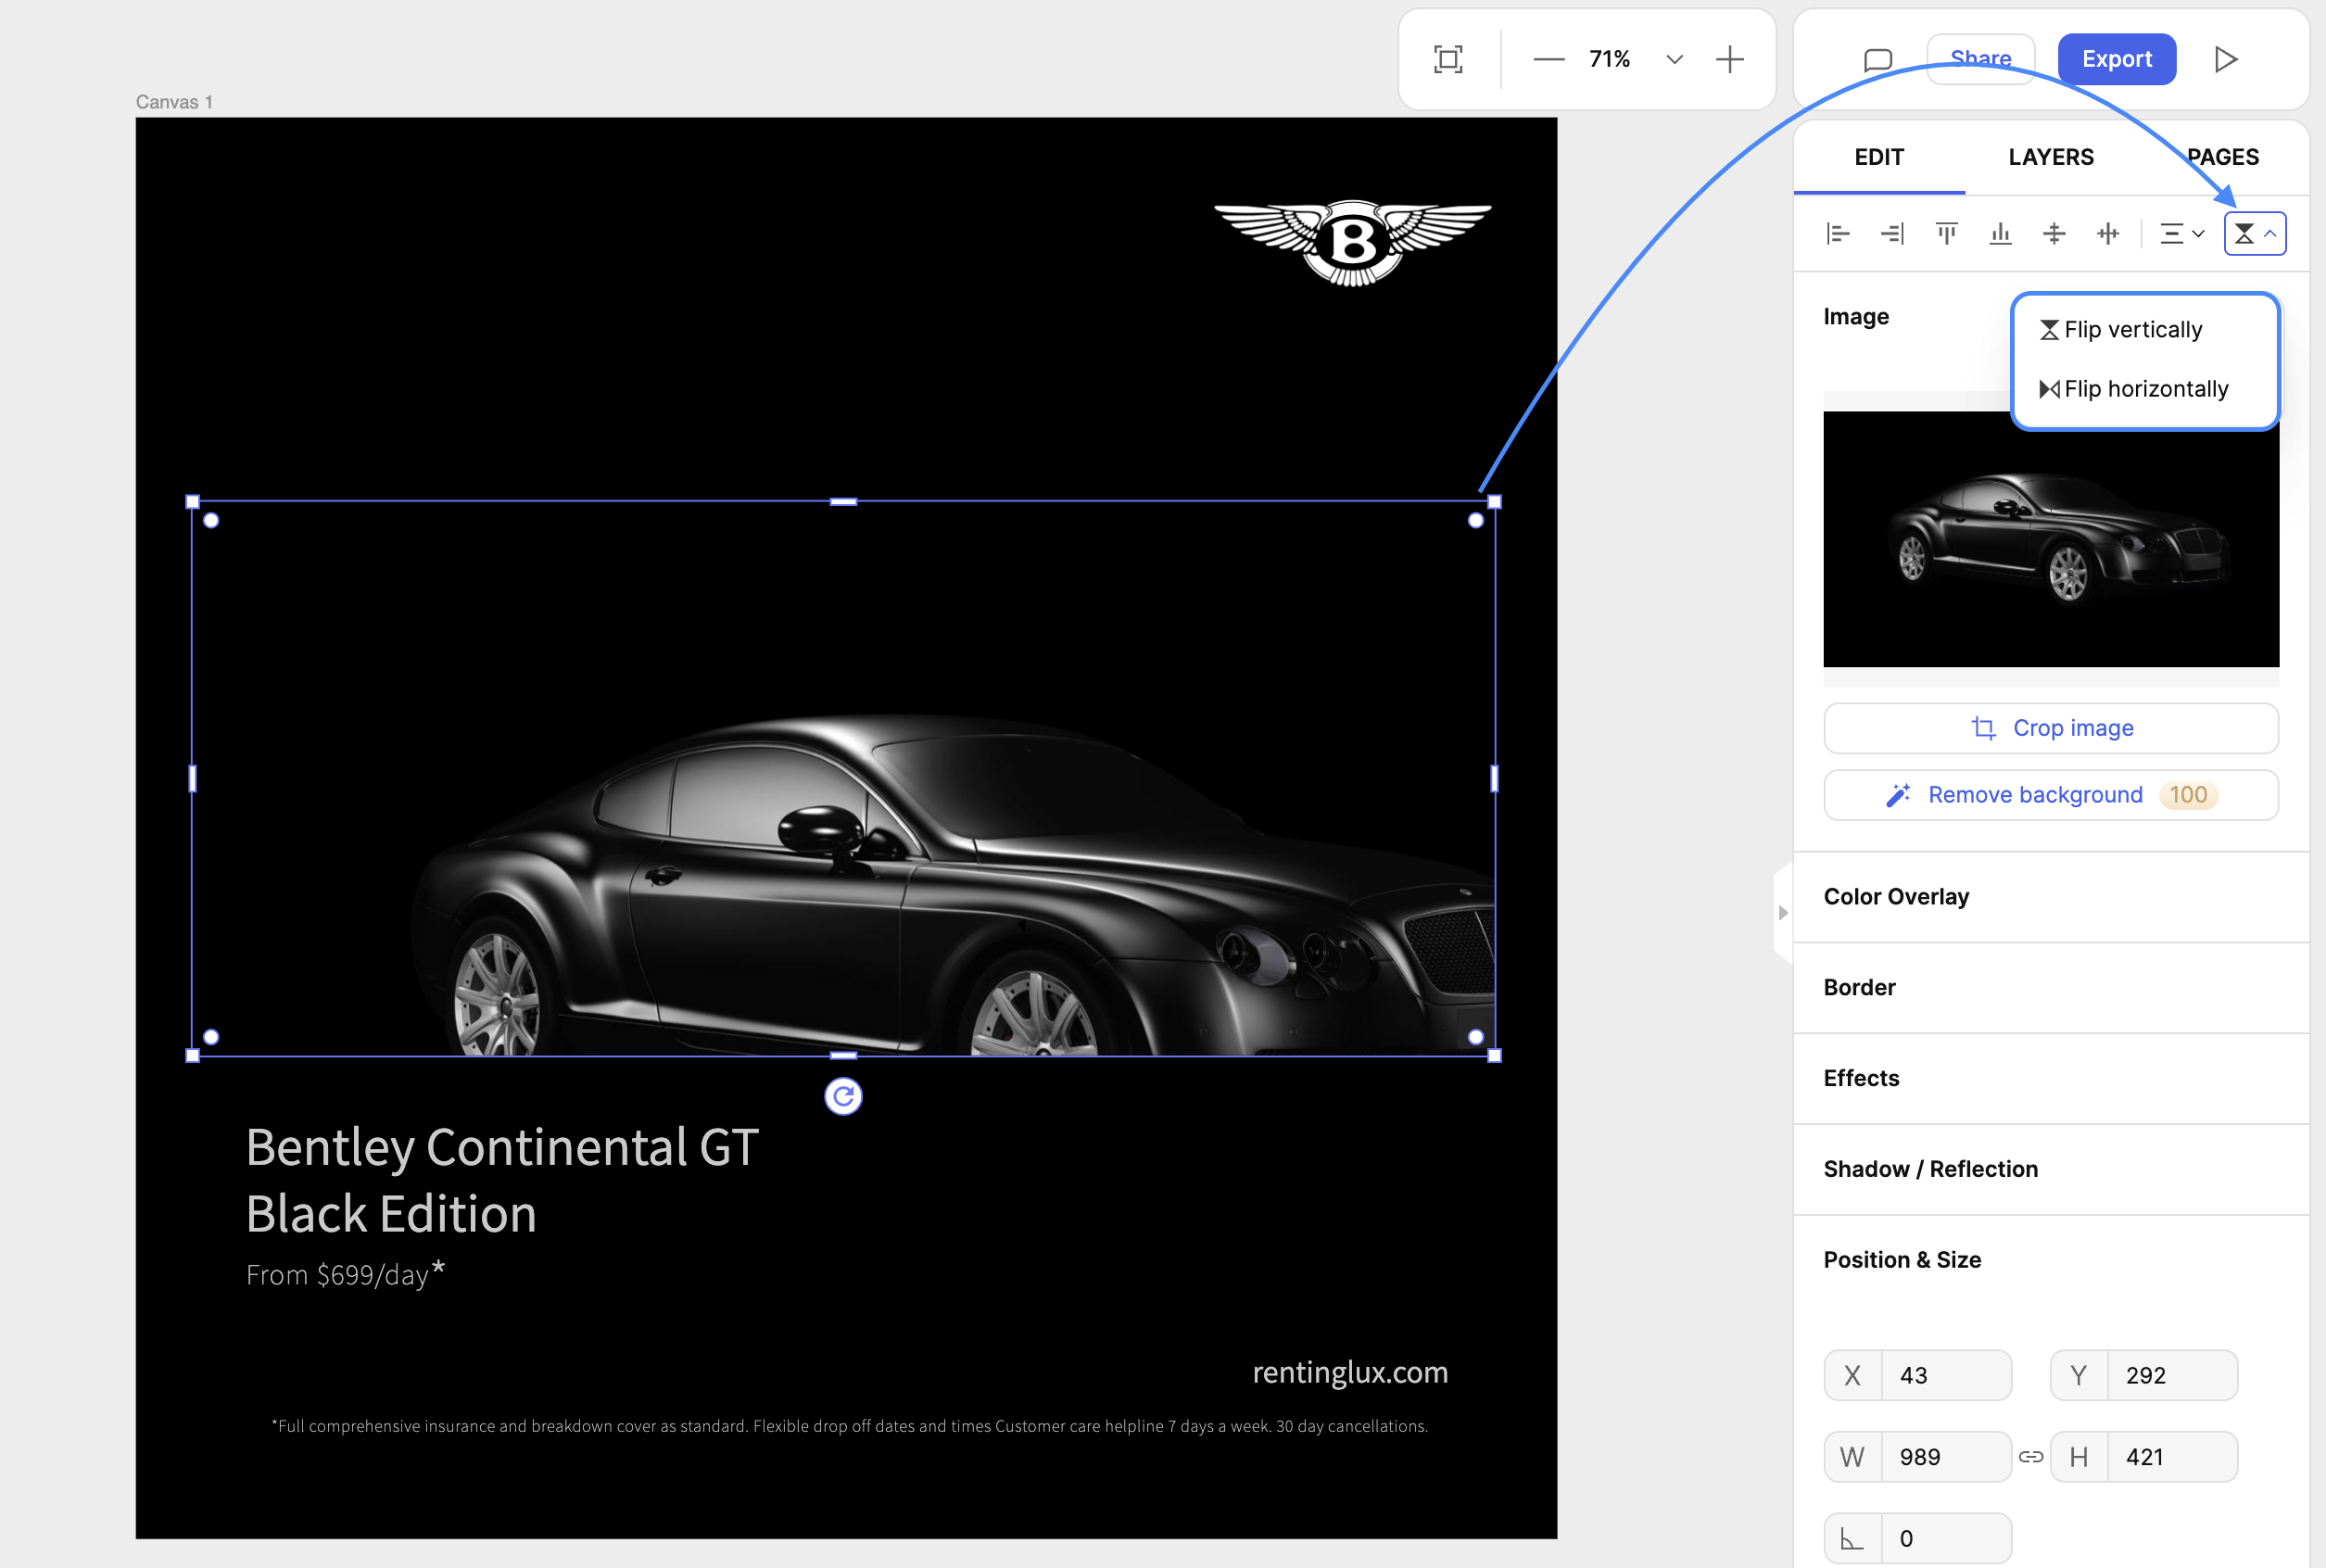
Flip an image
- Select the image element on your canvas.
- In the Edit panel on the right side of the screen, click the Flip icon.
- Choose the flip option (horizontal or vertical) that works best for your design.
Using brand color palettes
Applying your brand colors to a design helps maintain a consistent and professional look across all of your projects. You can learn more about how to set up a brand color palette here.
To apply a brand color palette
- In the editor, click the canvas you want to apply the brand colors to, then click the Libraries (+) icon.
- Under Brand Kit, click Brand Palettes.
- Click the Shuffle icon to apply your brand colors to the canvas.
Using the blob maker
The blob maker lets you create unique organic shapes that can be customized for your designs.
- In the editor, click the Libraries (+) icon.
- Scroll down and select Blobs, under the Basic section.
- Customize the blob using the Complexity and Contrast sliders, and choose a color.
- Click Add to place the blob on your canvas.
- Further edits to the blob can be done in the Edit panel to adjust its size, blend mode, or add shadows and borders.

Using annotations
Annotations are a great way to highlight or point out specific elements in your design.
- In the editor, click the Arrow tool in the left panel.
- Choose the type of annotation you want to use (line arrow, triangle arrow, circle arrow, ring arrow, or flat-end arrow).
- Click and drag your mouse on the canvas to place the annotation.
- Customize the annotation in the Edit panel, and adjust its curve by dragging the middle handle on the annotation directly on the canvas.
Effects
Adding effects
Want to enhance your designs and images? You can apply effects and textures right from the editor.
- In the editor, click the Libraries (+) icon.
- Scroll to the bottom of the list to find Libraries, then click Effects.
- Browse and select an effect.
- Click the effect to add it to your canvas.
- Drag and reposition the effect where you want it, then adjust its settings in the Edit panel.
Adding a shadow to elements
Elements such as text shapes, and icons have a Drop Shadow setting. Images, on the other hand, have a Shadow & Reflection option.
To add a shadow to an element
- Select the element on your canvas.
- In the Edit panel, click the + icon next to Drop Shadow.
- Adjust the shadow’s style using the available settings, such as opacity, color, position, and blur.
To add a shadow to an image
- Select the image on your canvas.
- In the Edit panel, click the + icon next to Shadow & Reflection.
- Select a Shadow & Reflection option (Drop Shadow, Ground Shadow, or Reflection).
- Once you’ve chosen a Shadow & Reflection type, click the Settings icon beside it to pull up options to adjust its styling.
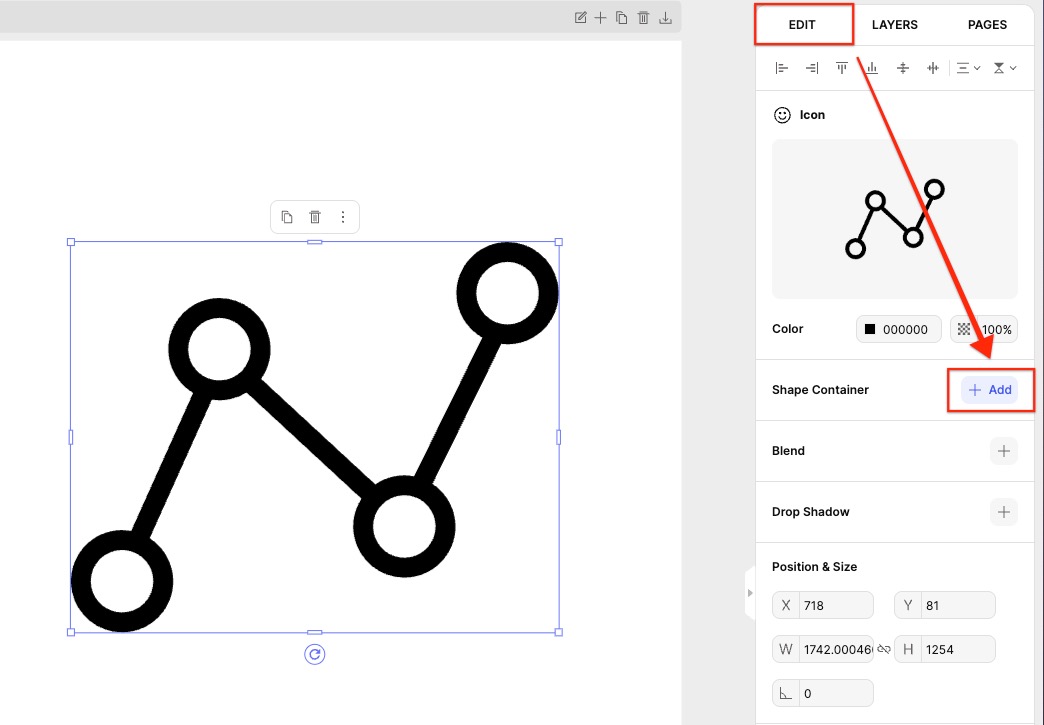
Adding a frame to an icon
Adding a frame to an icon can help it stand out in your design. To add a frame, you’ll need to:
- In the editor, click the Libraries (+) icon.
- Scroll down and select Icons, under Libraries.
- Add an icon to your canvas.
- Click the the icon on our canvas to pull up the Edit panel on the right-hand side.
- Click the + icon next to Shape Container.
- Adjust the container’s shape, color, size, thickness, and radius to achieve the look you want.
Frequently asked questions
How much can I customize?
You have complete control over all templates—move, transform, tweak, and add anything you like to make them fit your exact needs. You can even start with a blank canvas and use our native tools to design from scratch.
The background removal tool isn't working for me, what can I do?
Some users may run into issues removing the background of their images if their browser has these extensions:
- Decentraleyes
- Privacy Badger
Temporarily disable these extensions to see if it helps resolve the issue for you. If not, please visit the Technical support & troubleshooting article for more troubleshooting steps.
← Explore more Glorify articles
Need more help?
You can always get in touch with our support team—just click Support in your Leadpages navigation menu, or submit a ticket ↗