Did you cancel your Leadpages subscription and now you're looking to reactivate your account and take advantage of the newest updates? Or perhaps you set your account to cancel but have reconsidered and are looking to remove that pending cancellation? Learn how to reactivate your account here.
The fine print
- It is not possible to reactivate on a pricing plan that is no longer available. For the latest Leadpages pricing ↗
Reactivate an inactive account
If you cancelled your Leadpages account in the past and your account is currently closed, follow these steps to reactivate:
- Log in to Leadpages (same email address and password as you used in the past).
- Click Reactivate Account.
- Select the plan and billing cycle you would like, fill out your payment details, and you will be up and running again.

Remove a pending cancellation
If you have previously disabled auto-renew, you can easily reactivate automatic payment for your subscription to ensure that your account does not close at the end of your current billing cycle.
To re-enable auto-renew:
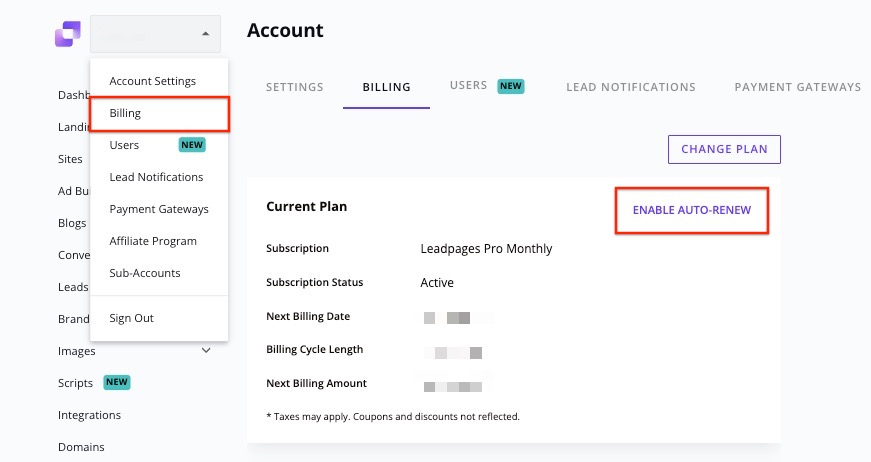
1. Log in to Leadpages.
2. Click your account name in the top-left corner of your account, then select Billing (Or, click this link).
3. Click Enable Auto-Renew.
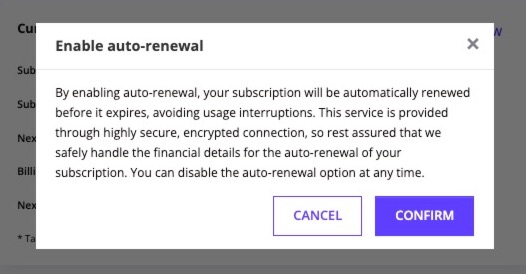
4. In the pop-up modal, select Confirm.
Once re-enabled, your subscription will automatically renew at the end of your current billing cycle. You’ll remain on the same plan and billing term you were previously using.
If you need to change your plan or update your payment method, check out our related articles or reach out to Support for assistance.
NOTE: If you reactivate on the same plan and billing cycle, you will not be charged and your renewal date will stay the same. If you choose a different plan and/or billing cycle, normal plan change charges/credits will occur. More on plan changes here.
Need more help?
You can always get in touch with our support team—just click Support in your Leadpages navigation menu, or submit a ticket ↗