Integrating with Facebook Ads requires using our automations feature. Facebook Ads tracking is only compatible with the custom forms widget, not our legacy form widget. At this time, only one Facebook Ads account can be connected under the Core integrations, and only one pixel can be connected to each automation. A single automation can send only send one event type —“Report Lead Event”— to Facebook through the server-side integration.
Sending lead event data to Facebook helps the platform attribute conversions to your ads and optimize your campaigns. This allows Facebook to learn which users are most likely to convert, improve targeting, and ultimately lower your cost per lead over time.
The fine print
- Only the LEAD event is support at this time.
- Only one Pixel can be connected per automation.
- Facebook does not store or display your form submission data, and they only receive hashed data for matching and attribution.
Integrate your Facebook Ads account
In the left-hand navigation on your account dashboard, under Assets, click the drop-down arrow next to Integrations. Select Core.
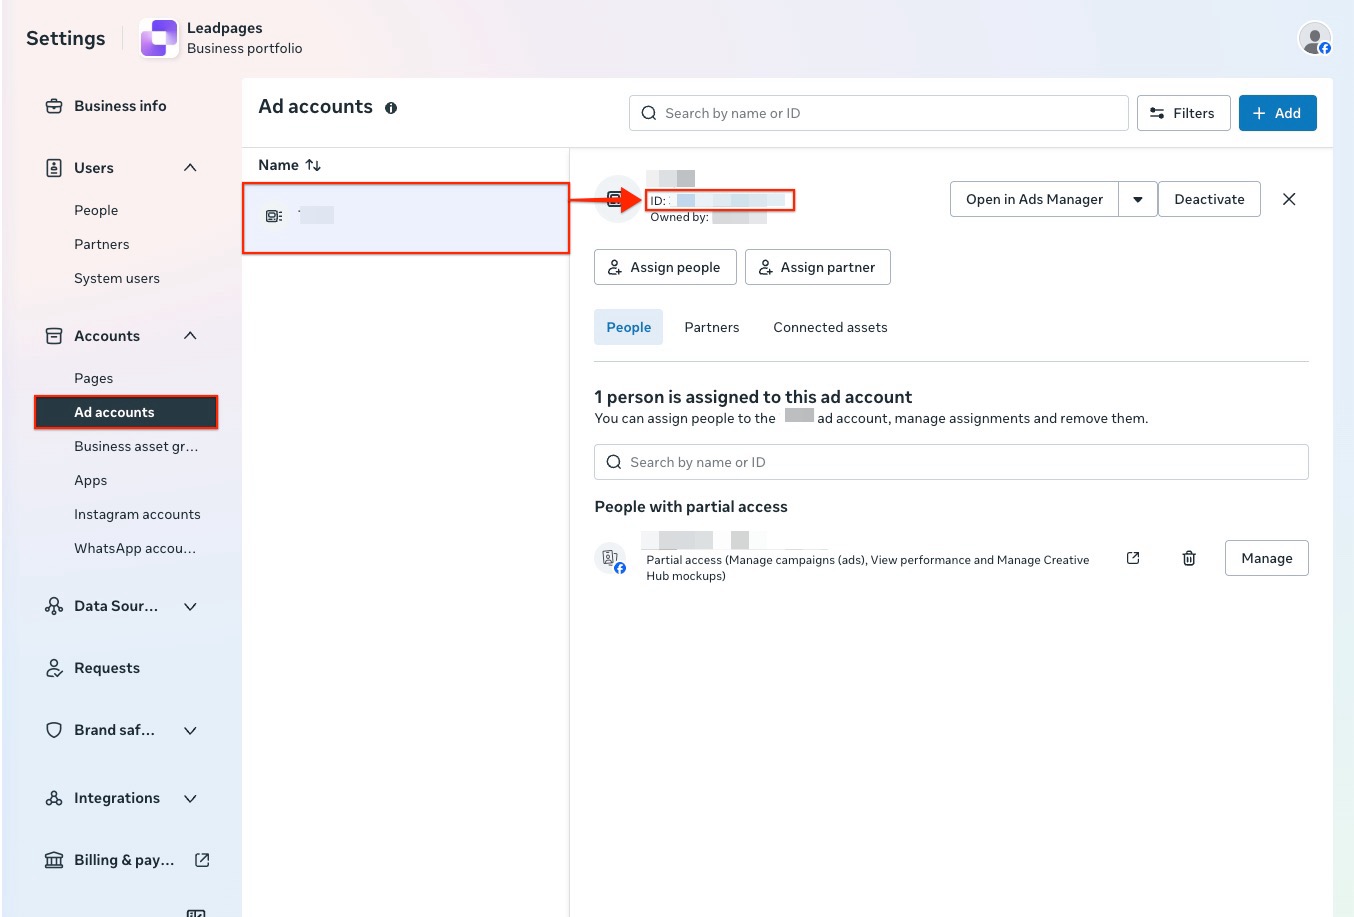
Click Facebook Ads in the Core integrations menu, and select Connect in the corresponding pop-up. You will be prompted to enter your Facebook Ads Account ID. For easy access, you can click the "Facebook Business Settings, under Ad Accounts" link in the pop-up, which will redirect you to the Ads Account page.

On the Ads Account page, you can find your Account ID by first clicking on the correct ads account. The Account ID should be listed besides ‘ID’. Copy the ID and paste it into the pop-up in Leadpages, then click Continue to connect your Facebook Ads account.
Send lead events to Facebook
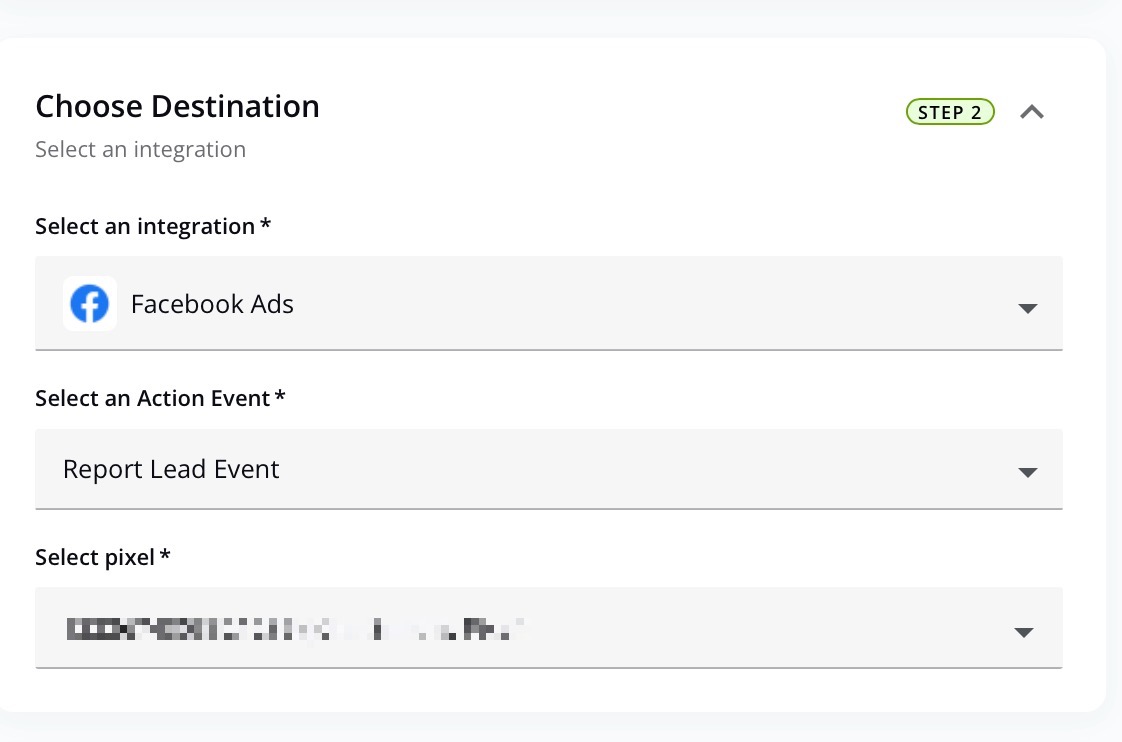
With Leadpages automations, your form submission is automatically sent to your connected Facebook ads account, specifically to the pixel you’ve assigned in the automations.
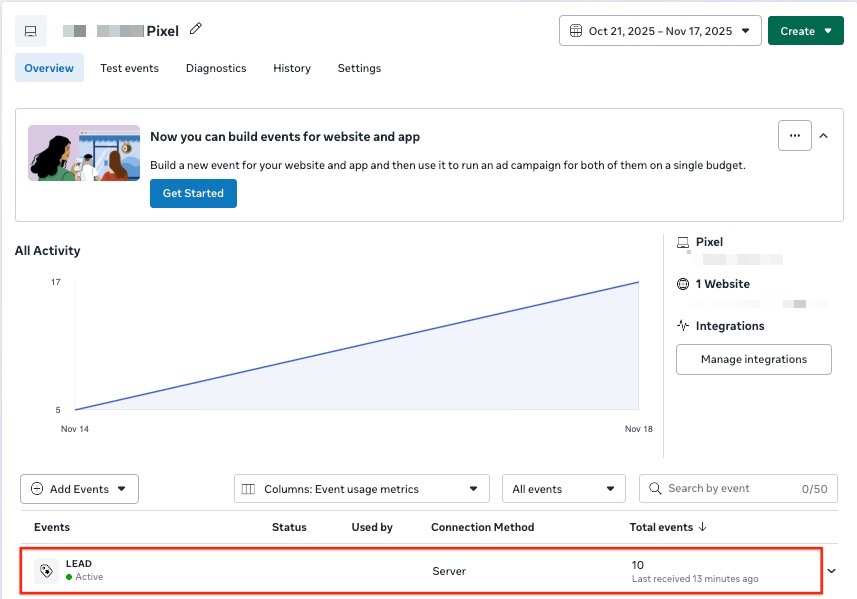
To see the events recorded on Facebook’s end, navigate to Events Manager → Data sets → your Pixel. Lead activity will appear in the Overview graph under the ‘LEAD’ event, labeled with the connection method ‘Server’.
Frequently Asked Questions
Do I also need the Pixel embedded on my page/site if I’m setting up an automation?
Yes, it’s still beneficial to have Pixel code embedded on your pages/sites.
If you’re only using Leadpages to send the LEAD event via their server-side API, then technically you do not need the pixel on your site to record that event. Automations will send data directly to Facebook’s servers.
However, having the pixel code on your pages provides browser-side tracking, which captures richer data (page URL, user agent, cookies, etc.). When you combine browser-side + server-side tracking, Facebook can better match your events and more accurately and give you more reliable reporting.
You can learn more about how to add your Pixel code to your pages in our guide here.
Where can I see the form submission data on Facebook’s end?
Facebook does not show the actual contents of your form submissions. They do not display personally identifiable information such as name, email, phone number, etc. In Events Manager, you will only see the event counts and any non-PII parameters, not the form fields themselves.
The actual form submission data can be found on Leadpages’ end.
On Facebook’s end, the data is used only for hashed matching, such as:
- Facebook hashes the data (turns it into a code) before sending it to their servers.
- They use this to match your lead with Facebook users who clicked or viewed your ads.
- This improves attribution and helps Facebook optimize your campaigns.
Need more help?
You can always get in touch with our support team—just click Support in your Leadpages navigation menu, or submit a ticket ↗