Working directly on the canvas gives you quick access to essential actions—like duplicating, deleting, or moving elements—so you can design faster without breaking your flow. The Layers panel adds another layer of control by letting you view every element in your design and easily repositioning them in the hierarchy. Together, these tools help you stay organized, fine-tune your layout, and keep your workflow smooth.
Working with layers
Working with multiple layers and elements on canvas can sometimes feel time-consuming and confusing. The layers panel helps you manage, organize, and adjust elements efficiently so that your design process goes smoothly.
View and manage layers
- Click the Layers tab in the right-hand panel.
- Click on a canvas in the Layers panel to expand it and see all elements placed within it.
- Click and drag elements within the Layers list to change their order (which determines whether they appear in front of or behind other elements).
- Use the icons next to each element to lock/unlock it or make it visible/invisible.
Adjust layer position on canvas
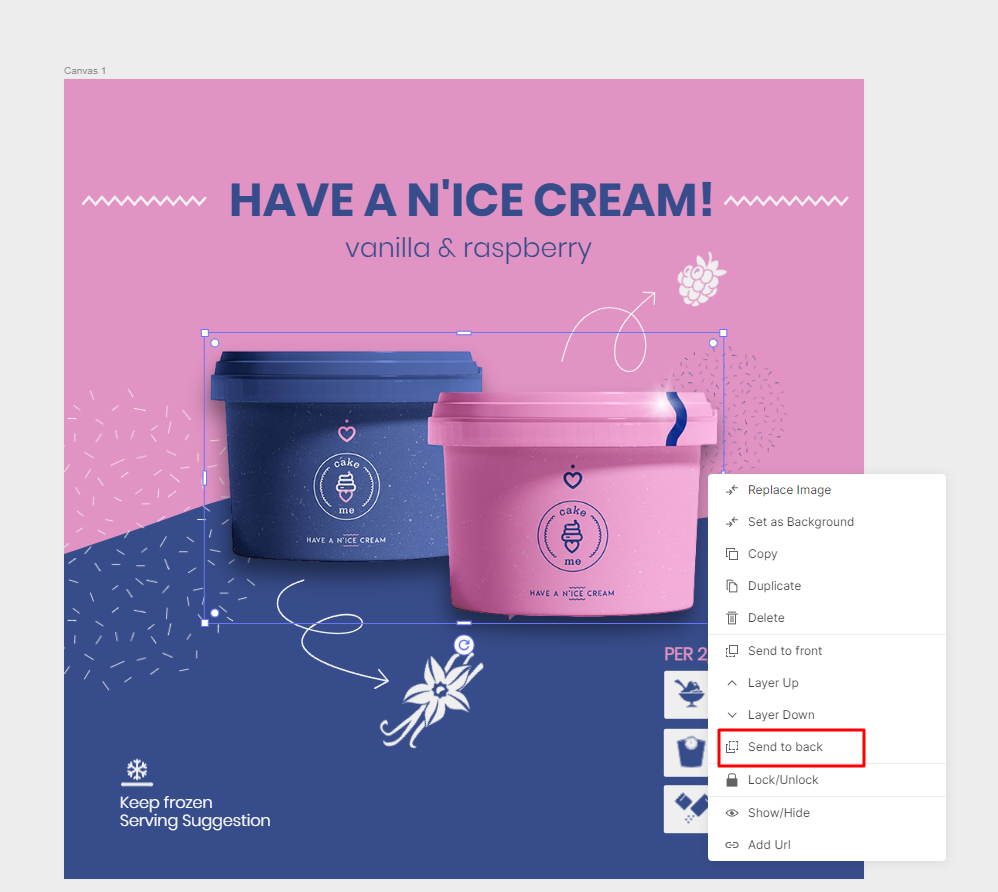
If you want to change the whether an element appears above or below others on the canvas:
- Right-click the element you want to adjust.
- Select a layering option: Send to Front, Layer Up, Layer Down, or Send to Back.
Manage elements on canvas
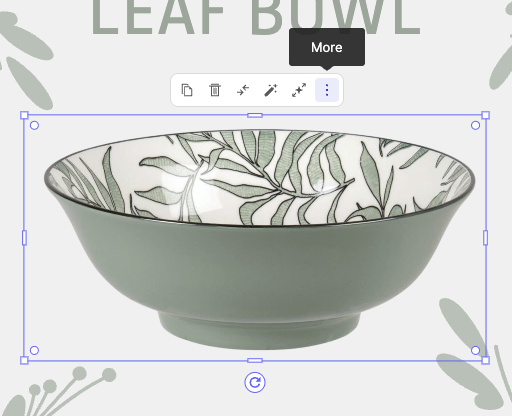
When you click an element on the canvas, a Quick Actions bar appears, allowing you to quickly duplicate, delete, or replace images with just a click. For more control, you can access additional settings through the ⋮ (More) icon to adjust the element’s layer position, or lock and group it to keep your design organized.
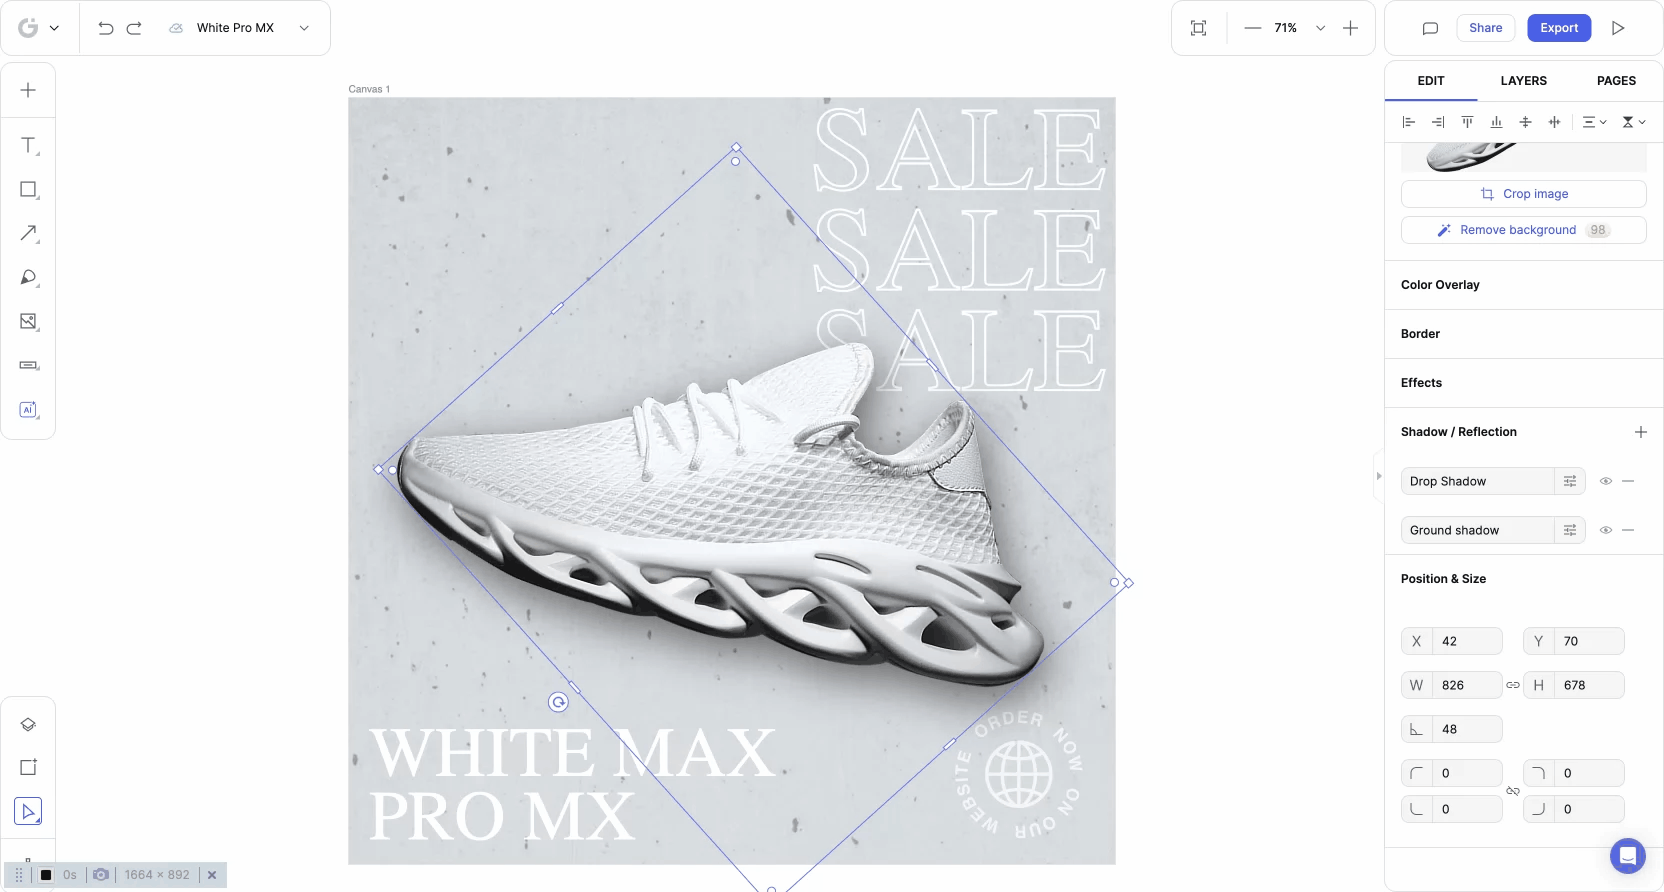
Scale an element
- Select the element you want to resize.
- Click and drag one of the corner handles to adjust its size.
• Alternatively, use the Position & Size settings in the Edit panel to enter precise dimensions.
Rotate an element
- Select the element on the canvas
- Click and drag the rotation handles to rotate the element
You can also fine-tune the rotation in the Edit panel on the right side of the editor.
Lock and unlock elements
Locking elements when working with multiple items can help you keep your design organized and prevent accidental changes.
- Right-click the element you want to lock in place, or click on the ⋮ (More) icon.
- Select Lock/Unlock.
• Alternatively, open the Layers Panel and click the lock icon next to the element.

Group elements
Grouping elements makes it easier to move, resize, and edit multiple elements at once.
- Hold down the Shift key on your keyboard when selecting multiple elements on the canvas.
- In the Edit panel on the right-hand side, click Group Object to consolidate the selected elements into a single group.
Duplicating an Element
- Right-click the element you want to duplicate, or click the ⋮ (More) icon.
- Select Duplicate.
The duplicated element will appear on your canvas, ready for you to move or edit independently from the original.
← Explore more Glorify articles
Need more help?
You can always get in touch with our support team—just click Support in your Leadpages navigation menu, or submit a ticket ↗