The fine print
- The information in this article is specific to the Classic landing page builder.
- This guide assumes you’ve already installed the WordPress plugin. If you haven’t, you can follow our guide here.
- Your WordPress setup might look different than the one used for this guide. For reference, we’re using WordPress 4.6.1 running the Twenty Sixteen theme, and version 2.1.4.4 of the Leadpages plugin.
- If you're publishing a split test via the plugin and you've previously published a page to the URL you'd like to use for your split test within the Leadpages WordPress plugin, make sure to change that page's URL or delete it from the plugin's published pages as shown below.
Publish a landing page
Choosing a page type
You can publish four different types of pages using our plugin. Each one has slightly different characteristics for various use cases, which are detailed below:
Normal
You can have unlimited normal pages active at a time, and this will be the type you use for most situations. Each normal page has its own customizable URL slug, so it’s easy to direct visitors to a normal page (whether via social media, ads, or an email campaign).
For even more flexibility, you can add multiple levels to your page’s URL slug, like so: https://www.yourwebsite.com/books/book-sale-page.
Homepage
You can have one active homepage at a time, which will override your site’s default homepage with your chosen landing page. Your homepage will be accessible at your root domain, or main URL, e.g. http://yourwebsite.com, http://www.yourwebsite.com, etc.
Welcome Gate
You can have one active Welcome Gate at a time, which first-time visitors will see when they land on your site (regardless of which page they’re attempting to visit).
Welcome Gate pages are great for converting new site visitors to leads right away. Visitors who have been to your site before will bypass the Welcome Gate and can access your site normally unless they've cleared their browser cache, or are visiting your site in an incognito/private window or a different browser.
Each Welcome Gate also has a customizable URL, so you can send visitors there even if they’ve already been to your site.
404 Page
You can have one active 404 page at a time. When visitors navigate to a broken link or page that doesn’t exist, they get a 404 page. Using a custom one can turn these instances into opportunities to give away a lead magnet or otherwise convert disgruntled visitors.
There isn’t a custom URL available for 404 pages, but our plugin will automatically provide a broken URL so you can test out your page.
Publishing a new landing page
Use the following steps to publish landing pages to your site:
WordPress-Leadpages plugin v2.3.13
- Click Leadpages › Add New from your WordPress Dashboard.
-
Choose the type of page you’d like to publish, then select your landing page.
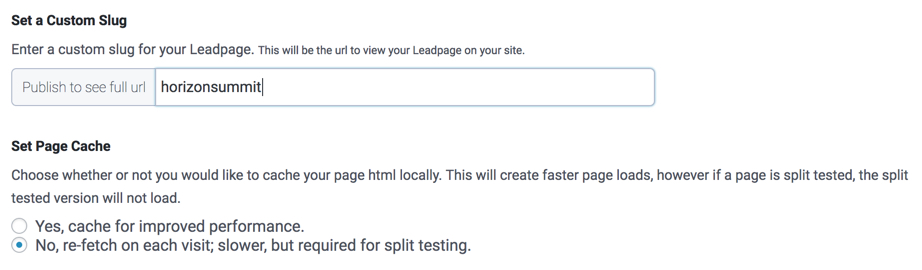
TIP: If you're not seeing the landing page you're looking to publish in the dropdown menu, click the blue ⟳. - If applicable, choose a URL slug as well as whether or not you'd like to cache your page. Caching can serve to increase page loading speed, but may interfere with pushing updates to your WordPress-published landing page.
- Click Publish.
Updating pages
You don’t need to take extra steps to update your landing pages on WordPress when you make changes. As long as you save and update your page from within Leadpages, you’ll see them update on your site.
You can set different statuses on your landing pages via the main plugin page in your WordPress Dashboard:
- Click Leadpages in your Dashboard’s sidebar.
- Toggle the checkbox next to any page you’d like to update.
- Choose “Edit” from the Bulk Actions menu, then hit Apply.
- Change the status of your selected page(s) as desired, then click Update.
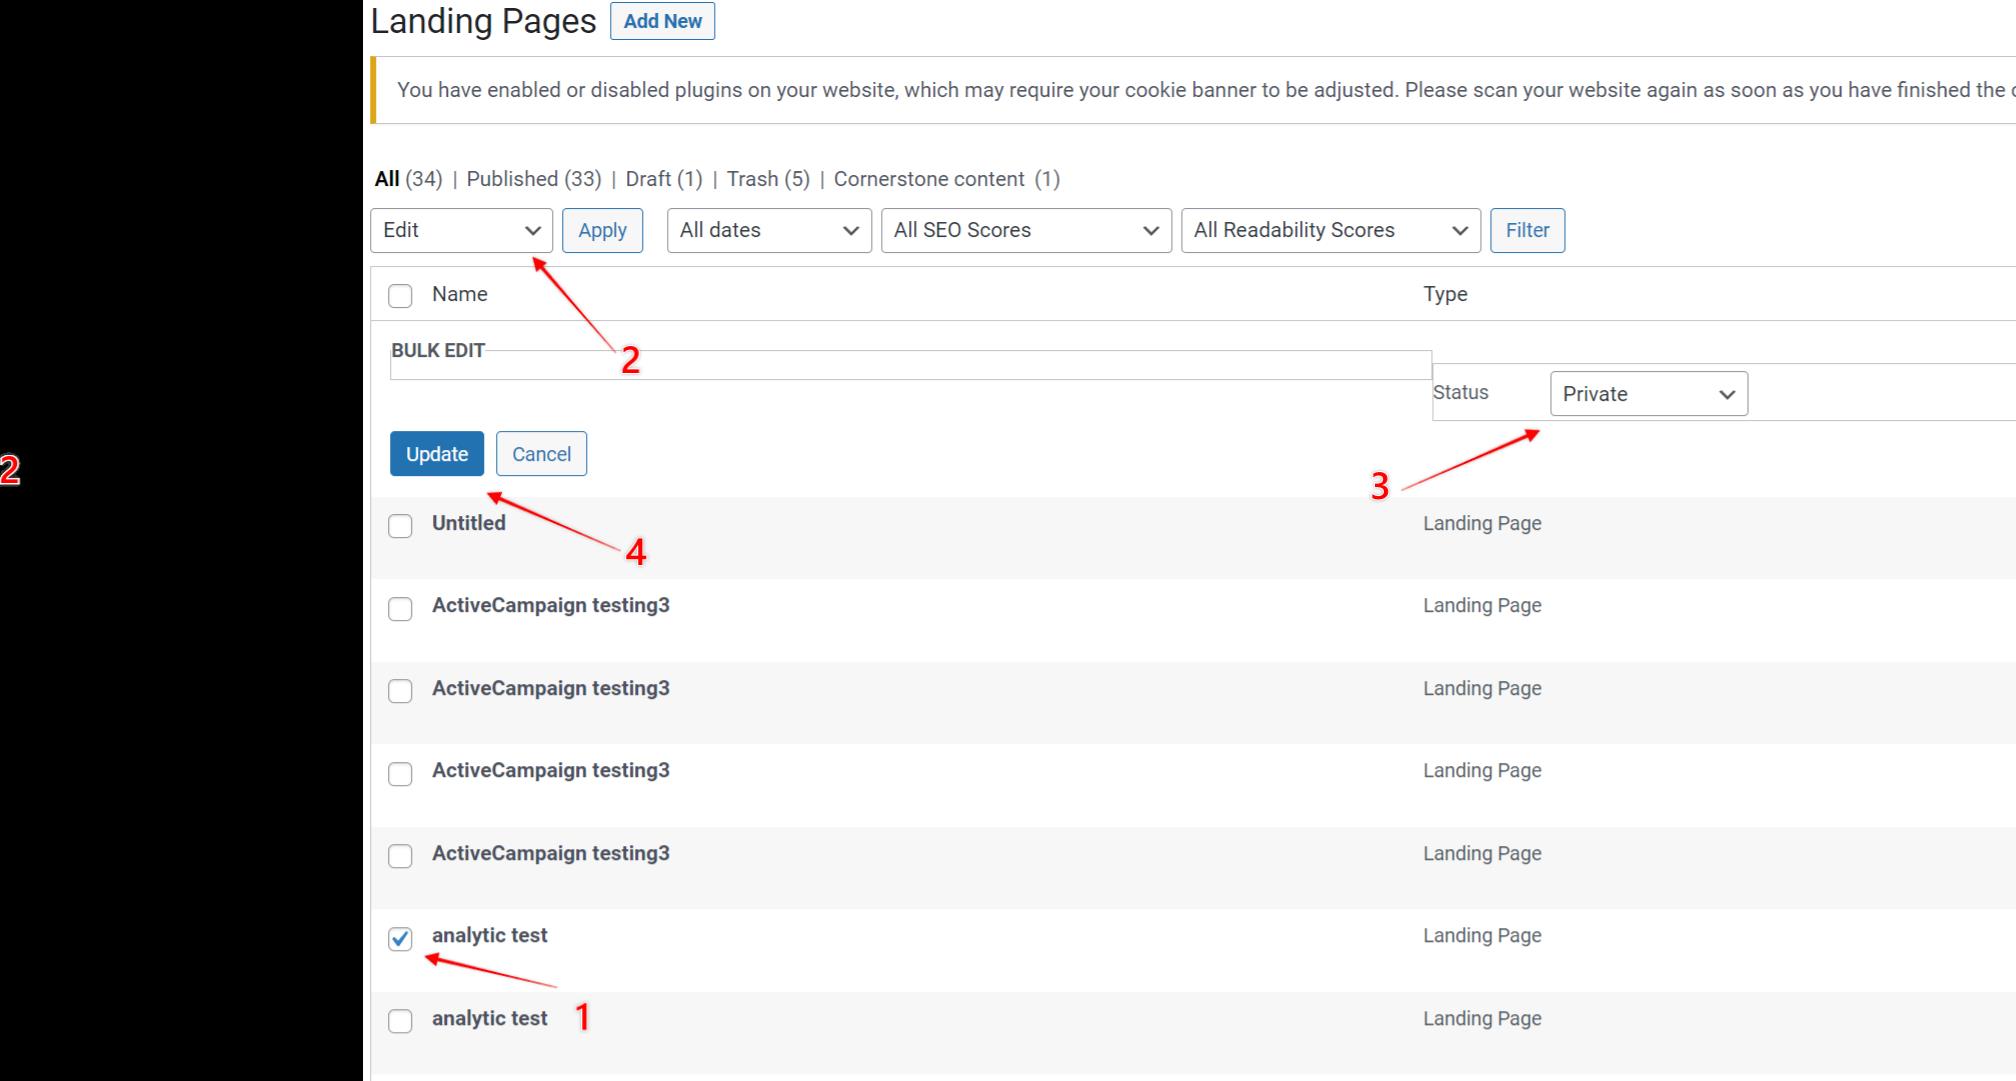
One great use case for this is to hide pages that you’ve published (keeping in mind draft pages won’t be accessible to visitors).
Deleting pages
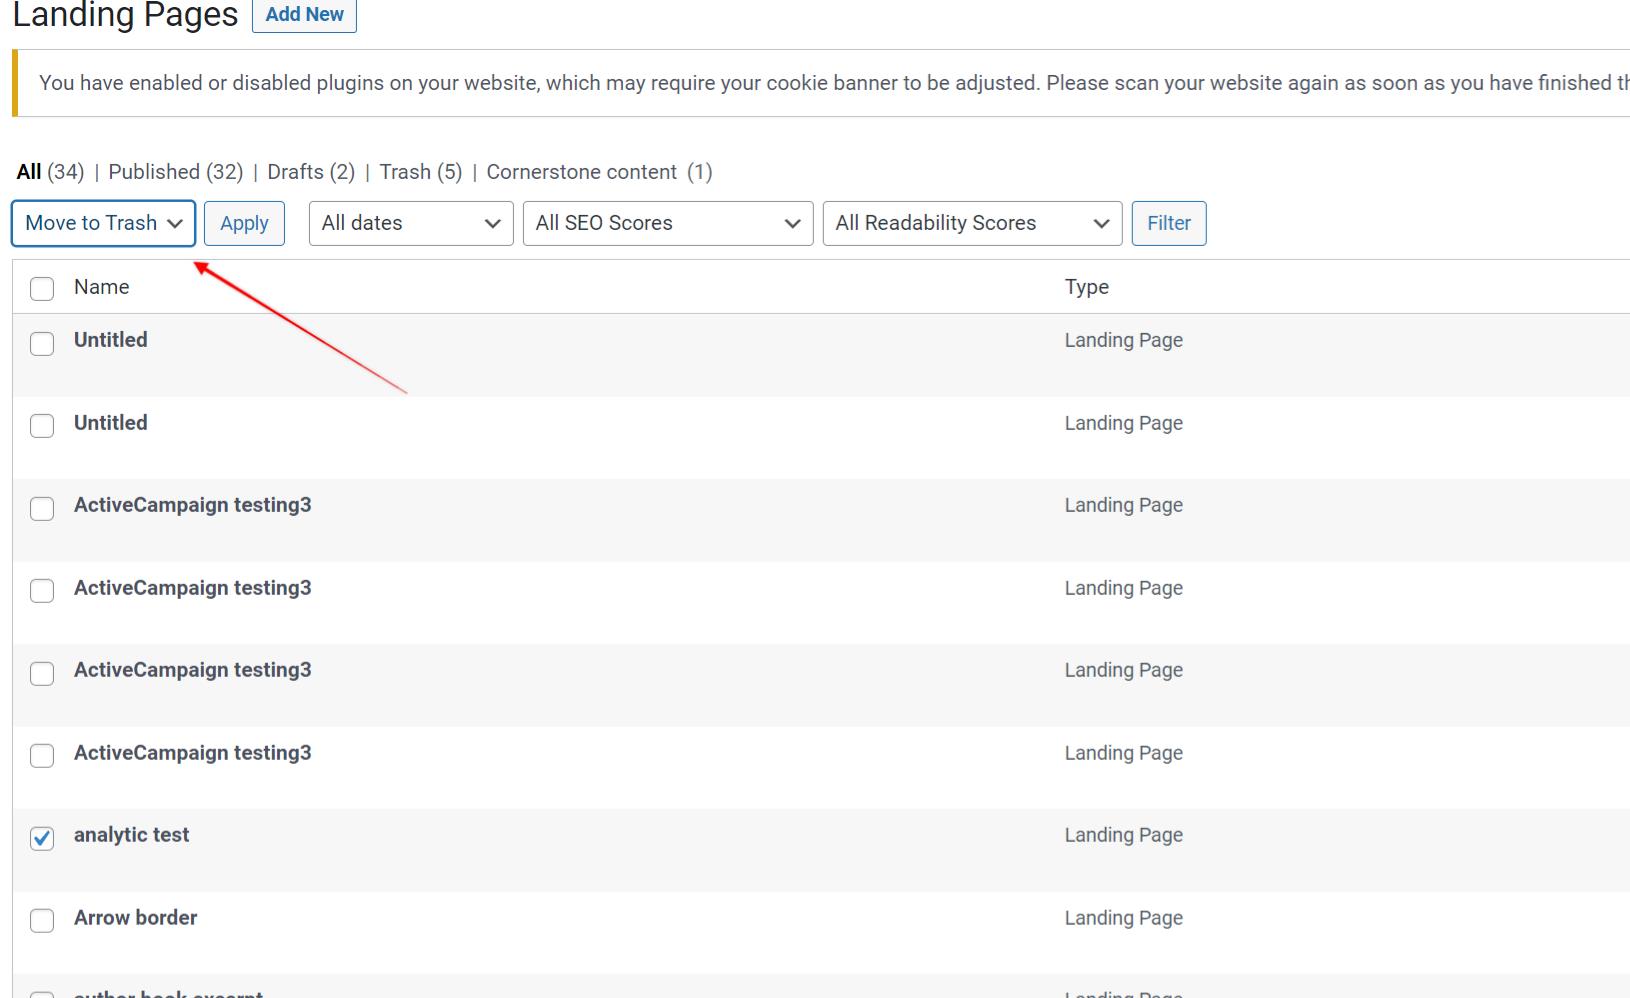
To delete a page, you’ll first need to move it to the trash within WordPress.
Here’s how to delete a page from your site:
WordPress-Leadpages plugin v2.3.13
- Navigate to the Leadpages plugin from your WordPress dashboard.
- Select the checkbox next to the page(s) you’d like to delete.
- Select Move to Trash from the "Bulk Actions" dropdown and click Apply.
- To delete pages permanently, navigate to the Trash tab and click Empty Trash… or select your page and choose Delete Permanently from the Bulk Actions menu.
Publish an alert bar
- Alert bars published via the Leadpages WordPress plugin will be published on every page of your WordPress site.
- Some WordPress themes may conflict with a Leadpages alert bar.
Publishing a new alert bar
With the plugin installed, follow these steps to publish your alert bar:
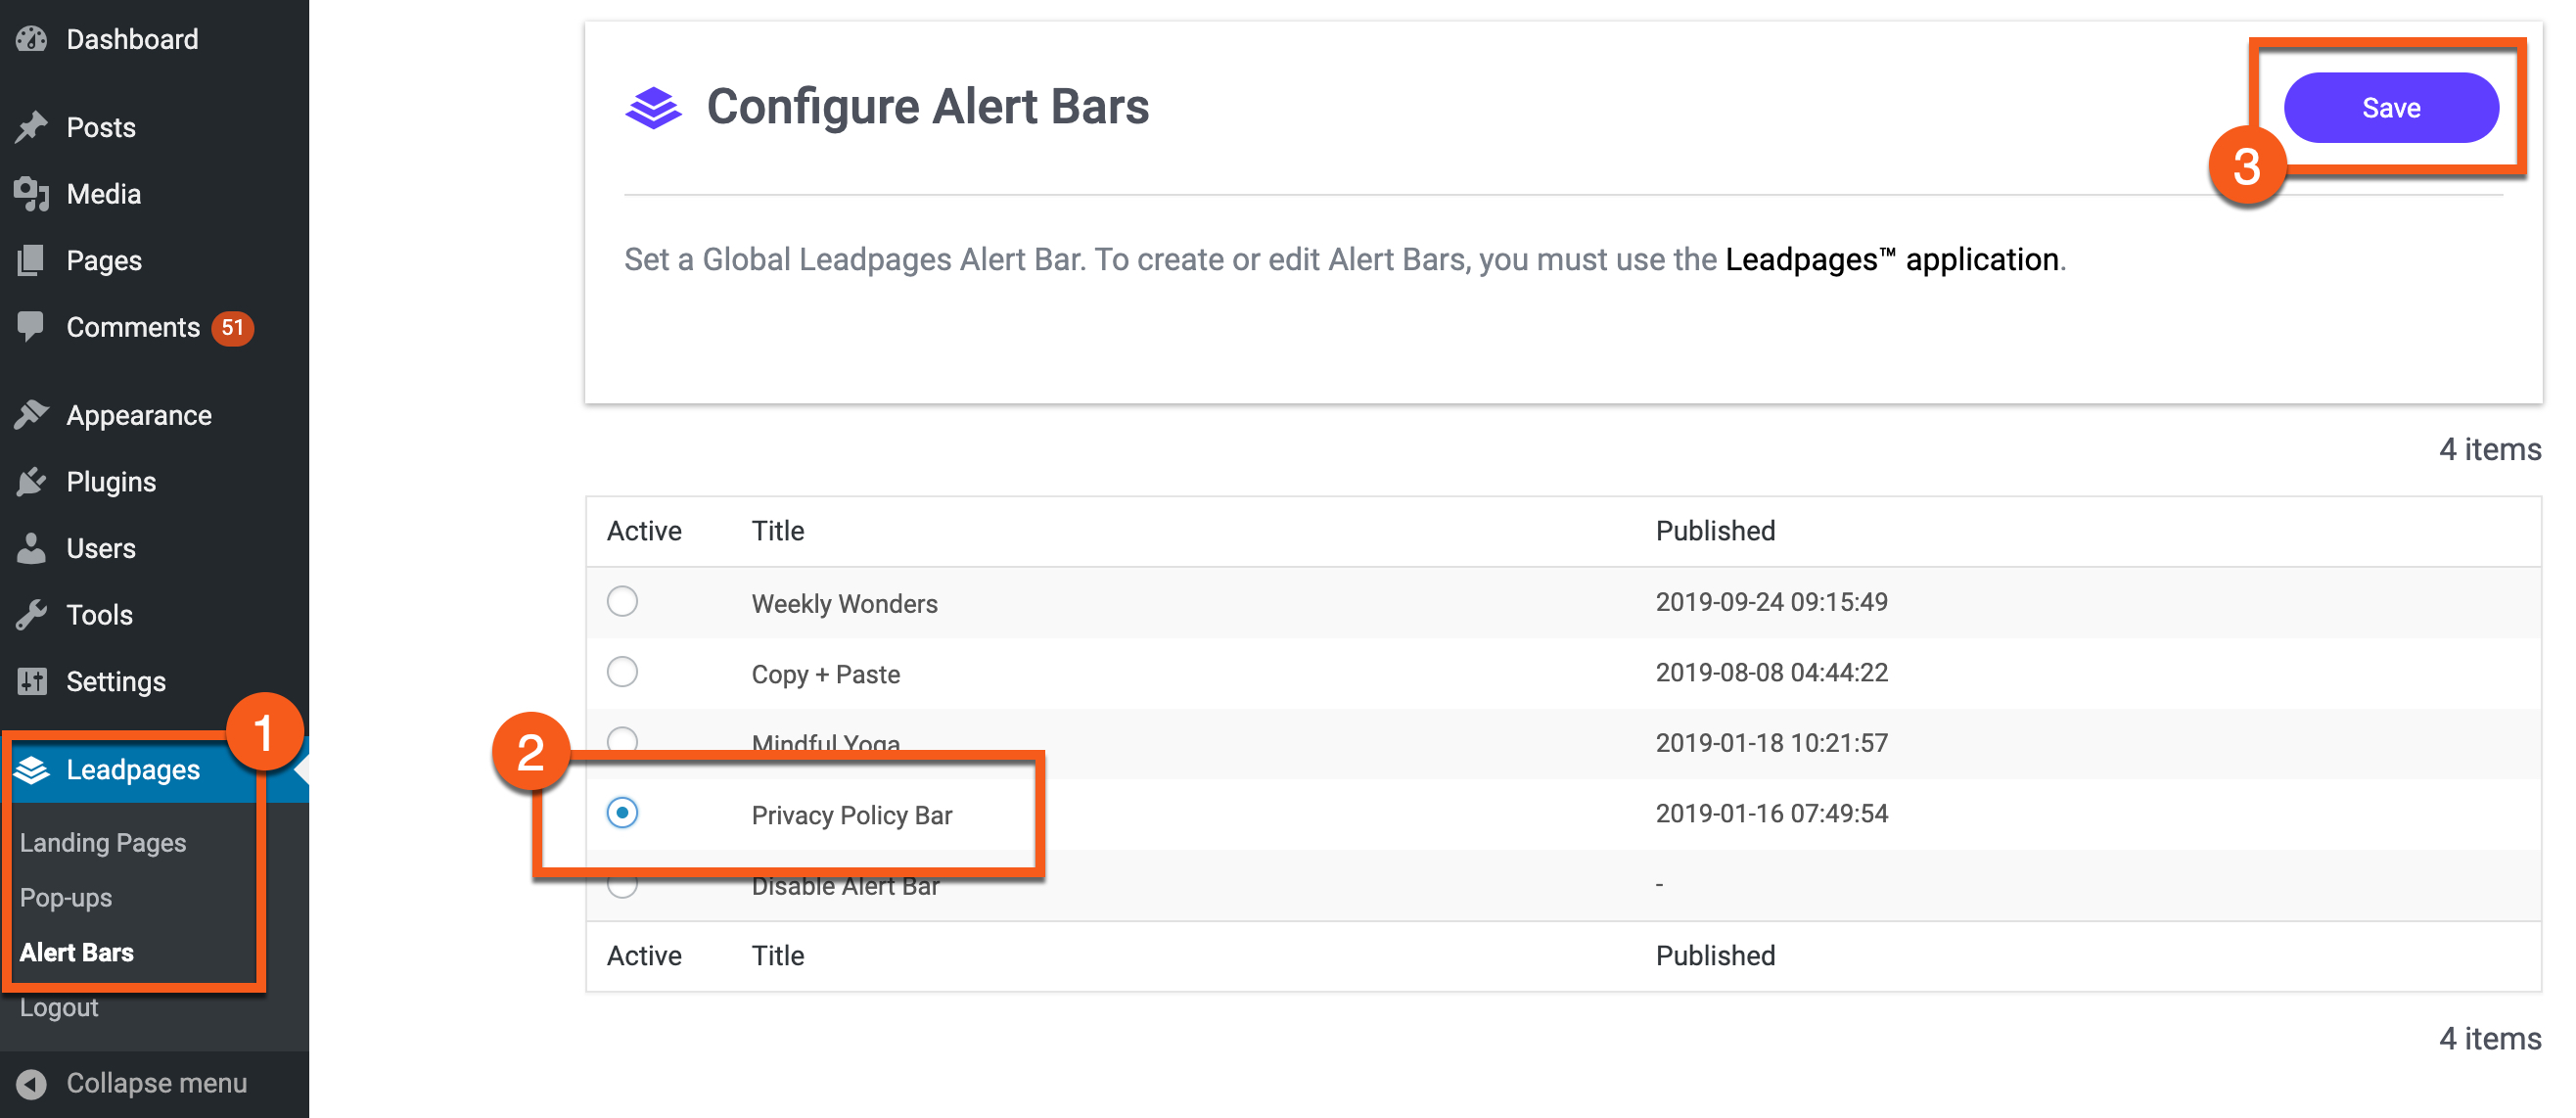
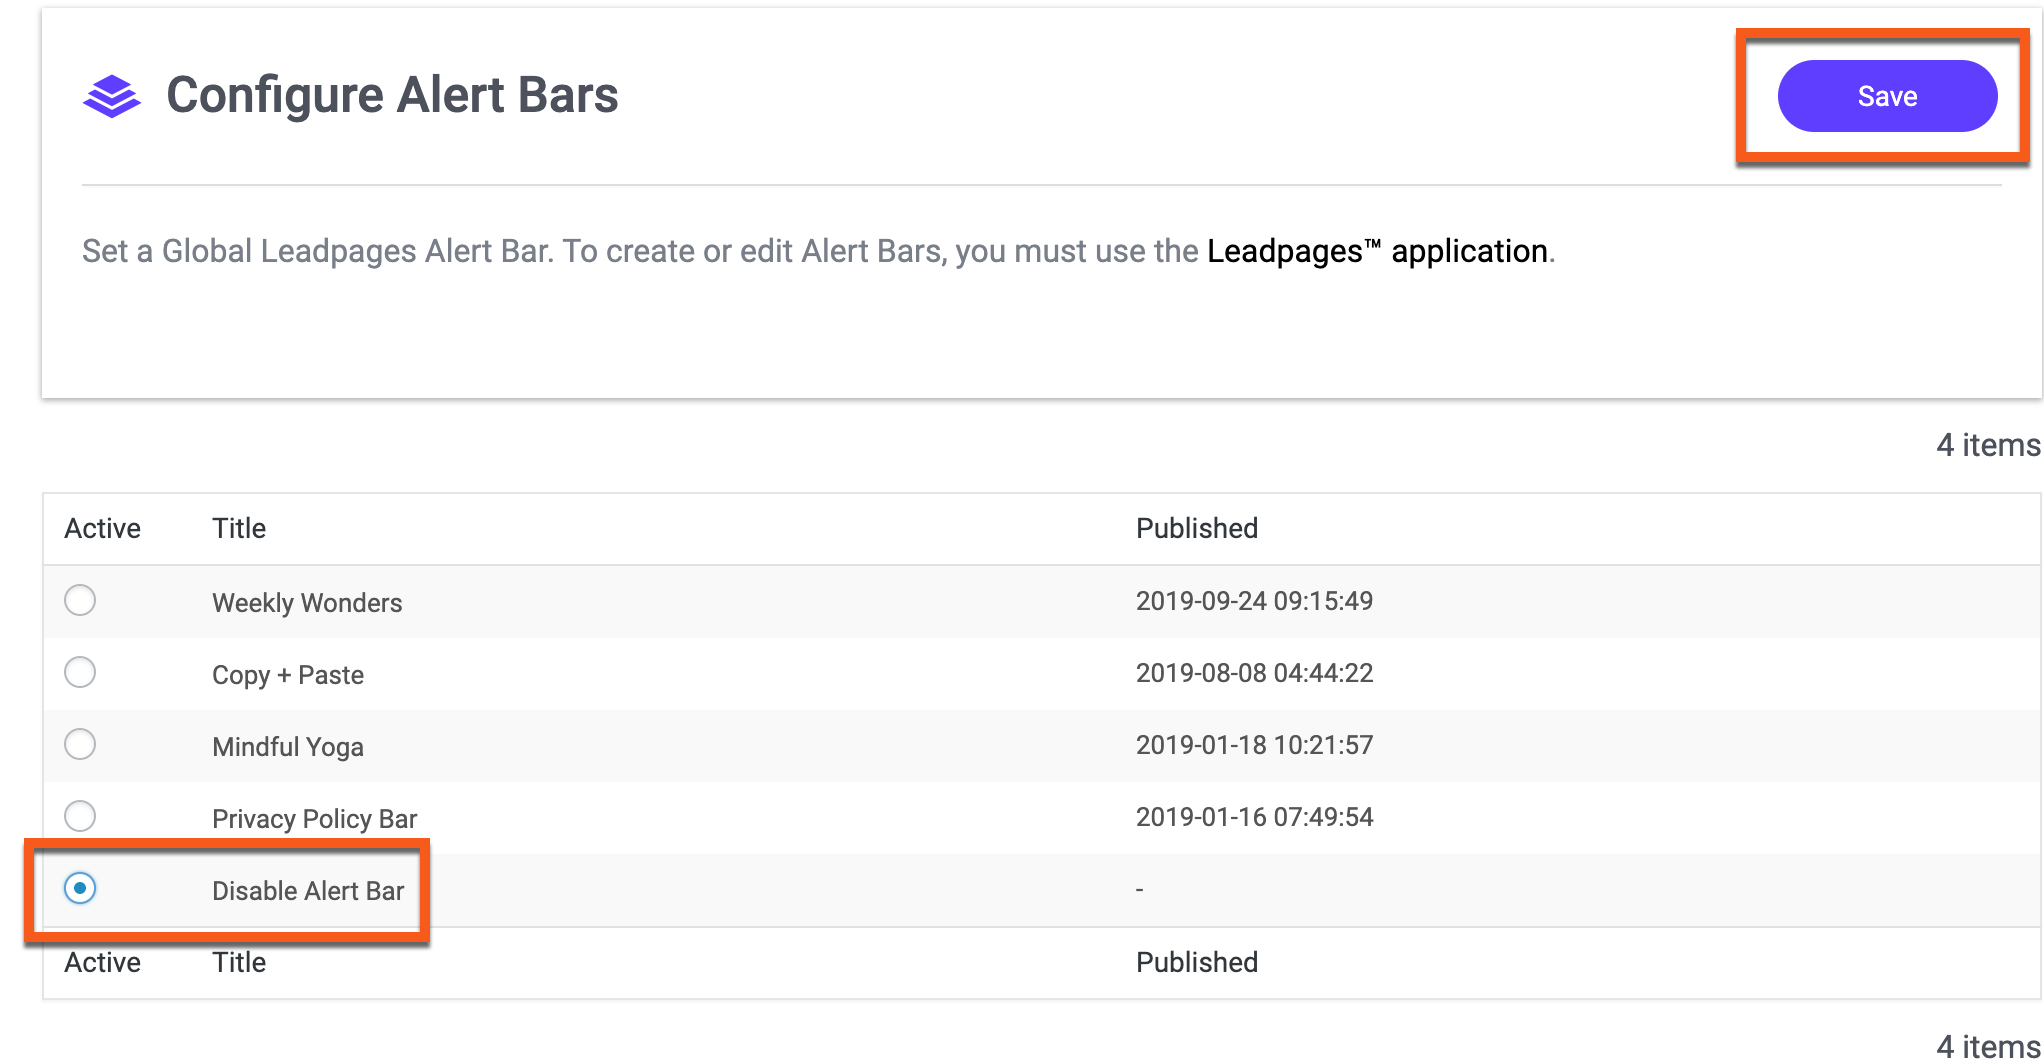
- From the left-hand side of your WordPress dashboard, select Leadpages, then Alert Bars.
- Click the radio button next to the alert bar you'd like to publish to your WordPress site.
-
Save your changes.
Updating alert bars
Any edits or updates you make to your alert bar within the Leadpages application will automatically be applied to that same bar when published to WordPress via the plugin.
To publish a different alert bar, simply navigate to Leadpages >> Alert Bars in WordPress. Select the new alert bar in the list and click Save.
Remove an alert bar
To remove an alert bar published via the Leadpages WordPress plugin, select the "Disable Alert Bar" option in the alert bars listing within the plugin and save your changes.
Need more help?
You can always get in touch with our support team—just click Support in your Leadpages navigation menu, or submit a ticket ↗