Split testing (A/B testing) will help you fine-tune your campaign by distilling exactly what it is that drives your audience to take action.
Running a split test can be a great way to optimize your pages for conversion. If you’re new to split tests, you may want to read our blog post here: From Curiosity to High-Conversion: A Guide to A/B Testing Your Landing Page.
Below, learn how to create a new split test with our tool.
The fine print
- Once a split test has been created, the pages used in the split test cannot be duplicated or used on their own until the split test has been ended and deleted. If you'd like to use one of the pages outside of the split test, make sure to duplicate the page before beginning your split test.
- Once a split test is running, it is not possible to redistribute traffic.
- To publish a split test as a homepage on your Leadpages Domain or connected domain, you must first publish your split test with a page slug (i.e. yourdomain.com/[pageslug]). You can then set that split-tested landing page as your homepage under the Domains section of your account settings.
- If you're publishing a split test via the Leadpages WordPress plugin and you've previously published a page to the URL you'd like to use for your split test within the plugin, make sure to change that page's URL or delete it from your plugin's published pages. More info here →
Plan your split test
We recommend beginning each split test you run by deciding what you want to learn. You might compare…
- different page layouts (or templates)
- headline copy
- your button color
… among other variables to optimize your pages.
Prepare your pages
When you know what you want to test, it’s time to set up your pages. If you already have at least two published pages you want to compare, you can jump ahead to steps for creating your test.
Otherwise, here’s what we recommend:
- Choose a page (or create a new one) that will act as your control—that is, the page that will serve as the baseline for your test’s analytics—and make sure it’s published.
- If you plan on comparing different templates, you’ll need to create and publish your variation page before setting up your test.
- If you plan on comparing smaller changes between pages using the same template, you’ll be able to create your variation(s) as part of the test setup process.
- To keep track of your test’s pages, you may want to name them so you can identify each variation (and perhaps add a “split test” label).
Create a new split test
Once you’ve created and published your test’s control (and variations), it’s time to make the actual test. Here’s how:
- Navigate to Landing Pages in your navigation menu, then click the Create New Split Test button at the upper-right corner of the menu.
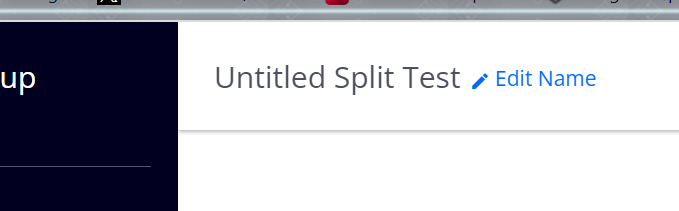
- Name your test by hovering over its placeholder title in the top bar (as shown below).
Choose a control and variations
In Step 1, browse your list of pages and click Use This Page to set your test’s control page—against which any variations will be compared.
On the variations page, click Add a Variation, then choose whether you’d like to copy your control (to test small changes), or use a different page entirely. Remember, in order to use a page in a split test, the page must be published.
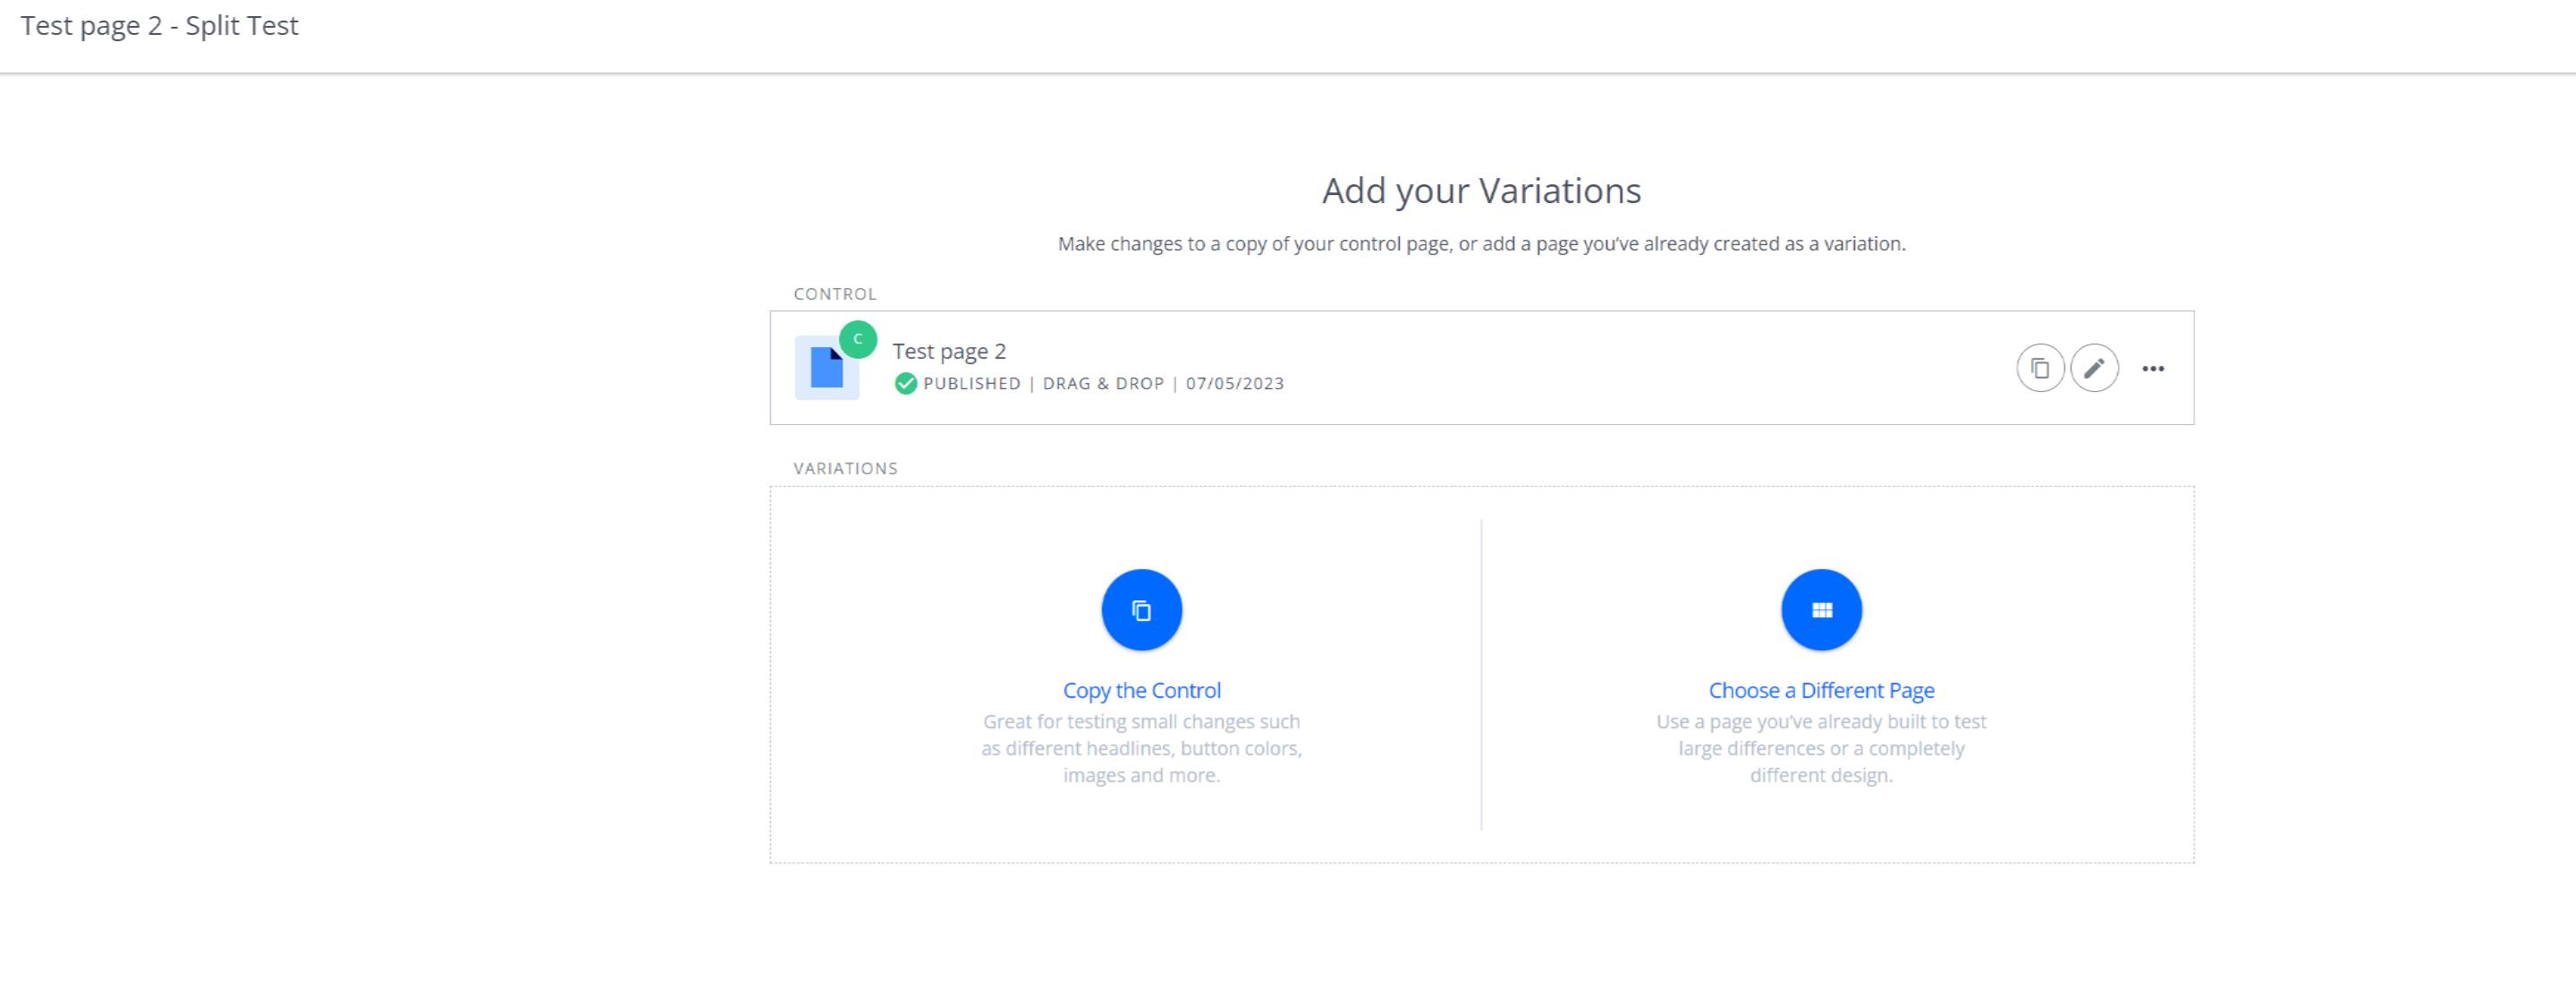
If you copy your control, you’ll need to edit and publish the new variation to use it in your test. Click the pencil icon next to the variation title to edit it in a new tab.
Distribute traffic
Click the Next ➔ button in the left-hand sidebar once you’ve chosen your variations to decide how traffic should be distributed to them.
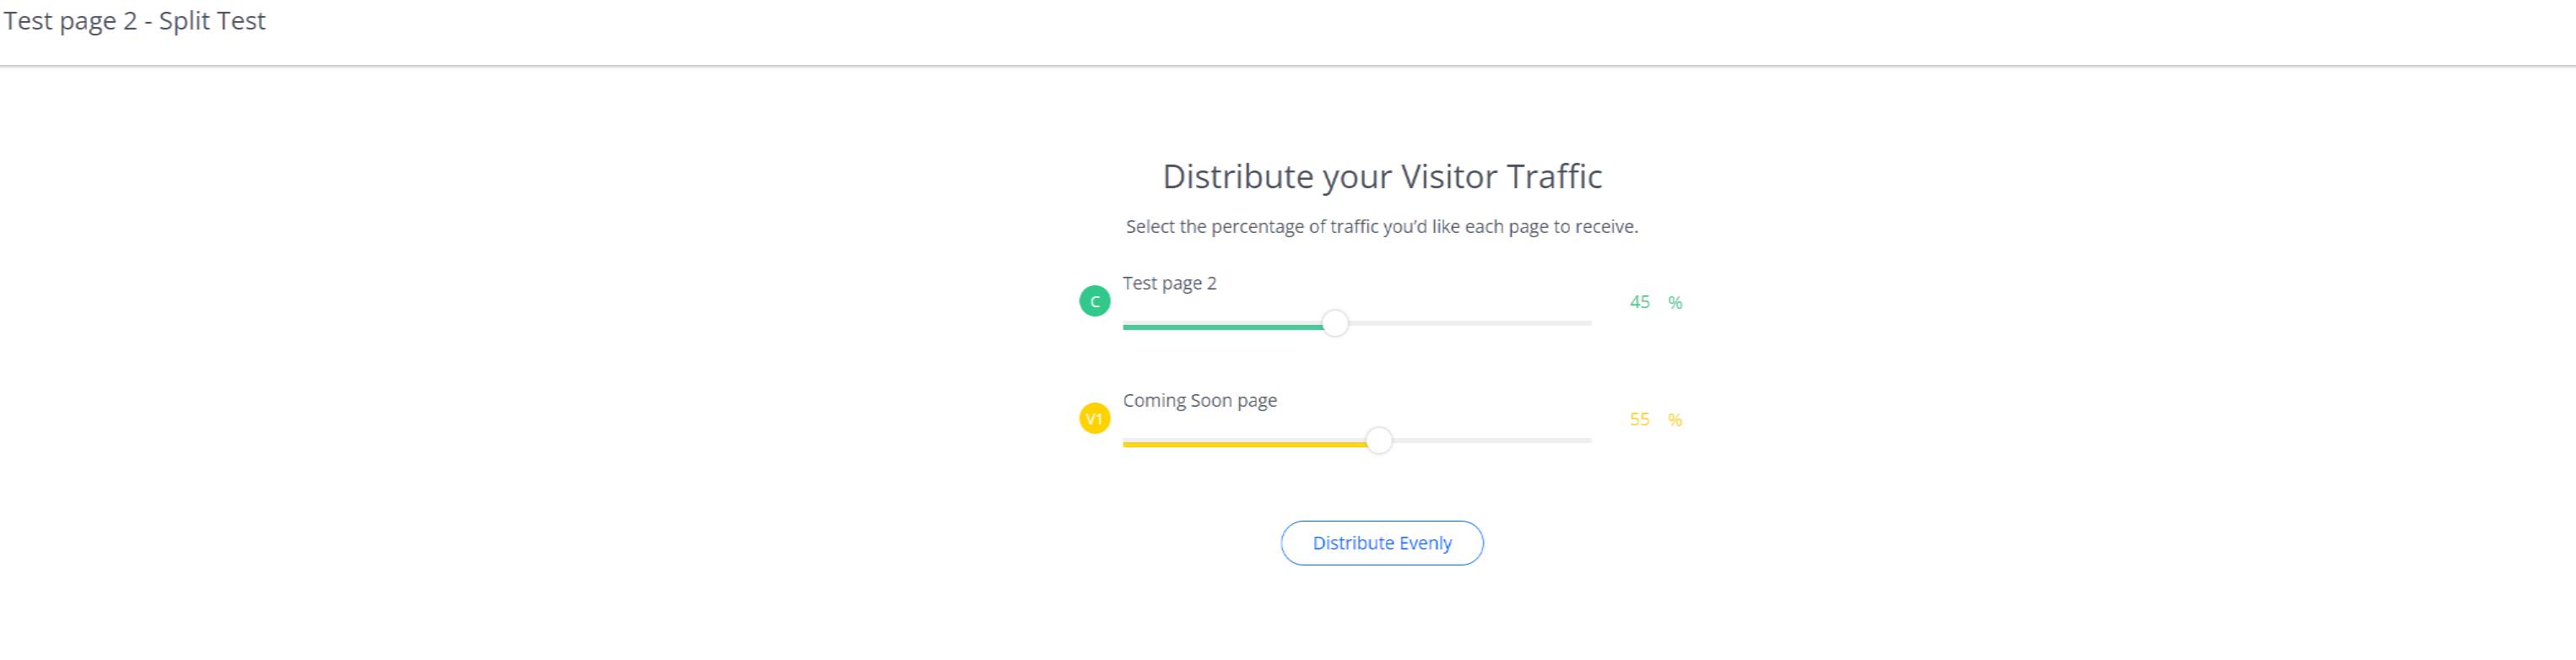
When people visit your split test’s URL, we’ll automatically direct them to a variation based on the traffic percentages you choose here.
Pro tip: If your control page is already solid and working well for your needs, you might consider sending more traffic to it than your variation(s). That way, you can run a test without a high risk to your conversion rate.
Keep in mind, you may not see your split test’s individual page views match up with your traffic distribution right away. It’s helpful to think of these settings as a weighted coin or die—you’re choosing which page(s) visitors are most likely to land on.
Start your split test
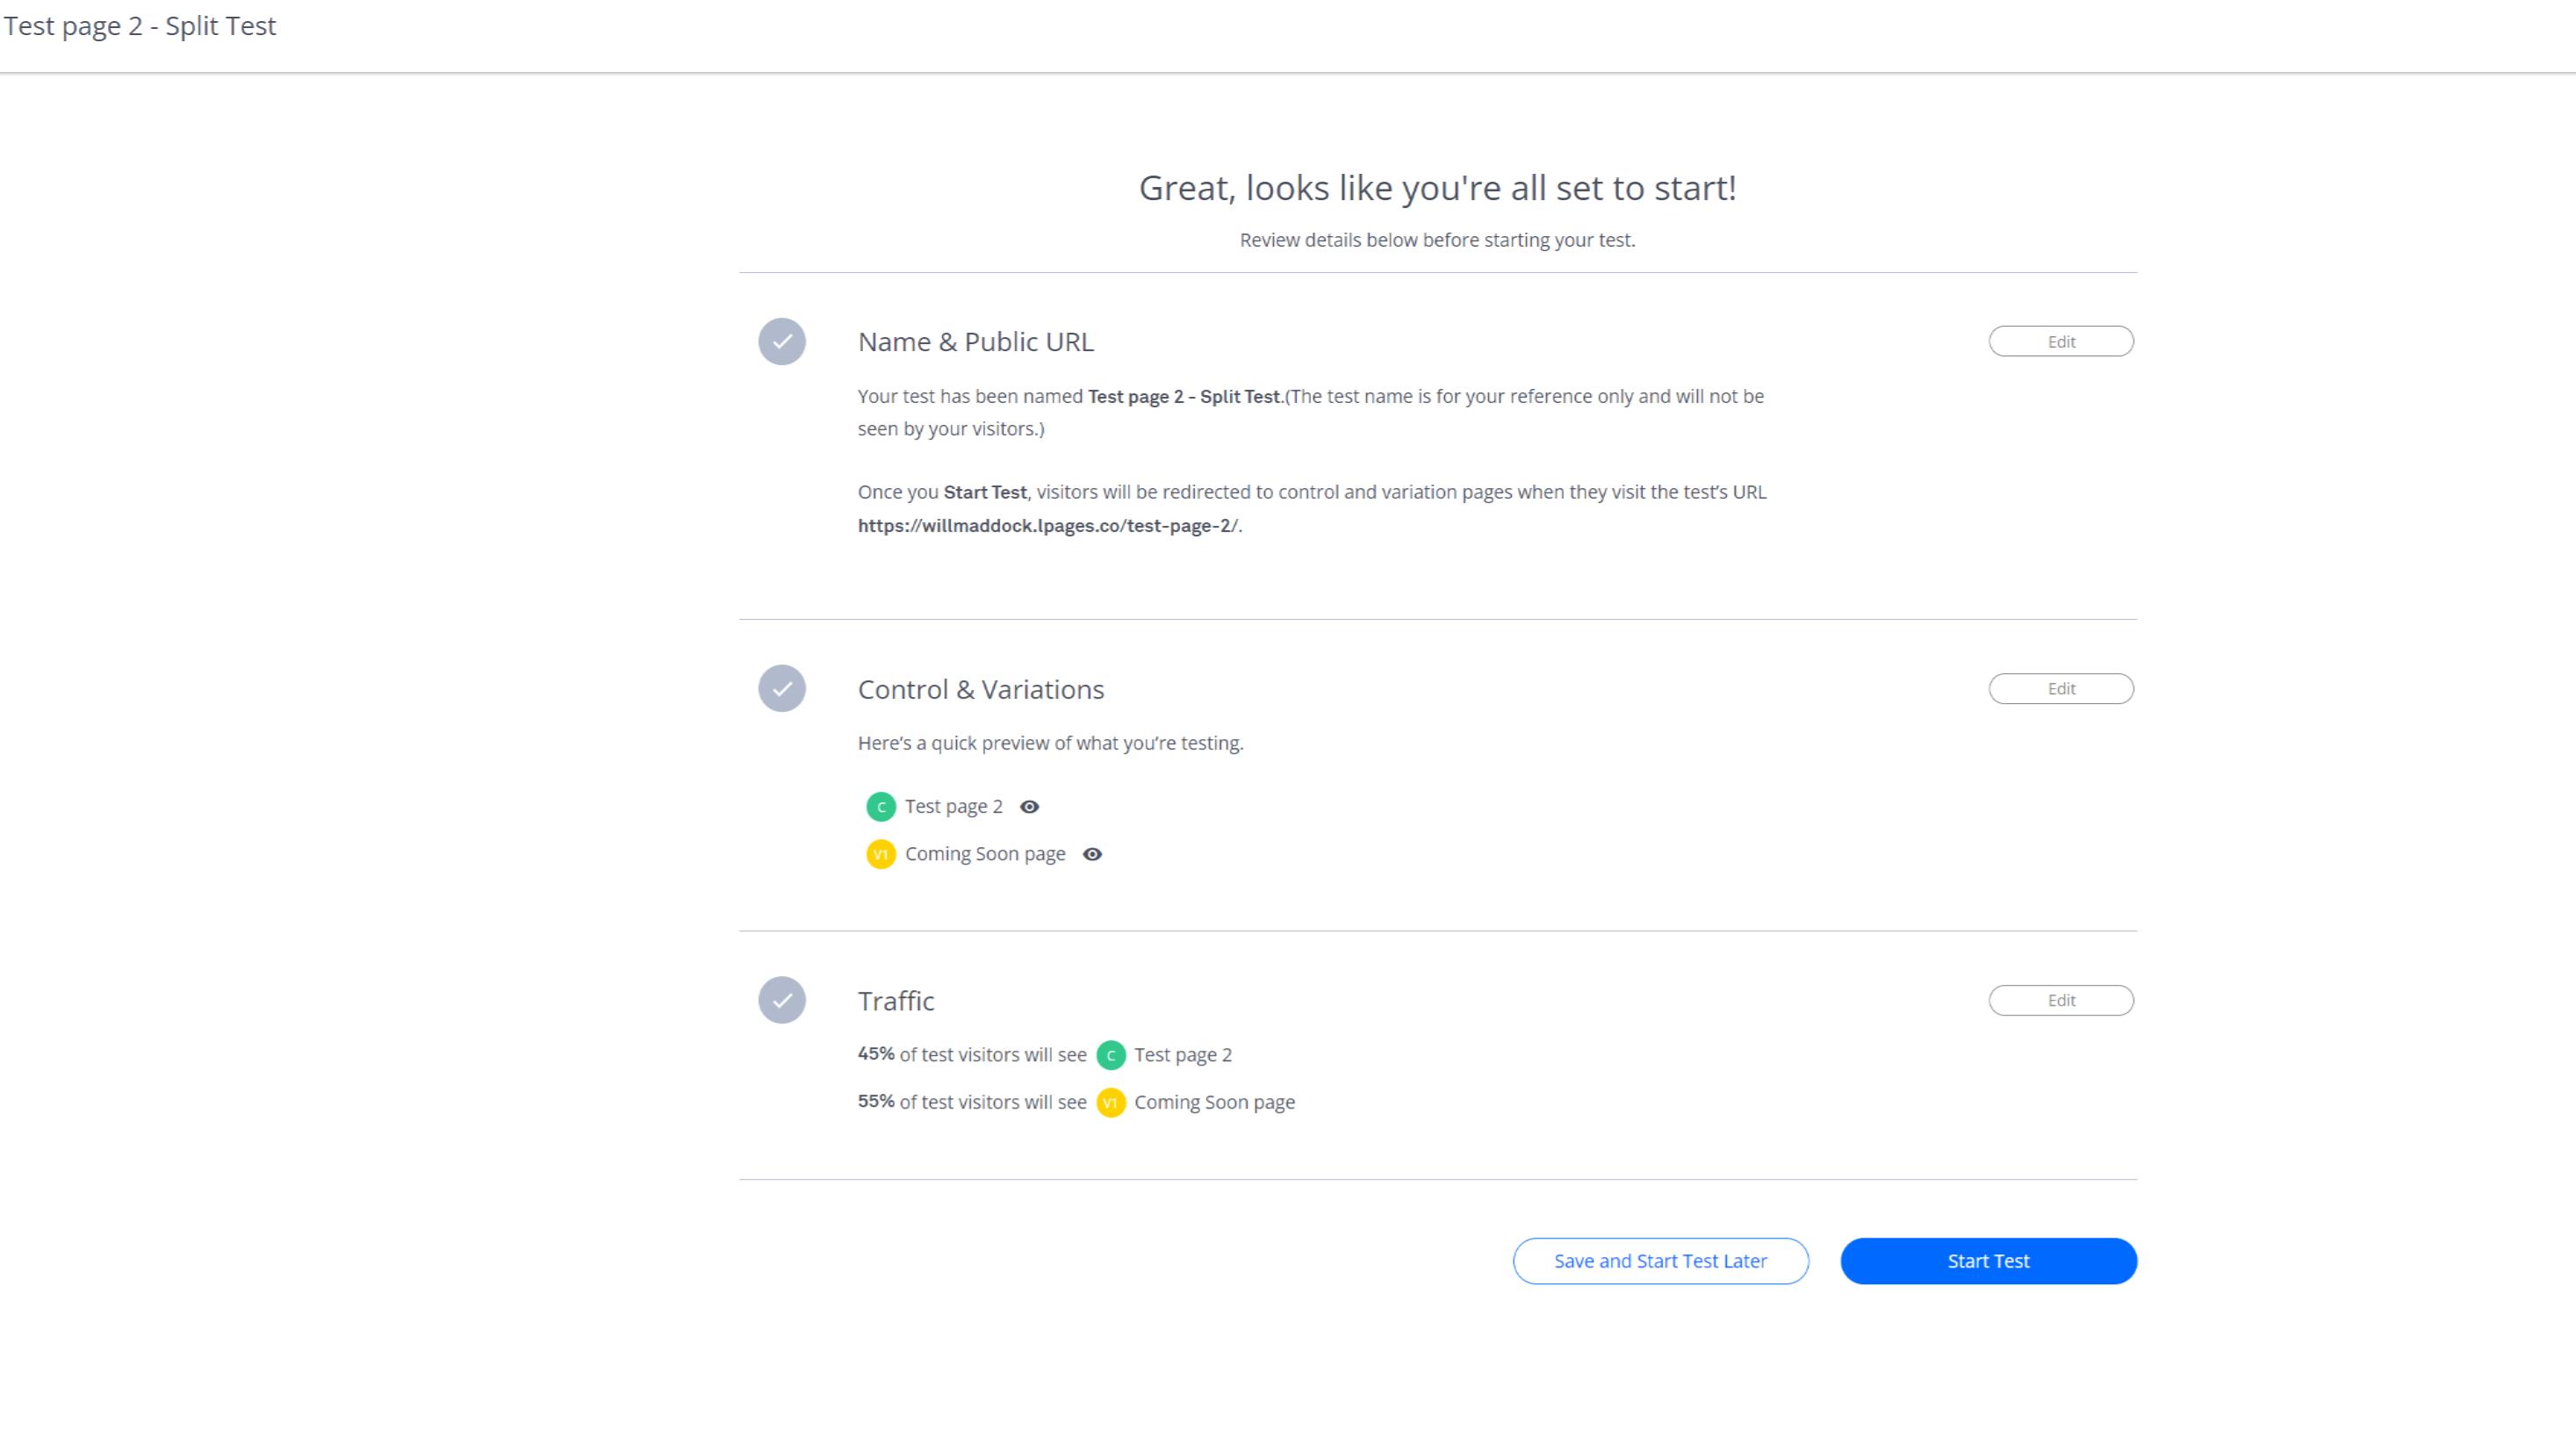
Click Next ➔ to move to the fourth step, where you can finalize your split test. Review your test to make sure everything looks good to go, then click Start Test (or save it for later).
To learn about running your test, check out: Run a Split Test
Need more help?
You can always get in touch with our support team—just click Support in your Leadpages navigation menu, or submit a ticket ↗