By default, visitors who submit a form on your page will get directed to a generic thank you page. Follow the steps below to customize what happens when visitors submit forms on your pages.
Choose a custom thank you page template
We've got a special section with great thank you page templates, specifically designed to make this part of your setup as efficient and customized as possible. You can filter the templates section by "Thank You" with the right-hand drop-down.
Here’s how to choose a template from the template gallery:- Navigate to Landing Pages in your navigation menu and click the Create New Landing Page button.
- Select "Thank You & Confirmation" from the Page Type drop-down on the left-hand side, or simply browse through our collection.

- Hover over any template’s thumbnail, click Start Building to jump right in or Preview to take a closer look.
- Once you have chosen a template, name your page, then click Continue.
Connect thank you to a form
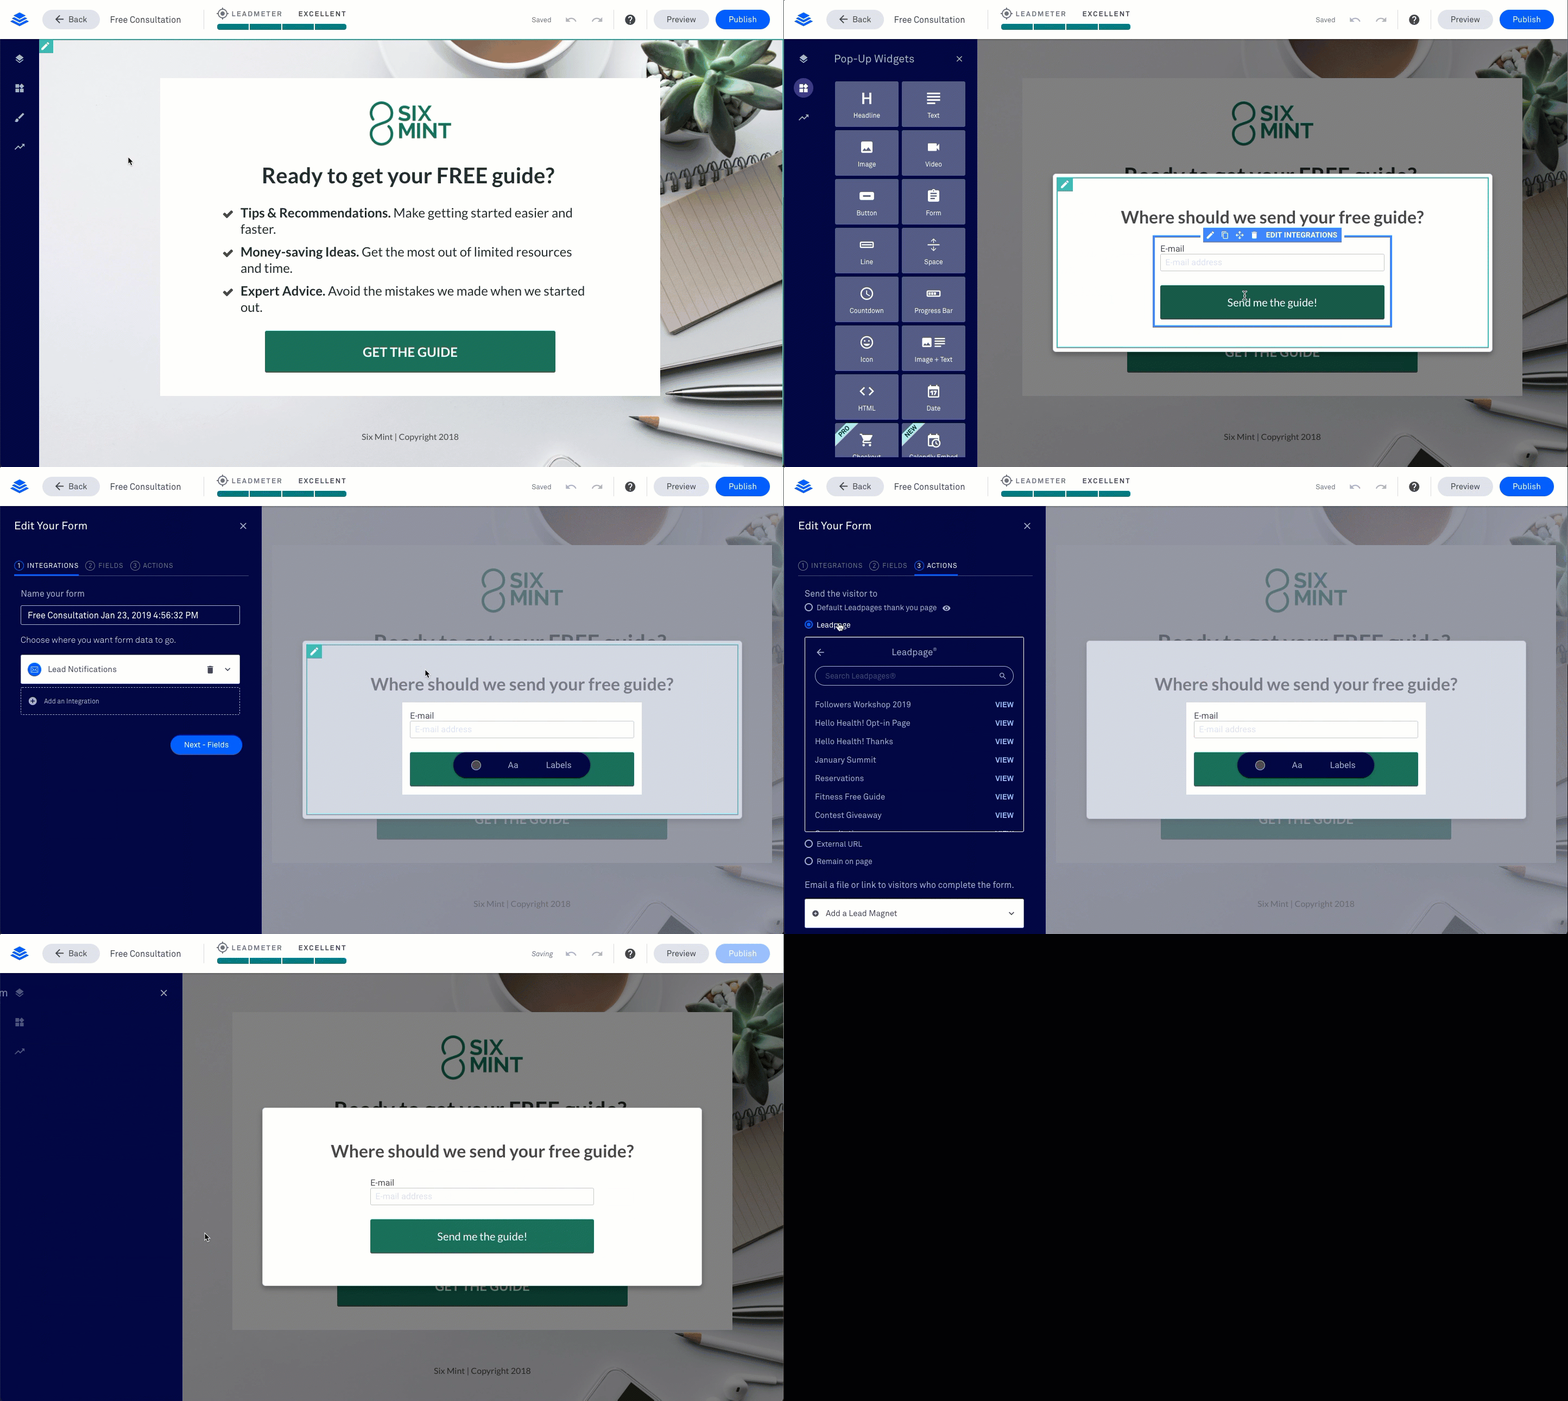
Once you've customized and published your thank you page, follow these steps to send subscribers to that page after they opt in on one of your forms.
- Navigate to the form on your page to edit its settings. (Keep in mind, you might have a form in a pop-up.)
- Switch to the tab labeled ③ ACTIONS.
- Under the “Send the visitor to” heading, select your preferred option. You can send visitors to another landing page, an external URL, or choose to have them stay on the same page.
- When you’re done, click Save & Close.

Need more help?
You can always get in touch with our support team—just click Support in your Leadpages navigation menu, or submit a ticket ↗
