We don’t have an official integration with PayPal, but there are a few ways you can use PayPal with your pages.
Create a PayPal button
To collect payments, you’ll need a “Buy Now” button from PayPal
You can create buttons by going to "sellers tools" by clicking the gear in the upper right next to log out.
Direct link to Sellers Tool
Once you go to PayPal Buttons you'll have a number of button styles to choose from that will be different depending on the type of PayPal account you have.
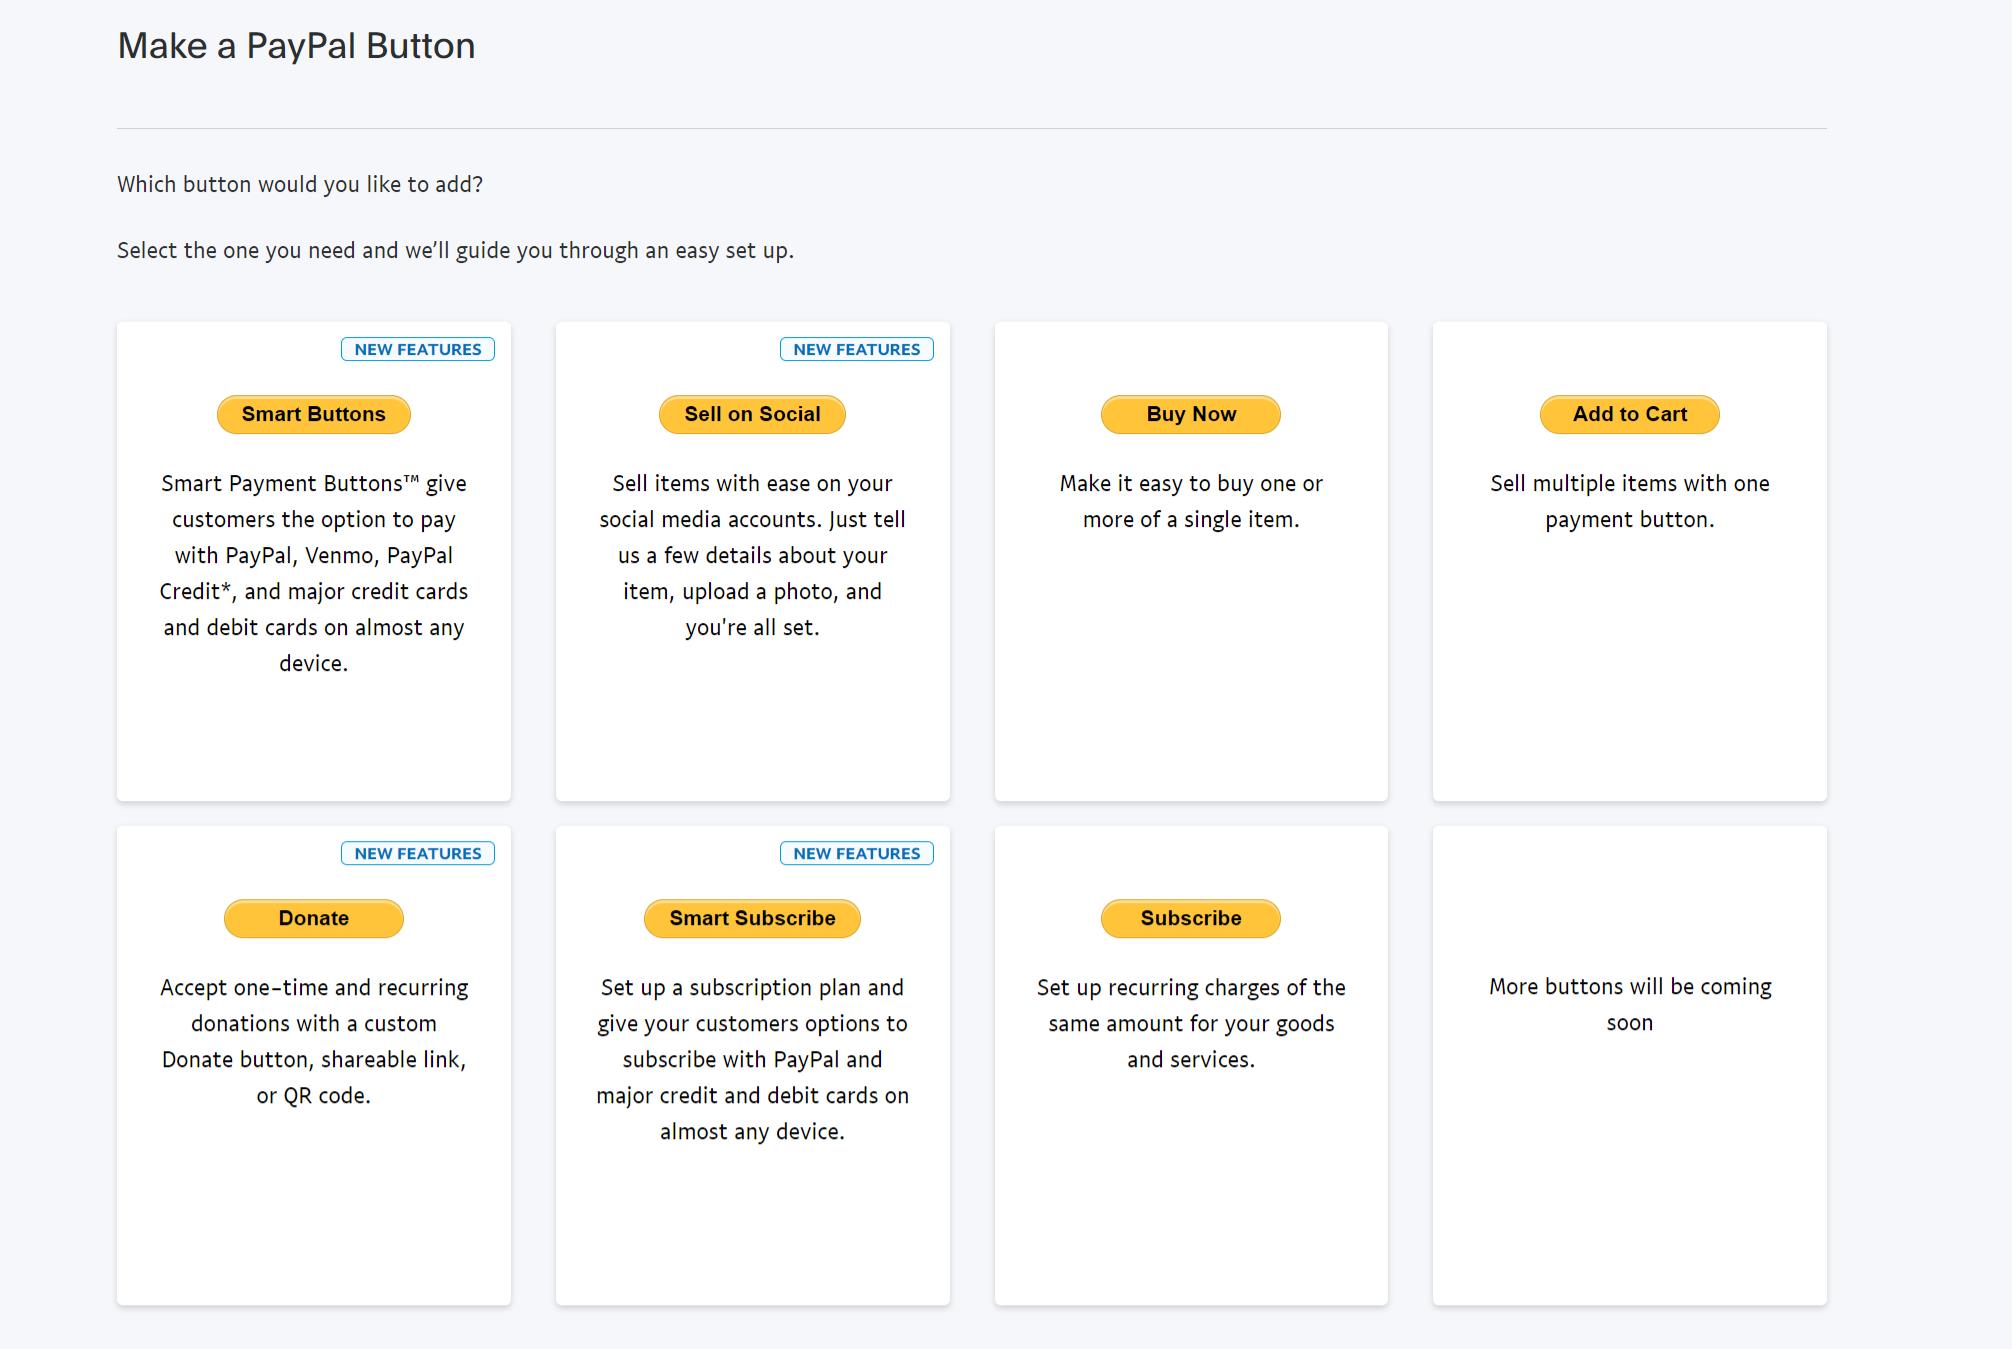
Once you choose your button type, you will want to customize it to fit your offering. 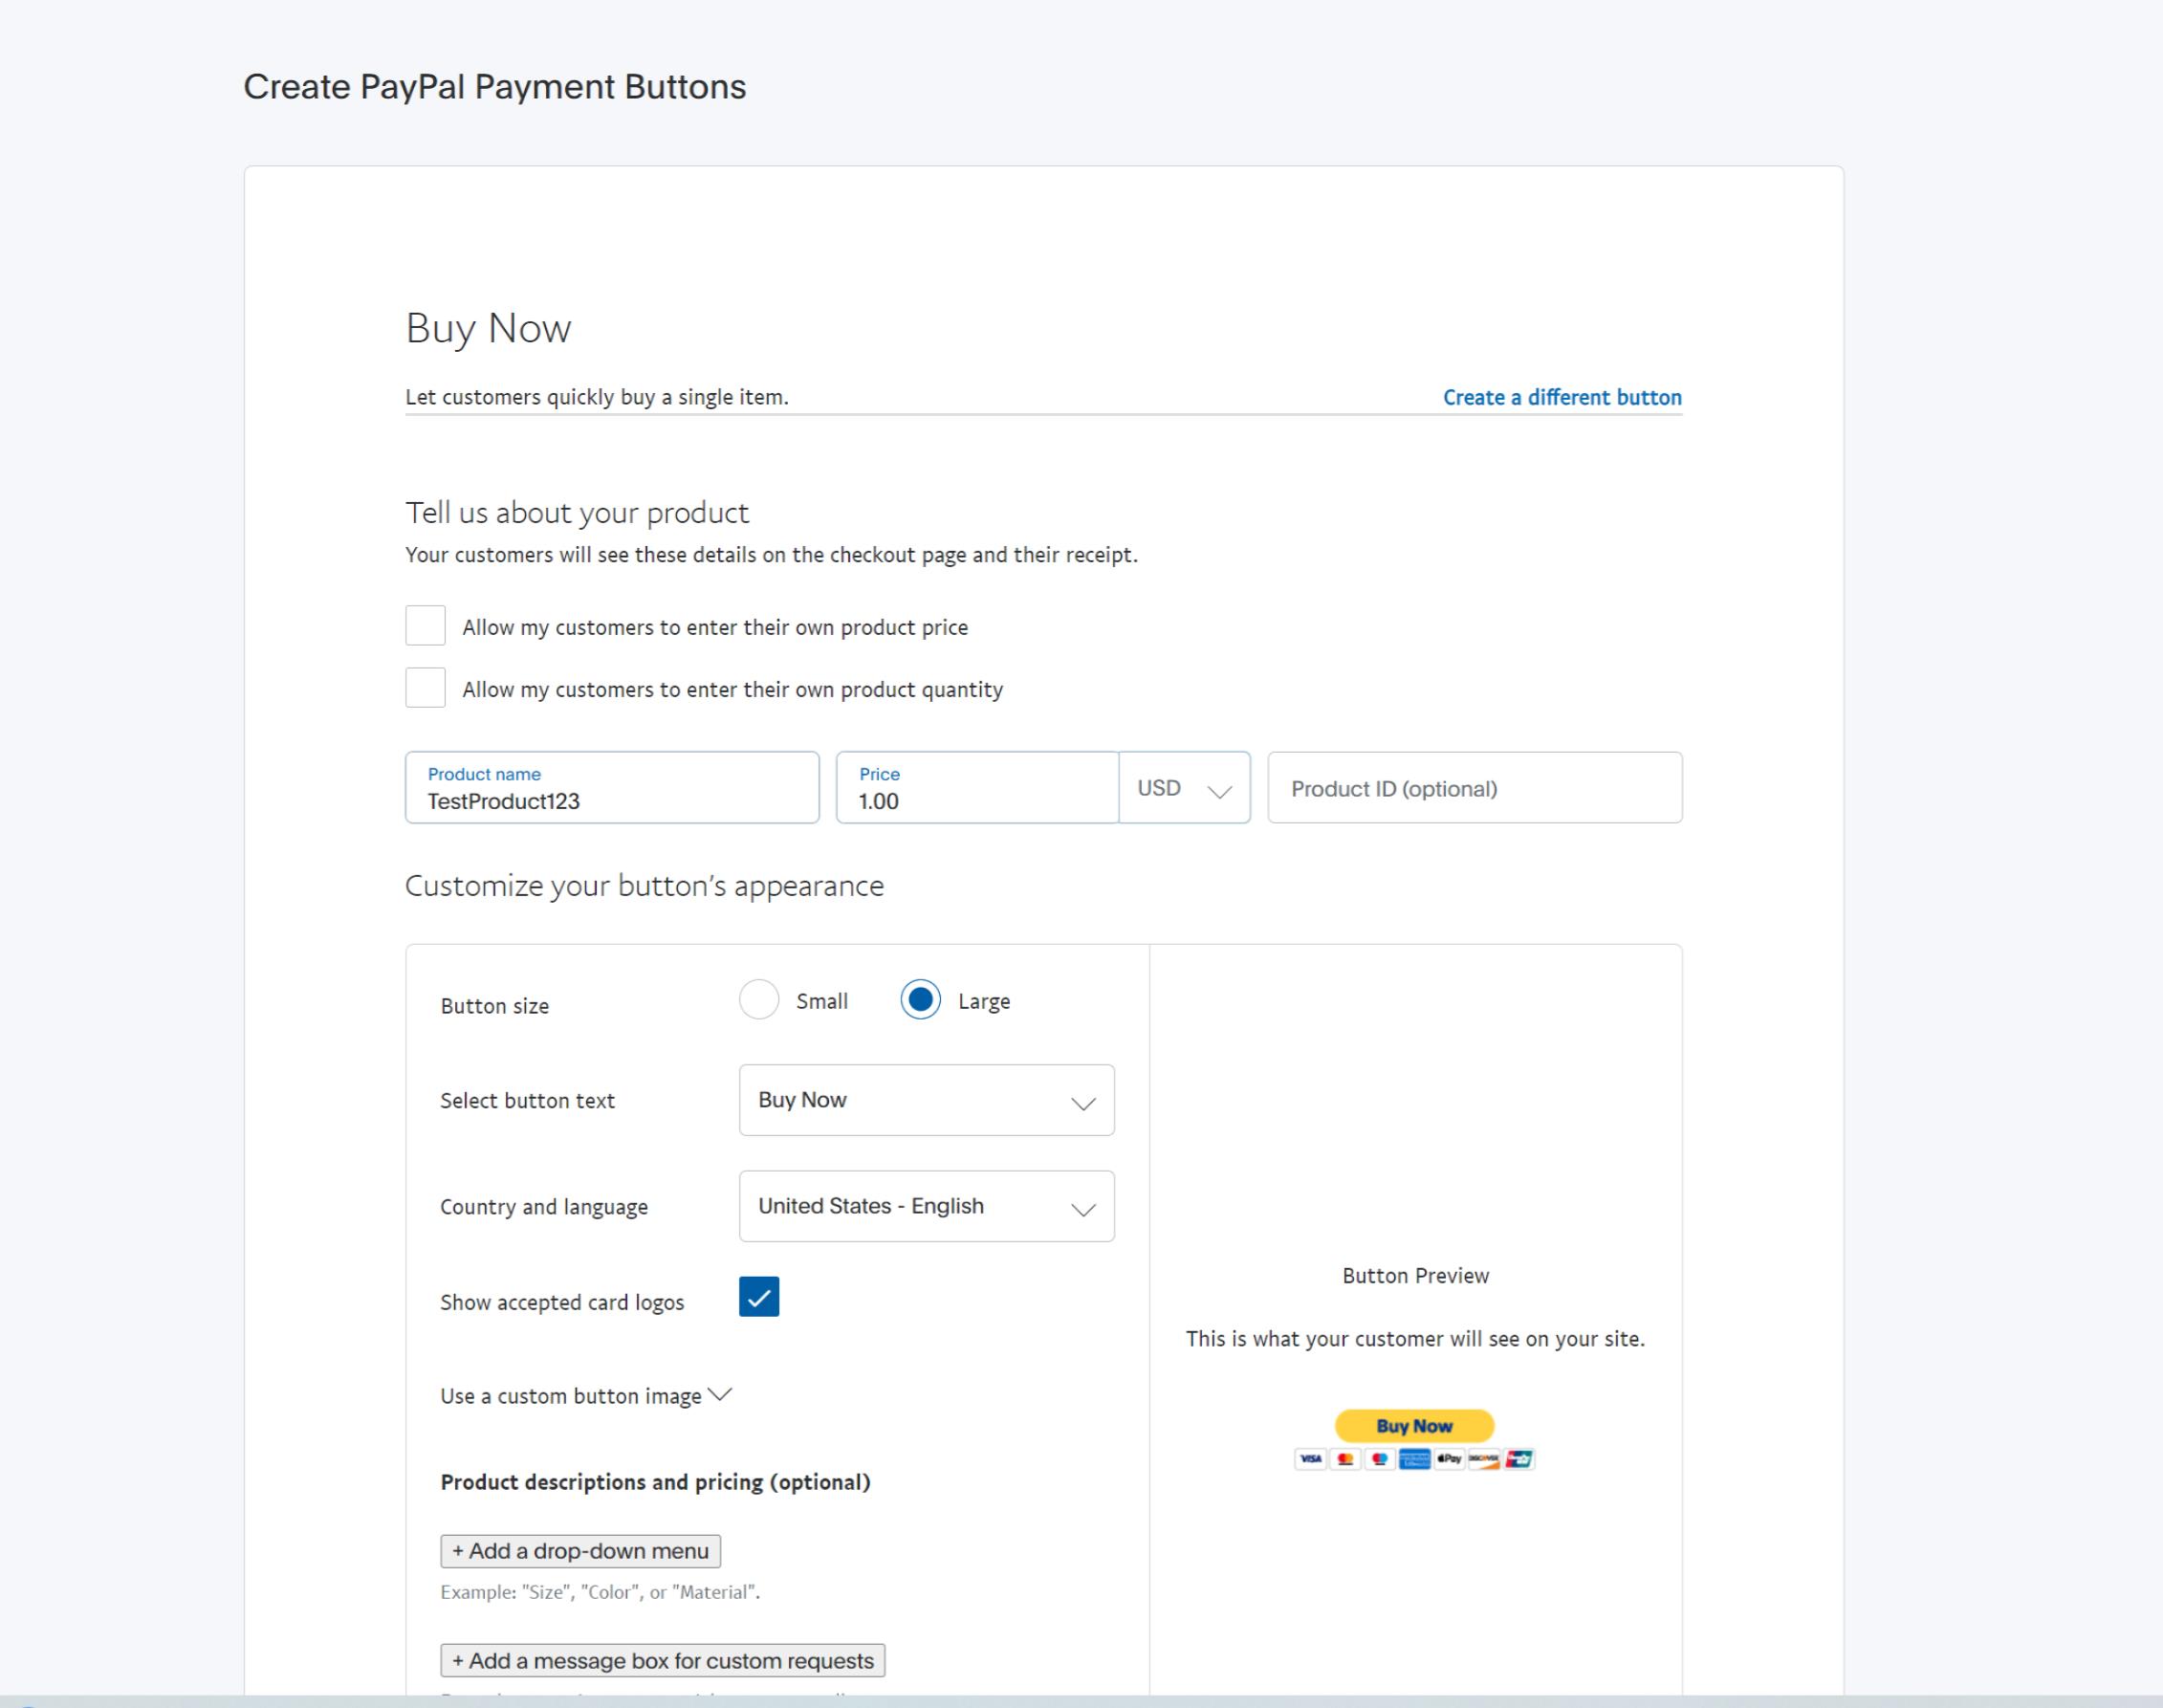
Click "Save and Create" to generate the embed code for your button
Add a button to your page
Once you’ve created a “buy now” button in PayPal, it’s time to add it to your page.
Step-by-step
To add your button to a page or pop-up, follow these steps:
- Copy your button’s HTML code
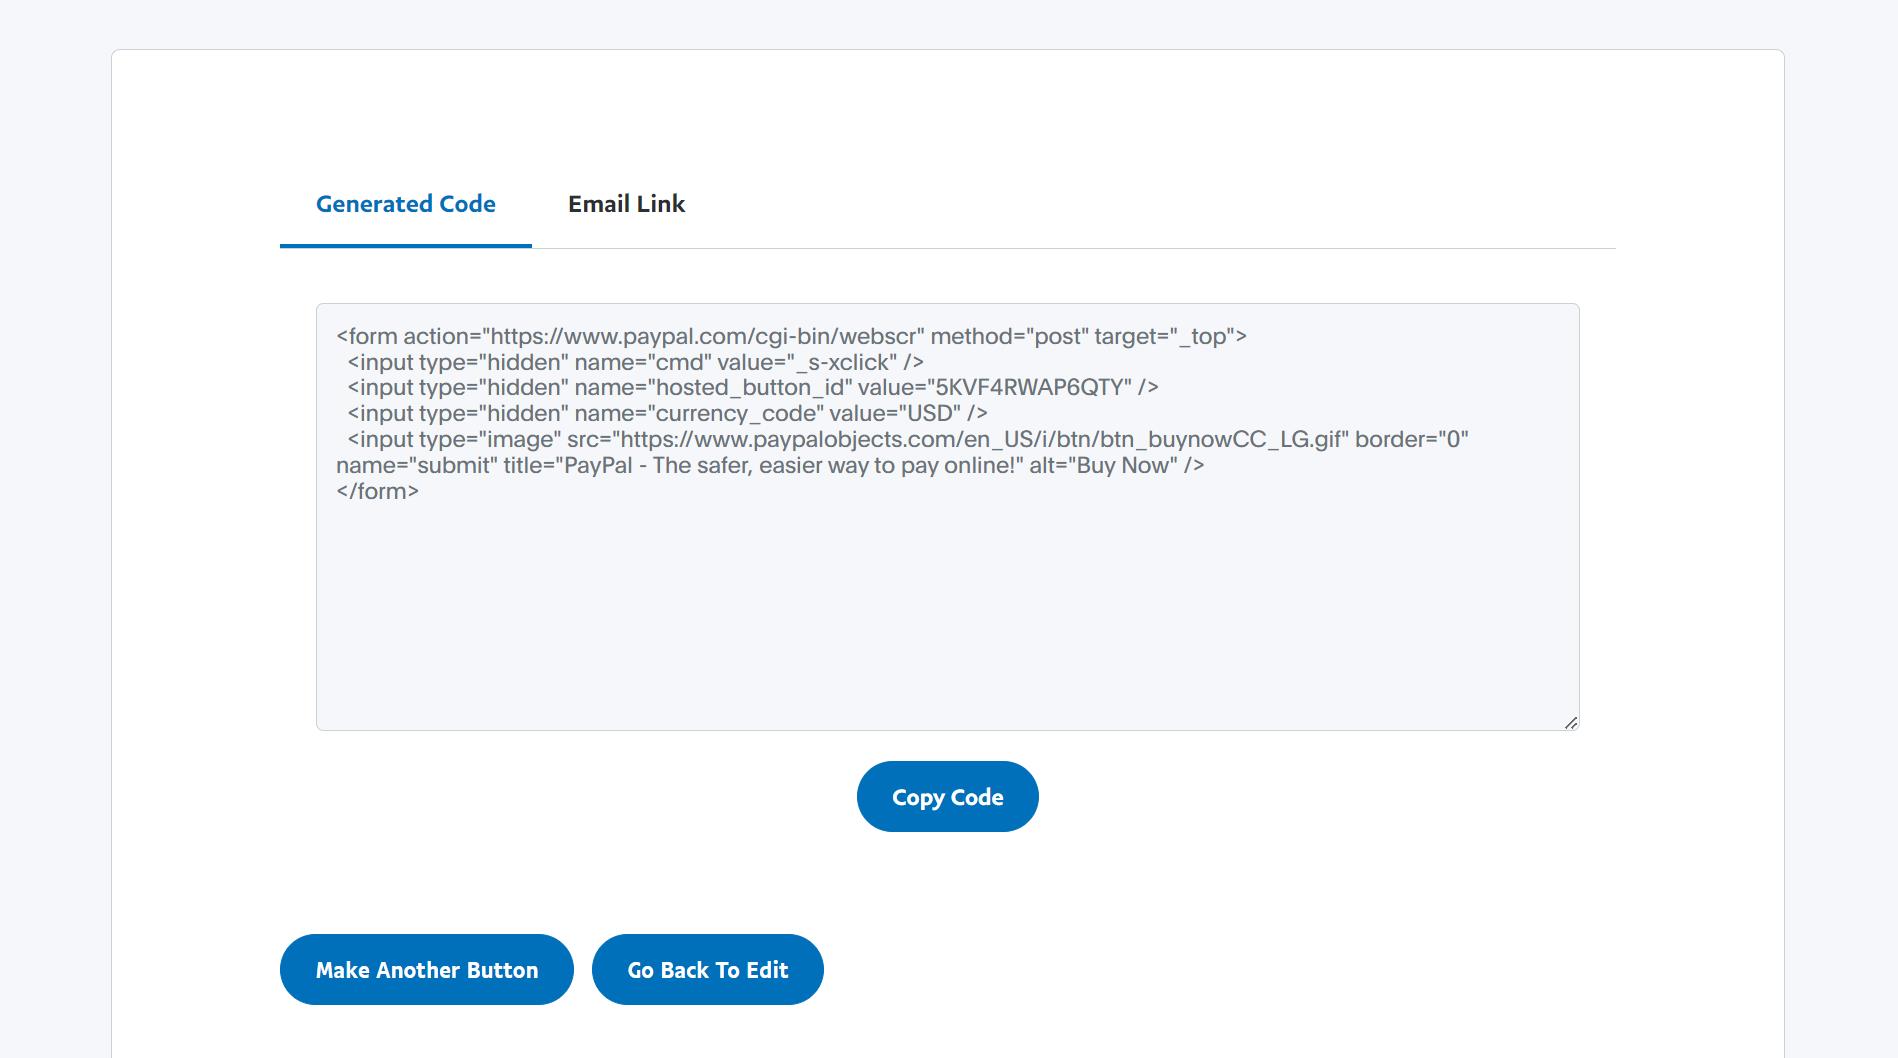
- Add an HTML widget to your page or pop-up, then paste the code from PayPal into the widget. Make sure to click Save on the HTML widget before you publish or update your page.
It’s a good idea to test your button out. One way to do so is to use your button as a customer would, then issue yourself a refund from within PayPal.
Track purchases
Our built-in analytics aren’t designed to track conversions on third-party buttons like those from PayPal. However, there are a few options you can consider using to track how many people purchase your product.
One option is to use a third-party analytics platform. Many popular options allow you to track custom events on pages. Please note, however, we cannot provide support for modifying third-party code. To learn more about using third-party tracking code, check out our guide here: Third-Party Analytics
PayPal Auto return
Another option is to use PayPal’s auto return feature. You can configure your checkout settings to direct anyone who purchases back to your site or to a custom URL. It’s also possible to return customers to a specific URL for individual transactions.
You can learn more about setting up auto return here: Auto return the buyer to your website
If you do set up auto return, you can use a custom landing page as a thank you/confirmation page.
Need more help?
You can always get in touch with our support team—just click Support in your Leadpages navigation menu, or submit a ticket ↗